close

Do It Yourself

AppsDo It YourselfGadgetsInternetInternet SecuritySoftwareTechnology News

How to Delete Win Log Files in windows 10

How to Delete Win Log Files in windows 10

If you are a Windows user, you will find a lot of unnecessary documents and folders available in Windows. There are plenty of hidden caches, old junks that take up space. You can delete them from your Operating System, but it may be challenging. This blog post is all about ‘How to Delete Win Log Files in windows 10’ for the File Edge Readers.

If you are willing to free up disk space, then you can remove Win log files in Windows 10. Here, we have given a lot of ways through which you can remove the log files.

What do you mean by Win Log Files in Windows 10?

Windows always store a record of the operation you are doing on it. It saves the records in the directory to its log files. We know the log files as Win log files also. Generally, the files can be found by navigating to the path – C:\Windows\System32\winevt or C:\Windows\System32\config. However, it relies on the windows version.

The files can consume huge disk space of your hard drive and may have large sizes. If you are willing to free up the disk space, it is essential to remove them from your computer or laptop.

Location in Windows 10:

Users can find these log files easily in Windows 10. But as a user, you should know the location of the event viewer default path and the event logs. If you know the location, it becomes very beneficial when you are going to resolve the problem or clear the Windows log files.

You should know that two folders are there, and it relies on the Windows version you are using.

You can go to the folder of:-

%windir%\System32\Winevt\Logs\

In case it doesn’t work, you should then navigate to the folder location given there:-

%windir%\System33\config\

You need to ensure that the %windir% you are using is the directory of your PC’s Operating System.

What Does The Event Log Store? 

Users can access the event log with the help of Windows Event Viewer. It was invented in 1993. Those who are administrators are capable of using this to view actions in five categories that are as follows: application, security, setup, System, and forwarded events.

If you cannot perform the steps completely, the error codes with recently installed updates will display. If you are an Admin, you can access installed apps, Office notifications like “Want to save your changes to x.docx?”.

This windows event log doesn’t keep too many personal details like the text from web pages or documents, mouse clicks’ records, desktop screenshots, etc. However‌, these should not fall into the wrong hands as they can use these to attack.

You should remove these log files for maintenance purposes. Thus, you can free up hard drive space. In case you find the event log cleared, it may be someone else who is hiding something. This article will let you know how to remove a Windows log file using both the Event Viewer program and an Event Viewer command in PowerShell.

How to Delete Win Log Files in windows 10:

The event log of windows is capable of offering an entire record of a user’s activity. If someone accesses the event log file, they will know about your private information. That’s why if you are willing to keep your privacy protected, you are required to remove the event log daily on your computer or laptop. Users should do this thing regularly to clear the Windows event log. Let me explain How to Delete Win Log Files in windows 10.

  1. Delete Event log:

Multiple ways are there to remove event log files with the help of the Windows native interface and a third-party tool.

  •  Removing the Event logs:

The event log may store an in-depth record of your activity on the windows. As a result, if anyone attains the log file, they may know about your activity. It is possible to remove the event log from your OS’s interface directly. Users can use the Command Prompt to remove the event log. This method of removing the event logs through the Windows native interface.

  • First of all, your task is to access the Event Viewer window. If you are willing to do, then you should open the Run prompt. After that, you should give the “eventvwr.msc” command to launch.
  • You should tap on the Windows and X buttons on the keyboard together. It will help you to get a quick access menu. Choose the option “Event Viewer,” and then you should open the Window.
  • After that, you can launch the Event Viewer interface. You are capable of accessing the event logs and editing these as per your requirements.
  • Next, you can access most logs available under the “Windows Log” section. It is available on the left panel. If you’re willing to free up any log, choose the option and then tap on that. Now, you should select the “Clear Log” option.
  • If you are willing to remove application logs, you should choose the “Application” option and tap on that. You can see there all the options. Tap on the “Clear Log” option.
  • If you are willing, you are capable of removing the Windows event log selectively. Choose the event log type by going to the left panel to clear it. After that, you can access the log you prefer to remove from the right panel. Then, you should select the “Clear Log” option from the list.
  • As soon as you choose “System” from the left panel, you must make a selection on the right side. Then, you should select the “Clear Log” action to eliminate the event log.
  • When you finish completing the selection, a pop-up message appears in front of you. It allows you to remove the logs or clear them after saving them.
  • Finally, you should make the final selection and wait for some moments. It is because Windows will remove the event log from it.

Depending on the windows version, the correct technique and interface vary. You are capable of storing the documents again after performing a recovery operation. If a user wants to permanently remove the event log files except for any recovery scope, use a third-party data eraser tool.

  • Remove Windows Event Log Entirely:

When you go through the instructions, you are capable of removing the Windows event log. If you cannot remove the files permanently, you will require a reliable data eraser tool. You can use the Data Eraser tool to delete your information completely within seconds. This tool comes with a simple-to-use interface. You can remove internet activities, system traces, and apps, event logs, etc. We have given here a few features of the tool.

  • Stellar BitRase is very useful if you are willing to delete the various types of system traces.
  • Using the tool, you are capable of freeing up unused and empty space.
  • This tool supports almost all windows versions.
  • Users can use the tool for removing internet activities, data files, app data, etc.
  • As soon as you complete the method successfully, it will offer a deletion certificate.
  • The tool features various types of algorithms that you are capable of selecting from its settings.
  • It doesn’t give any recovery scope and helps to remove your data permanently.
  • Stellar BitRase comes with a scheduler that allows you to remove your data automatically.
Steps:

1: First, your task is to download this tool on the Windows PC. After that, you are required to launch the tool.

2: Tap on the option “System Traces,” After that, you should access the significant features from the right panel.

3: You should then scroll the page down to look for the option of “Windows Event Log.”

4: Your task is to choose the option. Then, hit the “Erase Now” button for deleting the Windows event log. Thus, you are capable of erasing your event log files quickly from the Operating System.

With the help of BitRaser, you are capable of deleting the event log except for creating an issue. You merely have to tap on the option once, and the Windows event log will be removed permanently.

You are not required to wait anymore as the tool is here to help you. It helps to protect your privacy. You are capable of removing almost all system traces and Windows event logs from their interactive interface. The tool becomes useful for multiple occasions to keep your privacy protected.

  1. Using the GUI:

Users can move to the Settings of the Event Viewer GUI easily. Use GUI whether you are not willing to work with command-line tools. You need to go through the steps for launching the event viewer. It will help you to remove the event log.

  • First, your task is to navigate to a Run dialog and open it.
  • After that, you should select the option eventvwr.msc. Next, you should tap on these Ctrl + Shift + Enter buttons at the same time. You should have admin rights while launching the Event Viewer tool.
  • Then, your job is to tap on the small arrow option to expand the folders by going to the leftmost pane. You will get the option available next to the folder.
  • When you navigate to the list of entries, you should choose the entry option from the middle pane. Then, your task is to tap on the Clear Log, which you can see from the Action section in the rightmost pane.
  • The shift button can be used to choose various types of entries in the middle pane.
  • You are required to repeat all the steps for all entries. The method may look quite long, but it is very easy to navigate through.

Delete Saved Console.log:

Every console file comes with a function of recording recent activities. We don’t give importance to these because of their small size. As a result, the error remains. You should occasionally check the log files to offer the solutions.

  • First, navigate to the Event Viewer and launch it.
  • Then, your job is to go to the File option available in the menu and then move to the Options. It shows you the disk space available in the file and the area consumed by the saved files.
  • After that, you are required to tap on the Disk Cleanup option and then navigate to the Delete Files.
  • Finally, you should tap on the Exit option and then tap the OK button.
  1. Use PowerShell:

If you are willing to use a very strong command-line tool, then use it for removing the log files. You should just go through the steps that are:

  • First, your task is to navigate to the PowerShell and open it after that as an admin.
  • To do this, move to the Start menu first. If you still have not exchanged PowerShell with CMD, you must navigate to the WinX menu.
  • After that, your task is to write the command given and then hit the Enter button:

wevtutil el | Foreach-Object {wevtutil cl “$_”}

powershell_clear_all_event_logs

  • Once you write the command, it will remove almost all the event logs available in your Windows 10.
  1. Use Windows Disk Cleanup:

  • Hence, you should first tap on the option This PC. After that, you should choose the option Properties.
  • Navigate to the General tab after that and then tap on the Disk Cleanup option. As soon as you tap on the option, it will begin to calculate the volume of temporary files needed to be deleted.
  • Then, you should choose all the items, such as System archived Windows error reporting.
  • Finally, you are required to tap on the OK key.

How to Do Disk Cleanup:

Windows Update Cleanup: You should delete this as it removes the old copies of Windows Update files. Users can remove them easily, but it is essential to troubleshoot if they run into update-related issues.

Windows Upgrade Log Files: Windows keeps the data files for troubleshooting problems around installations. Whether you don’t encounter any Windows up-gradation issues, you should remove them.

Language Resource Files: Whether you have downloaded another language or keyboard layout, you can delete it.

Recycle Bin: The process of deletion is similar to the Recycle Bin. Ensure that there doesn’t exist anything inside it.

Temporary Files: Users don’t use temporary files for long periods. Therefore, deleting these won’t cause any effect.

These are the things you are capable of removing from Windows 10.

  1. The Hibernation File:

Location: C:\hiberfil.sys

This mode is similar to the sleep mode. In this case, the System stores all the openwork and saves it to the storage drive. After that, you should close the operating System. It is possible to erase the battery from the PC and keep the PC on hibernation mode. After that, you are required to begin the backup and then start from where you left off. The hibernation file consumes plenty of gigabytes, but it relies on the hard drive size.

Users can take help of the command prompt in case they don’t prefer to use hibernation and disable it. Ensure that you are not removing the hiberfil.sys only as your windows are capable of making it again.

You should then tap on the Start key or hit the Win + X buttons. After that, you are required to navigate to the resulting menu and open Windows PowerShell (Admin) window or a Command Prompt (Admin). Hence, you should write the command for turning off the hibernation:

powercfg.exe /hibernate off

It is all the things you need to do to turn off hibernation. Your windows will remove the hiberfil.sys. You should know that turning off the hibernate mode will stop the PC and won’t allow using fast startup.

  1. Windows Temp Folder:

Location: C:\Windows\Temp

These temporary files are required only when in initial use. The folders and files keep the details of the windows used at one time.

Navigate to the folder despite removing it with the help of Disk Cleanup. Then, you should erase the contents necessary. To do this, you must tap Ctrl + A buttons to choose all the options inside it. After that, you should tap on the Delete option. You can encounter some errors in your windows. Hence, you are merely required to remove everything else.

  1. The Recycle Bin:

Location: shell:RecycleBinFolder

It is a folder available below the C:\ drive. Users don’t have to access the drive. While users remove any files, Windows send them to this folder. It is storage where all the removed files are kept. When you erase them from that place, then these will be deleted permanently. If you want, you can restore the deleted files again.

The folder is available as a shortcut on the desktop of your laptop or computer. Therefore, it is simple to access. However, if you won’t find this, you should write shell:RecycleBinFolder into the navigation bar of File Explorer. After entering into the recycle bin, you can find all the things deleted instantly.

When you are going to erase them, you should tap on the individual items. Here, you should tap on the Delete option to remove them permanently. You can select the Restore option to get the file back to its real place. There are buttons available on the top of Ribbon’s Recycle Bin Tools tab. These help to clear the folder at a time and store the files again.

Tap on the Recycle Bin properties for tweaking through which the folder works. Hence, you are capable of changing the maximum bin size. If you want, you have to select the option Don’t move files to the Recycle Bin.

If you tap on the option, your Windows will skip the bin and erase items permanently. However, it is not recommended to use it to restore any file deleted mistakenly from the recycle bin. You can use the Display delete confirmation dialog, but you require an additional file to use this.

  1. Downloaded Program Files:

Location: C:\Windows\Downloaded Program Files

You may find the name of the folder a little bit confusing. The function of the folder is to hold files that Internet Explorer’s ActiveX controls and Java applets use. However, people who are using a similar feature are not required to download the file twice.

But it has become useless nowadays. You should know that ActiveX has become old & outdated technology. It is full of security holes and compatible with Internet Explorer only. It can be seen only on ancient corporate websites recently.

Generally, people are not using IE anymore. The folder containing Downloaded Program Files may be empty. You can remove the contents easily, so don’t hesitate.

  1. Rempl Folder:

Location: C:\Program Files\rempl

The folder doesn’t come in a big size. Therefore, while you see this on the Operating System, you may be surprised. It contains multiple small files. There are some Task Manager methods also connected to it.

It has a connection to Windows 10 update delivery. This folder contains “reliability improvements” that help to perform Windows 10 updates easily.

  1. Use Command Prompt:

With the help of the Windows command-line utility tool, users are capable of doing any task. We can take the help of the command prompt for removing the event viewer in Windows 10. Users can use this for removing individual log files. If necessary, you can remove the entire event log.

We have given here a few steps following which you are capable of removing all Windows log files.

  • First, your task is to navigate to the elevated command prompt and open it then. To do this, you need to navigate to the Windows search context menu. If you want, you can go to the Run dialog. Use hence Ctrl + Shift + Enter buttons to open the command prompt with the admin.
  • With the help of the change directory command, you should navigate to the event viewer default path.

cd %windir%\system32\config

  • Write this command for removing all the win log files. Then, you should hit the Enter button.

del *.log /a /s /q /f

delete_win_log_files_using_cmd

  • As soon as you do this, the .log extension files will no more available on your PC.
  1. Erase Single Log Files Taking Help of Command Line:

You can even erase the log files of individual files. Go through the commands that needed to be entered.

Step 1: Hence, your task is to move to another command prompt with admin and open it then.

Step 2: You should now list all the log files. To do this, first, you should type the command given below. After typing, you should tap on the Enter button.

.wevtutil el

Step 3: You can see there is a list available on display. People who are willing to remove the required log file need to write the following command. After that, you should hit the Enter button.

wevtutil cl <name of the log>

As soon as you do this, it will help you to remove the required log from the Event Viewer file.

  1. Create A Command File for Removing Log Files Automatically:

If you are trying the latest experimental features, it may happen that you have made plenty of win log files on the PC.in this case, you should know the process of erasing the log files in Windows 10 automatically.

Make a .cmd file to make the process automated. You should go through the steps for making this command file.

  • First, you should go to a text editor such as Notepad or MS visual code. Open it after that.
  • Then, your job is to write the code and perform copy & paste in the editor.

@echo off

FOR /F “tokens=1,2*” %%V IN (‘bcdedit’) DO SET adminTest=%%V

IF (%adminTest%)==(Access) goto noAdmin

for /F “tokens=*” %%G in (‘wevtutil.exe el’) DO (call :do_clear “%%G”)

echo.

echo Event Logs have been cleared! ^<press any key^>

goto theEnd

:do_clear

echo clearing %1

wevtutil.exe cl %1

goto :eof

:noAdmin

echo You must run this script as an Administrator!

echo ^<press any key^>

:theEnd

pause>NUL

  • Use the extension command prompt file to save the command name in any place you want.

clear_log_files_cmd_file

  • After that, your task is to run the command file as administrator. To do this, you need to select the right option from the right-click context menu.
  • Here, a command prompt window will open in front of you. Then, all the log files are removed automatically.

You should run the file as admin for removing event log files.

  1. Use CCleaner to Clear Log Files:

People who are using the drive-maintenance program CCleaner can scan the files. You are capable of removing the files except by downloading a dedicated log cleaner program. Hence, you need to open the tool as you normally do. As soon as you open the “Cleaner” menu, your job is to hit the “Windows” tab. Then, you should scroll down the page. After that, you must tap on the check box marked as the “Windows Log Files” option. Next, you should choose the option “Run Cleaner.” When the tool recognizes the system for those files you can remove, tap on the key again. It will help you to erase the Windows log files along with other chosen files. You are required to ensure the deletion of the log files, but it relies on the configuration process of the CCleaner installation.

  1. Use Third-Party App for Erasing Log Files Windows 10:

Plenty of third-party cleaner apps are there, which you can use to remove temporary files and other junk files. In this case, you are capable of using an app to erase the event log files.

Along with the most famous tool CCleaner, you can use BitRaser For File. CCleaner helps to clear up all junk files on the PC for free. BitRaser For File is a powerful file deletion software that you can use here.

How Can You View Windows Log Files?

The method of viewing the Windows log files is as follows:

First, your job is to tap on the Start button on the Taskbar of your PC.

After that, your job is to tap on the All Programs option.

Next, you should tap the Accessories menu item.

Now, you should hit the option WordPad application.

After doing this, you will see a new Wordpad window.

Hence, you should tap on the File menu option.

Then, you have to hit the option Open menu item.

Finally, your job is to move to the log file that you prefer. Then, you are required to hit the Open button.

Final Words:

In this article, you must have learned How to Delete Win Log Files in windows 10. Whether you are willing to remove log files, the methods given here are perfect. We hope you will find these easy to apply. Select any one of these first and perform after that accordingly.

Frequently Asked Questions:

  • Can you remove CBS log files?

You should first remove all existing log files in \Windows\Temp directory. After that, your task is to prevent The Windows Module Installer services. Then, you should remove the \Windows\Logs\CBS\CBS.log file. Hence, you are required to begin the Windows Module Installer service. It helps you to recreate the CBS.log.

  • Is it safe for removing the Windows upgrade log files?

If you want, you are capable of erasing the Windows Upgrade Log Files. But for this, your job is to solve the error if you cannot complete the up-gradation process successfully. When you choose the disk cleanup software, you should tap on the OK button to erase the documents. As soon as you tap on the Cleanup System Files, it will help you to erase more junk files.


  • Can you remove event log files?

Now, you are capable of removing event log files easily from your Operating System. Just take the help of online tools to remove the files and the event log without making any issues. Thus, you can remove the event log files permanently just with one tap. You only have to erase the Windows event log along with the system traces from the interface, while using online tools.
read more
AppsDo It YourselfSoftwareTechnology News

Java Vs C++: Similarities and Differences

Java Vs C++: Similarities and Differences

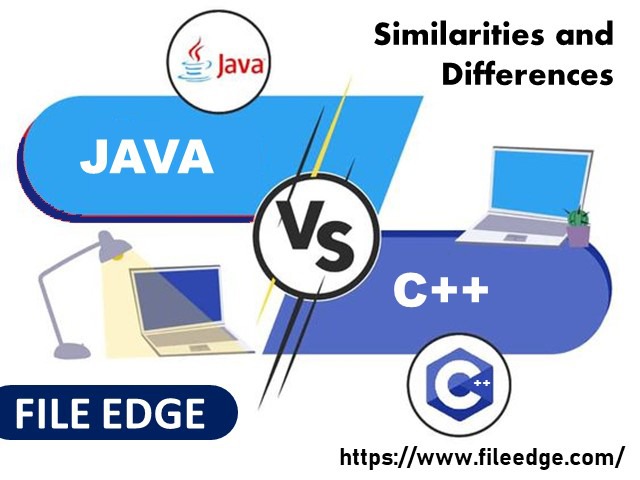
Let us discuss Java Vs C++: Similarities and Differences in this blog post

What is Java?

Java is defined as a high-level programming language, the purpose of which is general and is designed in such a way as to curtail dependencies while remaining class-based.

Any application to be developed needs a computing platform to which it caters. Therefore the need for this language to be speedy and reliable and security features in place is imperative.

Every computing device does require its program to develop applications in it. To cite a few, it could be laptops, mobile phones, data centers, computers, supercomputers, etc. The IT industry uses this language, and it is considered an indispensable one for developing software.

It was developed at Sun Microsystems (now a part of Oracle) by James Gosling in the early 1990s.

What is C++?

Similar to Java, C++ is yet another computer language that is object-oriented but in reality an extension of the ” C’ language only. It is considered a high-level language as it has the standard features of its predecessor, ‘ C.’

This familiarity with C allows for low-level manipulation and a step closer to the primary machine language.

Bjorne Stroustrup developed the language to continue the rising trend of C languages. It does, however, usher in further control over system sources and memory.

Java Vs C++ Key Differences:

Here are a few key features in which both feature and the differences between them.

Platform

Java Platform:

The platform of this language has a suffix. It is platform-independent. In other words, all operating systems are ‘ user friendly’ with their compiled codes. The usage of the compiler has to be emphasized at this stage.

Humans write programs, and one can read those. It is known as ‘ Source Code. ‘ The compiler becomes a translator for these source codes and converts them into executable codes for machines. That language is known as Machine Language.

When there are many instructions in machine language, it has to arrange in sequence. The CPU can work on these instructions and execute them in two ways. It can carry out the work directly.

The other way is for the CPU to make an intermediate representation. Such a representation can only be understood by a virtual machine and then interpreted.

The interpretation is in Java, and it is called Java Byte Code.

Java Program Execution: The Step by Step Procedure.

  • It compiles all programs whenever written.
  • Such compilation would not be in machine Native Code. It is called the • Class file (or) bytecodes.
  • Without using an interpreter, execution on the machine is impossible, so the bytecodes are always ‘ non-executable ‘ codes.
  • JVM acts as the interpreter, and the JVM can only execute all executions of Bytecodes.
  • The desired output can only be achieved by running the final program.

C++ Platform:

  • They are not platform-independent.
  • The compiler can only generate a file in the • exe extension, which is OS-dependent.
  • It can only run on that OS from where it has been generated and not any other OS. Therefore the compatibility with other OS is redundant.

Java maintains independence across platforms, whereas JVM is 100% dependent on media. – Explained why!

Points to be noted:

  • Pointers can be used in C and achieve a call by reference
  • In C++, the choice of pointers and references (either one) for pass by.
  • As far as Java is concerned, the primitive types are always the values, and the non-primitive can only reference.

Call by Value & Call by Reference:

Call by Value:

The method or practice of attaching values to variables is known as Call by Value instead of calling it a function.

On the same note, we substitute addresses in place of values to the same function. It is known as ‘ Call by Reference.’

So, what is the difference between both?

The commonality is the function between both. Therefore, the procedure is invoked using these two methods only.

The difference between the two ways is ascertained by the value types which are passed on to them. These are called Parameters.

A function can either be given a parameter or receive them. When it is passed onto them, it is called ‘ Actual Parameters. ‘ On the other hand, when accepted, it is called ‘ Formal Parameters.

Call by Value:

To understand this better

  • The Actual Parameters are transferred to the function.
  • Now, the function has two parameters that can be stored in two memory locations independently. Due to this, if any changes occur internally inside the functions, the actual parameters would not be reflected.

Call by Reference:

They share the exact locations under this. We refer to the actual parameters and the formal parameters in which only the Actual Parameters reflect the changes inside the function.

Features:

JAVA C++
1. Many features are available and are capable of adding many more It does not have this capability and has no features that would be equivalent to many in Java.
2.
  • Packages
  • Interfaces
  • Multithreading is are certain features here.
There are no features that can complement these here. The library functions under a standard header file are the only plausible solution.
3. The main objective of multithreading is that

• It permits simultaneous execution

•Conditions are that the pieces should be from the same program

In here, one would do it only manually. No program exists for such multithreading.
4 The string is one of the built-in types in it. In some respects, this string resembles the string class type provided by C++. It is important to note that in C++, the string is available only if its class declaration is included. There is no built-in type for this.
5.


It consists of API classes that are it is own. In case the standard library of C++ exists, it would be removed.


Has only the standard library.


The C++ programming language and Java have many similarities and differences. Following are a few of the significant differences between them:

Comparison Index

C++ Java


Platform-
independent
It is entirely platform-dependent. Compiling its code on each platform is necessary. It is completely platform-independent.
Mainly used for
System programming is the primary function of this language. Application programming is its primary usage. It is to be used here, conditions are, it should be

  • Windows-based,
  • Web-based,
  • Enterprise,
  • And mobile applications.
Design Goal
It was designed for systems and application programming. It was an extension of the C programming language. Originally designed as a printing system interpreter, it later expanded to support network computing. An easy-to-use interface facilitates the use of the program by a wider audience.
Goto
It supports the goto statement, but it should be avoided as much as possible to prevent adverse effects. It does not support Goto statements as it is initially not available.
Multiple inheritances
Unlike interfaces, multiple inheritances are possible in this language. It supports many types of inheritance, including multiple and single inheritance. Even though there are issues, When numerous estates are encountered in it, the virtual keyword is used to solve the problems.  The  classes do not support multiple inheritances.
Operator Overloading
It is possible to override methods and operators in it. The excessive workload for operators The only way to overload methods in it is by using strategies. The system does not allow operator overloading.
Pointers
It is possible to use pointers in this language. You can write Pointer programs in it. Pointers are the foundation of it. We have seen in previous tutorials that C++ has strong support for pointers. Pointers are limited in this language. Java‘s internal pointer system supports pointers. It is, however, impossible to write a pointer program in it.
Compiler and Interpreter
It uses a compiler only. And, is compiled and run using the compiler, which converts source code into machine code, which is platform-dependent. It uses both compiler and interpreter. And the source code is converted into bytecode at compilation time. In addition, the interpreter executes this bytecode at runtime and produces output. This language is interpreted; that is why it is platform-independent.
Call by Value and Call by reference
It supports both

  • Call by value and
  • Call by reference.
 It supports

  • Call by value only.
Thread Support
It does not

  • Have any built-in support for threads but do rely on
  • On third-party libraries for thread support.
It has built-in thread support.
Documentation comment
It doesn’t support documentation comments. It supports documentation comment  such as /** … */ to create documentation for java source code.
Virtual Keyword
It supports virtual keywords so that we can decide whether or not to override a function. It doesn’t have the virtual keyword. By default, We can override all non-static methods. In other words, non-static methods are virtual by default.
unsigned right shift >>>
It doesn’t support >>> operator. It supports an unsigned right shift >>> operator that fills zero at the top for the negative numbers. For positive numbers, it works the same like >> operator.
Inheritance Tree
It always creates a new inheritance tree. It uses a single inheritance tree because all classes are the child of the Object class in Java. The Object class is the root of the inheritance tree in it.
Hardware
On a relative basis, it is much close to Hardware. Java and Hardware have minimal interaction.
Object-oriented
It is an object-oriented language. But in C language, a single root hierarchy cannot exist. It is also an object-oriented language. However, everything (except fundamental types) is an object in this language. It is a single root hierarchy as everything gets derived from it. Lang.Object.
Structure and Union
It supports

  • Structures and
  • Unions.
It does not

  • Support structures
  • And unions.
String
The string is one of the built-in types in Java. In some respects, this string resembles the string class type provided by C++. It is important to note that in C++, the string is available only if its class declaration is included. There is no built-in type for this.


Library
Java consists of API classes that are its own. In case the standard library of C++ exists, it would be removed.


Has only the standard library.


Memory
 

In this, compound-type objects are allocated in a typical manner in the form of a local stack bound.

The idioms are not the same used as far as resource management is concerned.

Memory is allocated by using object instantiation. In this, by initially allocating an array of bytes, arbitrary memory can be assigned.


Which one is better?

It is certainly not the easiest of answers.  In fact, there is no straightforward answer at all to point out one above the other.

The advantages and disadvantages are there with both.

System programming is excellent with C++, but that does not make Java redundant or less worthy. Java continues to prove its worth in many apps like the internet, Desktop, etc.

C++ on its own is versatile and can help even in gaming to leave alone system programming. On the other hand, Java cannot be trusted to develop low-level applications, gaming included.

The decision which is better weighs on the application which is to be developed. For this purpose, do the following.

  • Jot down the Pros and Cons of both
  • Check the compatibility and uniqueness with the application in development and decide which one suits better. Choose that one.

Which one is harder between them?

Java is simpler. It’s preferable because:

  • Syntax is easier to read comparatively
  • It is an object-oriented programming language and helpful to learn
  • Automatic garbage collection is available in it.
  • The quantum of undefined behavior is far lesser with Java which makes debugging easier.
  • It has a library that is of better standard and more extensive.
  • It does not necessitate dealing with pointers.
  • As Booleans are strictly required, the cause of concern for bendiness is removed
  • It surpasses any language in job postings
  • Billions of manufactures trust this language and run it on their devices.
  • In addition, it is racing up the popularity charts with C++ in a declining mode.
  • It has better packaging.

Besides, it does have its merits, and there are many. But Java makes things easier.

Conclusion:

Both C++ and Java are excellent object-oriented languages. C++, in addition to this, is also a procedural language.

There exists a few new features which are available in both but differ in their characteristics.

Likewise, a few features of C++ are powerful compared to Java. Such features make C++ stay in the reckoning for a long time to come.

Web-based applications would embrace Java more for features like templates, automatic garbage collection, etc.

read more
GadgetsDo It YourselfInternetTechnology News

APU vs CPU- How Do They Differ- Explained

APU vs CPU- How Do They Differ- Explained

Let us discuss APU Vs CPU in this blog post. Sometimes people get confused between them. But they are neither same nor perform similar functions.

Suppose you are going to buy a new computer or a new setup. Then one must know the difference between these. So that you can make intelligent choices while setting the pc.

Here, we will provide a complete and easy guide to know these and benefit from them. So, read the article till the end.

In this article, we put some light on these acronyms and their differences. Knowing about these will provide you an advantage and also help you in saving you precious money.

Without further due, let’s know them in-depth and have a clear picture of these units.

Firstly, before moving ahead, quickly understand the definitions.

What is a CPU?

 It stands for Central Processing Unit. We have studied about this one in our schools. It is called the mastermind or brain of the computer as it works in processing all the main functions and executing them. All information is processed here. It is a controlling chip responsible for the execution of arithmetic, logic, or other operations. Besides, it is an excellent calculator which computes and calculates in just a few seconds. Further, it is also responsible for telling other components what they are supposed to do.

It is nothing complex but a simple chip. The processing rate differs according to the clock speed, thread count, or several cores. Previously, a single-core was only able to do a single task at a time. But nowadays, 16 core CPUs are available, which has 3GHz speed that means it can perform three billion instructions per second only.

The Central processing unit has a default factory clock; It can be overclocked to perform even more instructions per second. But sometimes, due to overclocked heat, heat is generated, which is eliminated by an external third-party cooler.

What is a GPU?

 GPU stands for Graphics Processing Unit. It is crucial and responsible for rendering graphics like its name suggests, i.e., Images or videos. Also, most importantly, for gaming purposes like video games, 3D modeling, video editing, and more. If its base clock is slow, then like the CPU, it can also be overclocked.

If you are about to set up a gaming computer, GPU must comment because powerful and effective graphic cards are needed. That’s why these cards are pretty expensive. But cheap ones are also available in the market, but these are not recommended for more excellent performance in gaming.

GPU is more effective than Central Processing Unit as they process heavier loads of data in parallel. In simple words, it performs various data simultaneously and improves the performance of graphics or video.

The GPU is interfaced via PCLe ( PCI express) slot on the motherboard and via Thunderbolt 3 port, its interface with laptops or PCs.

 GPU is in two forms:

#1 Integrated Graphics

 #2 Dedicated Graphic Card

  • Dedicated Graphic Card is not a part of the motherboard, but it is a small chip that comes in different cards; and the best part is these cards are removable, and one can upgrade them. It has its RAM, which can be customized to increase performance for graphics-related processes.
  • Integrated GPU is the part of the motherboard, and it’s not removable. It doesn’t come with its dedicated RAM but uses the system RAM for operations. It means it refers to a computer where the GPU is built onto the same as the Central processing unit. So many benefits you get Inside, like Small Energy and its Efficiency. A few years ago, this Graphic had a bad reputation. But now, so many you see in recent years.

As compared to Dedicated GPU, Integrated GPU is slow.

Note: Without GPU, CPU alone is not sufficient for gaming as GPU does all the heavy lifting and renders 3d experience. Also, without a Central processing unit, GPU can’t work to a full extent. So, a combination of both is best for gaming and avoiding bottlenecking.

Therefore an average Central Processing Unit with GPU is good enough for high-level gaming purposes.

What is an APU?

 It’s an Accelerated Processing Unit. It is a combination of both CPU and GPU on a sole die. Or it can also be called a Central processing unit with an integrated chip on the motherboard.

It performs both units; it serves as the Central processing unit with the basic graphic processor.

For gaming, its performance is not as effective as dedicated ones. But it is fine for some PC and Console games. Maximum performance is not gained with this.

It is a good option for budget-friendly users. It’s a good solution for rendering graphics for Pcs and laptops. And it can be overclocked as well.

It works efficiently and has capabilities of both, and also consumes less power. But the sad part is that its performance is not strong.

There are many series of Accelerated Processing Units in the market like:

  • Its A-Series is an affordable option, but its potential is weakest.
  • The Athlon series is better than the A-series. Work performance is average.
  • And, Rayzen is strong nowadays.

At last, it’s an affordable option and power-efficient but not powerful enough for running AAA games nicely.

What makes Accelerated Processing Unit a worth buy is its low manufacturer, increased power efficiency, good performance speed, and pocket-friendly. So if you want to upgrade your PC, then go for this affordable option which falls within your budget.

APU without Dedicated Graphic Card

If your budget is tight but still wants to build gaming, then It is the ideal option. Its latest models come with quad-core processing with multi-threading and thus results in an impressive performance.

But if you need more graphical performance, then this device lacks in this regard. Also, it is an affordable option, but still, it makes you spend money on other factors.

Buy this one as per your need and preferences as it provides many benefits like dual-channel, fast-acting memory, etc.

CPU with Dedicated Graphic Card

 The Central processing unit with Dedicated Graphic Card is the best combo for best and high gaming performance. But the only thing is it is an expensive option as it increases build cost.

For a greater extent of gaming, both components are needed. Some people think that only the Central processing unit is an essential component, but one can’t enjoy many games without a dedicated graphics card. GPU offers more power as it comes with its power, cooling, and memory. It is a small chip that comes separately.

APU vs CPU- How do they differ?

With the difference between them, one can more easily get a clear picture of these acronyms. Let’s see some major factors in which they differ so that you can decide clearly which one to buy.

#1.What they process

 They sound similar, but actually, they differ in process. CPU processes all the arithmetic, calculations, and computation and lets other components do what they are supposed to do and receive and give direction to the command or data. Also, GPU handles all the graphics like directing or receiving data. Whereas Accelerated Processing Unit has both CPU and GPU work capabilities, it’s not as pro as the combo of these components.

#2.Power and Efficiency

 Many people have only knowledge about CPUs. And we suppose it is the most powerful and effective one as it is the mastermind of the computer. But I’m reality the GPU is more effective than the previous one as all the heavy and lifting tasks are done. So, GPUs are more effective and powerful than CPUs.

Talking about Accelerated Processing Unit offers high power as it combines the two of a 2 in 1 component. It is an affordable option but does not beat the performance of a dedicated CPU and GPU.

#3.Necessity

 The question must arise in your mind: what component or unit to run a computer? Or which one can single-handedly do the job?

Then the answer is GPU is not much needed for the running of the computer, or you can play some games also. But for heavy gaming and gaming to another level of experience, a graphic card is needed to provide higher-speed quality and more.

#4.Pricing

 Getting both CPU and GPU will cost more. So, considering pricing, it is an affordable option and even good to play some games. Its cost differs depending on frame rates.

Similarly, if you want a more effective and powerful for Both, you need to pay more.

Overall, the Accelerated Processing Unit is much cheaper.

CPU Vs APU- How Easy is it to Upgrade?

It’s a truth that everyone wants to hold thing’s for a long time, but We can’t ignore Updates that will Come for a lifetime. Now we need to prepare for upcoming updates. But here we’re talking about Upgrading Graphic cards that can be expensive for you. Changing a graphic card is straightforward because you need to replace the graphic card with New Version.

We all know that before the release of Ryzen, It was seriously an issue. So, overall we can say that if you want to do some upgradation, then it’s a compelling Swap Process.

If we talk about the previous years, it’s tough to do this job, but now after launching Ryzen, everything changed, and Now anyone can upgrade easily. It means a lot when we add a graphic card inside the Central processing unit, but after the Ryzen game is completely changed and it’s so easy to implement a Graphic card. And you have decision capabilities to decide whether you want to update later or not.

Conclusion:

Well, buying any processing unit depends on your needs. If you are a new baby, it’s always better to go for Accelerated Processing Unit as it’s sufficient for start and affordable. But for higher gaming needs and have enough budget, then go for both.

So as per your wallet, go for the right one which suits you. It just depends on the price and gaming needs. So decide accordingly. If you still think who wins this battle, then let me clear you – Accelerated Processing Unit is good, but it’s not for ideal gaming lovers. Still, it’s a powerful game-changer and Comes with fantastic flexibility and Time-saving.

In my choice, going for the combo as Accelerated Processing Unit will not be the right or ideal for gamers. For much better performance and experience, choose CPU and GPU.

But if you want to play games casually, then, of course, Accelerated Processing Unit is sufficient, and you can upgrade it as well.

Frequently Asked Questions:

Q.1 Is APU better than CPU & GPU?

  • Well, if you’re looking for typical computing, then you can say that the Accelerated Processing Unit is all you’re looking for. But if you’re looking for applications, then you need both because, as we noted, Two are better than one. For 3D animation or Gaming purposes, both are better options.

Q.2 What is the Most Powerful APU?

  • Without a doubt, AMD Ryzen 5 3400G is the best and most potent Accelerated Processing Unit. With this processor, you can play almost any game without any Hitches.

Q.3 Will APU replace GPU?

  • As we discussed in the Entire Article, to be summed up, we know that the Accelerated Processing Unit alone is not Fulfilled all the requirements, but Yes, we can say that It can replace GPU.

Q.4 Can an APU work with a GPU?

  • 100% Yes, It can work with GPU. Even though you should know that the GPU is compatible, it is the best point of the Accelerated Processing Unit. Well, you can start with Small and wait until you’ve something big to invest in hardware.

Q.5 How much RAM does the APU use?

  • If we talk about Its User’s they’re using Two 4GB memory modules that Come with 8 GB capacity. These are especially Value for Ryzen 3 2200G.

Q.6 Is 8GB RAM enough for a Ryzen?

  • 8GB is enough for casual games, but I suggest you go with 16GB RAM if you’re looking for intense gaming.
read more
Do It Yourself

Remove Scratches from Glasses- Easy Fix

Remove Scratches from Glasses- Easy Fix

You may feel annoyed if there is a scratch on your lenses. No matter whether the scratch is minor or major – it can distract your concentration from doing any task. Scratches on lenses can make things hard to see. But these scratches are imminent. So, you need to think about how you can prevent your glasses from getting scratched. Here are few tips to remove scratches from glasses.

Best Ways to Avoid Scratching Your Glasses

Always Use Hard Cases: 

You should use hard cases to store your spectacles. Keep them always in a hard case when you don’t wear them. Thus, you can avoid the risk of breaking the frames of your glasses. Besides, it will minimize the risk of bending your glasses. You must not keep the specs facing down on your table. Don’t keep them in the bag, or the pocket. Also, you should not hang the specs from the shirt collar.

Try to Put on Your Specs Most of the Time:

To avoid scratching, you can try to wear the specs for most of the time. But what to do when you are not wearing them? You can use a chain around the stems. These can help the glasses to dangle from the neck. Thus, your lenses will only touch your soft shirt, and you will get rid of this issue.

Don’t Leave Your Specs Anywhere:

Most people leave their specs in their car. As a result, the hot temperature of the car can damage the coating of lenses. For example, it can damage both anti-reflective and scratch-resistant coating. That’s why you must not leave the glasses in your car. The damage can cause glass lenses to crack. Even, the extreme heat can wrap the shape of the lenses.

Use Microfiber Cloth:

You should clean the specs correctly. Use optometrist-approved lenses cleaning spray and microfiber cloth to keep the specs cleaned. Besides, you should clean your specs very carefully. Most importantly, don’t use any paper cloths for cleaning the surface of your specs. The microfiber cloths help to remove dust, debris, etc. But when the specs need deep cleaning, you should use lukewarm water. Use the water to rinse the debris, dust off from the glasses. Next, you need to use dish washing liquid and rub on the lenses. After applying the liquid, your job is to take a dry microfiber cloth and wipe the lenses.

Store the Specs Properly:

You should always use hard cases as we have said earlier. It will help to avoid the risk of having scratches on the glasses. However, if you don’t have any cases, then use microfiber bags. These also allow you to store your specs carefully. If you want to put off your specs at night, then you can use a glass stand. Keep the stand next to your bed and put the specs on it. Don’t leave your specs in the bathroom or on your dressing table. These kinds of carelessness can lead to having spots on the specs.

Handle with Care:

When you remove your specs, handle these carefully. Remove the specs with your both hands. After that, you need to hold it by the temples. Don’t hold the rims around the lenses. By following the procedure, you can protect the specs from extra dust and skin oils. In case you need to place them on a hard surface; you need to fold and place the specs by keeping the temple down. Placing them down in this way can protect the lenses from remaining towards the ceiling.

You must not use your finger or shirt to smudge a scratch on the specs. However, you can consult with the eye specialist for getting advice regarding how you can protect your specs from getting scratched.

Why Do Eye-Glasses Get Scratch Easily

Here, we have given a few reasons due to which eyeglasses get scratches.

Usually, lenses are not glasses. Nowadays, the glasses consist of sophisticated plastic. Besides, these kinds of materials are ideal for everyday use. Also, plastic offers more safety compared to the glasses. However, there will be less risk of having cracks on the surface than the glasses. Since the plastic ones get scratches easily.

Most of the time, dust, lint cling to the plastic material. If dirt or debris are accumulated on the specs and rub it on that time, it can cause scratches. That’s why those products that have gritty textures will not be able to solve this issue.

Many people think that they can use tissue and fabrics to clean their glasses. But these are much harsher than they think. You must not use a shirt, facial tissues, towels, or toilet paper because these can cause lint on the specs.

You should not use household cleaners because of their abrasive property. For example, Windex, a household cleaner, can strip the protective coating of lenses. Therefore, it can lead to damage to your specs.

Wearing Scratched Glasses- Issues

If you see that there are small scratches on it, then don’t worry. It won’t affect your vision too much. But if there remains major scratch, then you may face visual disturbances and headaches.

When Do You Need to Replace Your Specs? 

According to the doctors, if a person faces problems while performing their regular activities due to the visual distortion and things seem to be a blur, it’s time to change the old specs. Mainly these problems seem while driving.

Otherwise, if you are getting a headache or other visual disturbances, then you need to replace it as soon as possible.

Can You Get Benefited From An Eye Specialist If Your Specs Have Already Been Scratched? 

If you want to repair them, then no. It’s not possible. Even a minor scratch can’t be fixed with the help of a professional. You need to go for replacement in this case. And make sure that while choosing the new, you have asked the provider to add a scratch-resistant coating to the specs.

How to Remove Scratches from Glasses

Here, we have a few tips following how to get scratches out of glasses. Let’s check out.

We have already told you that you can get headache by using scratched specs. But it’s quite impossible to protect your glasses throughout the lifetime. By chance, it can fall from your hand. Or it may happen that you have kept the specs in your pocket without the case. It can also cause scratches on spec. Here we have given some tips that will let you know how to get scratches out of glasses.

Remove Scratches from Glasses Using Toothpaste:

Toothpaste is the most common and essential thing of daily life that every person has in his/her home. Therefore, you can effortlessly  remove scratches from glasses by using toothpaste. In this case, you first need to take a little non-abrasive toothpaste. Put the toothpaste on the cotton wool, and then you need to rub it circularly. Do this process for a few seconds. After that, you need to rinse the specs in cold water. Then pat it gently with the help of a dry and clean cloth. In case you see that the scratches are remaining, repeat the process.

It is a quick, inexpensive way that is effective for minor scratches. But for deeper scratches, you have to repeat the method a few times. RDA stands for Radioactive Dentin Abrasiveness. It measures the abrasiveness of any item.

A paste having below 70-80 is known as low abrasiveness. To follow this method, you don’t need to buy expensive toothpaste. Non-abrasive and non-gel ones can easily do your job. If you are looking for low abrasive toothpaste, try to ignore the advanced products. For example, you need to avoid whitening or plaque removal.

However, there are a few kinds of toothpaste that you can use:- Arm & Hammer Dental Care Sensitive (48 RDA), Weleda Children’s Tooth Gel (45 RDA), Rembrandt Mint (63 RDA), Colgate 2-in-1 Fresh Mint (70 RDA), Colgate Sensitive Max Strength(83 RDA), Colgate Total (70 RDA), Colgate Regular (68 RDA), and Sensodyne (79 RDA).

How Remove Scratches from Glasses Using Baking Soda

Sometimes, you are confused to determine whether the toothpaste is abrasive or not. At that moment, what you can do is avoid those. Thus, you can minimize the risk of damaging your specs. Using Baking soda, you can remove scratches from glasses easily. It is a useful and cost-effective solution that you can find in your kitchen easily.

Usually, baking soda that comes with an abrasion rating of 7 RDA. It is very safe for your specs. So, you can use it without any tension. If you want to remove the scratches by following the procedure, you need to take one spoon of baking soda. After that, you need to mix it with water. Then, what you need to do is stir it until it forms a glue-like thick paste.

Now, you have to apply the paste to the lenses using a soft cotton cloth or ball. Make sure that you are rubbing the paste in a circular motion. You need to do this process for around thirty seconds continuously.

After doing that, you need to wipe the soda away. You need to use a clean, damp cloth in this case. Then, keep the lenses to get dry. If you still see scratches, repeat the method. For hard scratches, this way is time-saving and useful too.

How to Get Scratches Out of Glasses  Metal Polish

For plastic frames, you can go for another method. And that is you can use brass, silver or metal polish to remove the scratches. In this process, you need to select a low abrasive metal polish. Then, take a little amount of polish and apply it at every scratch portion. You need to rub this polish on the scratches for a few seconds with a soft cotton cloth.

Always remember that this process is time-consuming. It takes time while polishing out any item. When you clean the specs thoroughly, you can take a cotton bud, and then rub alcohol on it to give the specs a clean look. But this process is not applicable for lenses. It can damage the coatings. The drawbacks of this procedure are: This method is time-consuming and costly too.

Remove Scratches Using Car Cleaning Wax

These kinds of wax are used mainly for polishing vehicles. However, this is an excellent option for removing scratches from both plastic lenses and glasses. Usually, people prefer to use high brands like Turtle Wax or Meguiar’s. Here, we have elaborated how to use Car Cleaning Wax to remove scratches on specs. Let’s check out.

First, you need to wipe off the dust, debris properly from the glasses. Use a microfibre cleaning cloth to do it. After cleaning the glasses, start the process.

Then, you need to apply the vehicle wax on the scratched area with a soft cotton cloth. After that, you need to rub the wax in circular motions. You need to repeat the step if there is major scratch.

Next, your job is to rinse away the glasses using room temperature water.

Now, you have to dry the lenses. A clean, dry microfiber cloth can be beneficial in this case. Repeat the methods if still there remain scratches.

How to Get Scratches Out of Glasses Glass Etching Cream

For this process, you can use any glass etching cream that has hydrofluoric acid. First, you have to wear disposable gloves. These will help you to protect your hands. Then, you need to take a cotton swab. Then, apply a thick coat of this cream on the lenses’ surface.

You must not rub the cream on the lenses. After applying the thick layer of the cream, you need to wait for a while and allow this cream to sit for five minutes. Next, you need to rinse the glasses.

Lastly, you need to use a cotton cloth to wipe off the lenses. Then you will get to see that the cream is getting peeled off. But you should avoid this process for removing scratches from glass lenses. However, this method is a little bit risky and expensive too. In case you left the cream to settle for more than five minutes, it can damage the lenses.

It is basically a temporary quick-fix method. But if the scratches are deep and stubborn, this process is not going to be worked. Moreover, there remain huge possibilities of damaging the lenses. Besides, the harsh chemicals can damage the coatings.

Try a Scratch Filler Kit

Multiple scratch filler kits are available in the market that helps to repair scratches. Usually, these kits come with a glass polishing compound, clothes and tools. These can make your job done easily. Ensure that you have gone through the instructions carefully. If you don’t do it properly, then it can damage your lenses.

How to Avoid Scratching of Glasses

  • Never use paper towels, tissues, or shirts that you are wearing for smudging the lenses. Cleaning with these materials can cause minor scratches on the lenses. Always use soft cotton clothes, especially those that you get with the specs when you buy them.
  • Try to avoid cleaning your lenses and frames with those solutions that contain acetone. Acetone that is known as nail polish remover can damage both plastic and glass lenses. These kinds of products remain on the surface of lenses for an extended period and damage the lenses.
  • It is often advised to use and spread toothpaste over the lenses. Then, you need to rub the toothpaste to remove scratches. It can work sometimes. But you need to make sure that you are using non-gel and non-abrasive toothpaste. Besides, you need to check whether it is non-whitening or not.

What to Do:

  • Make sure that you have washed your hands properly. By doing so, you can ensure that you are not transferring germs to your specs.
  • You can use warm water to wash your scratched lenses. Then wipe the lenses with a microfiber cloth.

Frequently Asked Questions:

  • How to remove scratches from glasses?

Plenty of ways are there that you can follow to remove scratches from glasses:

  • Toothpaste
  • Scratch filler kits
  • Metal polish cleaner
  • Baking soda

But you should use these methods on minor scratches. However, in case your lenses have any deep cracks, then you should go to a professional.

  • How to remove scratches from prescription glasses?

For many years, most eyeglass wearers have used baking soda to solve this problem. You need to make a thick paste by mixing the baking soda with the water. After that,  apply it on the scratched area. Then take a soft cotton cloth and rub gently. In addition,  rinse the glasses in water and wait until the glasses get dried.

  • How to remove scratches from eyeglasses?

You can follow the toothpaste, baking soda, or metal polish method given above. You can try the car wax method to remove surface scratches. On the other hand, if you have plastic or polycarbonate lenses, then use glass etching cream. It will help you to remove the scratches effortlessly.

You can try the combination of vinegar and dry mustard also. In this case, you only need to make a paste of these two items. Then, take the paste and rub it on the scratches. After completing the method, make sure that you rinse the glasses correctly. It is because mustard can cause irritation to the eyes.

Baby oil can also be used. You need to apply a little drop of baby oil on the scratched portion. Then, your job is to buff the lense with the help of a clean cloth. Do it until the scratches become invisible.

  • How to remove scratches from glasses lenses?

First, you need to put little non-abrasive toothpaste on any cotton wool. Then, what you will do is rub the lenses circularly. After that, you need to remove the scratches slowly. However, if you want, you can use baking soda as an alternative. In that case, you only need to make a thick paste by mixing water and baking soda.

  • Does toothpaste really remove scratches?

Yes, you can use toothpaste to remove scratches from lenses. You only need to use a soft cloth along with a smear of non-abrasive and non-gel based toothpaste. Thus, you can remove scratches.

  • How do you get scratches out of drinking glasses?

You need to use baking soda to get the scratches out of drinking glasses. In this case, you need to mix both water and soda at the same ratio. Take the mix in a bowl. You need to stir the mix until a pudding-like paste comes. Then, you need to rub the mix on the scratched portion. You need to wipe away the remaining soda using a clear, and damp cloth.

  • How do you remove scratches from plastic eyeglass lenses?

You need to put a little regular toothpaste on a cotton cloth. Make sure that the cloth is clean and soft. You need to rub the toothpaste on the plastic lenses. Do it for 10-20 seconds in a circular motion. Now, you need to take a dampen cloth. Finally, rub the soft cloth over the lenses and remove scratches from plastic eyeglass lenses. However, you can follow the baking soda methods too.

read more
Do It Yourself

Restricted Call: How to Block It in Android and iPhone

Restricted Call: How to Block It in Android and iPhone

A restricted call indicates the type of calls that we are unable to trace. If you are an Android or iPhone user, you must see the restricted calls appearing on your phone. These Calls are incoming calls, not outgoing. It is tough to find out the real number of a restricted call. That’s why we usually block the number on our phone. If you want to know how to find a restricted call, then go through this article accurately.

Restricted Call: How to Block It in Android and iPhone

The process to find a restricted phone number:

Usually, sometimes we receive restricted incoming calls that appear on our phones. Then, we block the number so that the number won’t appear on our phone for the next time.

If thou want, you can block the phone call’s origin only by dialing *67 before that specific number. You can restrict your call also when you don’t want someone to trace your call.

What will you do if you are facing the same issues? Here, we give some methods by following which you can find out the number of restricted calls.

Restricted Call Blocking

  1. Check your phone records: You can know the details of the restricted call by checking your phone number’s records at the end of the month. When you see your phone records, you can see all the incoming and outgoing calls. You can get your phone records from the cell phone providers. They have the full list of incoming and outgoing calls. You need to note down the exact time and date of the restricted call at the time of receiving calls. At the end of the month, thou can check the time and date with the phone records.
  1. Block restricted numbers: We usually block a number when we find it restricted. As soon as you block the number, the caller can’t call you. Therefore, they are unable to call after that. But overall, it is an effective way to get rid of the unwanted spam callers.
  1. Ask the caller: In case you have answered any restricted call, you can ask the identity of the caller. Sometimes, you can know about the caller by asking it. However, it doesn’t work all the time. But there remains a chance of getting the information about the caller
  1. Ask family members: Thou can ask your friends and family members to check the number whether they have also got such calls from the same number or not. You can take suggestions from a people who have already faced this situation.
  1. Ask the police to track the number: In case the number is harassing you, you can ask the police to take the necessary step. You need to give all the details i.e. number of the restricted call, time and date, entire phone record. They can easily track the number by using the advanced technology. Therefore, you can get real information about the number.

Process To Block A Number On iPhone:

Many procedures are there that let you know about the method of blocking a number on iPhone devices. If thou want to block any number on your iPhone, then follow the steps. But before this, you need to update your iPhone.

1) With the help of call history

Step 1: At first, thou have to open the Phone app.

Step 2: After going to the phone icon, you have to tap on the ‘?’ symbol. You can see this blue symbol next to the restricted call.

Step 3: At last, you need to select the ‘Block’ option to block the particular number.

2) Use Do Not Disturb

Step 1:  First of all, thou have to open the settings option. Then, you need to click the option ‘Do Not Disturb.’

Step 2: Then, you have to click on the

‘Allow Call From.’

Step 3:

Next, select those numbers you want to allow, like your family members, close friends, etc.

Step 4:

When you set the ‘Do Not Disturb’ mode, ‘ you need to check the other options available in that page whether their settings are accurate or not.

Step 5:

At last, you have to turn on the option ‘Do Not Disturb’ available at the top of the page.

Procedure To Block A Number On Android

If you want to know about the method of blocking a number on an Android phone, go through the steps properly.

Step 1: First, open the Phone icon.

Step 2: Then, you have to tap on the restricted call. After that, click on the ‘?’ details.

Step 3: At last, select the number that you want to block or don’t allow to call you.

Conclusion: This article let’s you know about the restricted calls, how to know about them, and how to block the restrict calls on Android and iPhones. We hope you must get benefits after going through this article.

Restricted Call- Frequently Asked Questions:

  • Should I receive restricted phone calls?

Nowadays, people usually don’t answer unknown numbers.  However, if you think that you may get any necessary call from unknown number, then you can pick up the call.

  • Can I trace a restricted call?

If you are getting harassed by any number, then you want to trace it. Usually, any private numbers, and restricted calls are traceable. If the number is unknown, unavailable, or out of the area, then you can’t trace the number due to lack of essential information.

  • Can I call back a restricted number?

When we will call the last incoming or outgoing phone number, it comes automatically into your phone. But if you are using a landline, you need to dial 69 to call the last number. Or you can dial *#69 on a cellphone to call back a restricted number or any usual number.

  • What does Restricted implement on an incoming call?

It implies that the caller doesn’t want to let you know his number. As a result, you cannot find out the number of the caller.

read more
Do It Yourself

How to Pair Apple Watch- A Complete Guide

How to Pair Apple Watch- A Complete Guide

Apple Inc. has produced this Apple SmartWatch. With the help of it, people can get fitness tracking, other essential benefits. But for this, you need to know how to pair Apple Watch with Apple devices. In this article, we will unpack the details of how you can pair an Apple Watch to a new phone, how you can unpair it, and so on. Let’s look at the details underneath.

How to Pair Apple Watch to new phone

  • After buying the Apple Watch, your first job is to power the iPhone and Apple Watch.
  • After that, download the band. You only have to tap the button and hold it for some time.
  • Next, what you have to do is to wear the Apple Watch in your wrist. You should look Whether it fits in your wrist or not.
  • Then, press and hold the button again and switch on the Watch. As soon as thou see an Apple logo on display, you need to remove your hand from the side button.
  • Then, you can see a pairing option on your new iPhone. Click on the continue button. You get to see a pattern of blue particles come in front of the screen on the new Apple Watch. Then, you need to keep the iPhone near the Apple Watch. As soon as you will do this job, you can pair these two devices.
  • Next, what you require to do is to click the setup option on your phone. You need to follow the methods appropriately to complete the setup procedure. While doing this, you can transfer the backup details from the old model of your Apple Watch to the latest one.

How to pair Apple Watch manually:

Are you unable to use the game of the iPhone device that you want to pair with your Apple Watch? Then, you can do it manually.

  • You can see an option available at the bottom part of the screen of the Apple Watch.

Next, you get to see the pattern of blue particles on the screen. You need to click the ‘i’ option quickly. By tapping on the alternative, you can get information about the manual process. Then, you can see a code containing six characters.

  • After getting the code, you have to enter it in the new Apple device. Then, wait for some time until both of these get paired. After pairing, you can go for the setup program.

How to unpair Apple Watch from an iPhone

When you unpair the Apple Watch,  what you have to do is keep a backup of your Apple Watch. Then, you can remove your new Apple Watch from your phone. As a result, you can get all the details available in the new Apple Watch.

  • First of all, you have to go to the Apple Watch application that you have downloaded on your device.
  • After that, you are required to go to the My Watch tab option.
  • Then, you can see an option named as Apple Watch at the upper part of the display. You need to click on it then.
  • After going to the next slide, you get to see the ‘i’ option. You can see it beside the Apple Watch option.
  • At last, click on the Unpair Apple Watch option. Then, you will get two options for either keeping it or removing it. And then it will ask you to put an AppleID password. Now, thou need to wait for a minute. After some time, you can see your Apple Watch unpaired from the factory settings.

The process of backing up your Apple Watch

You can transfer the data from your old Apple Watch to a new one. But it depends on the setup process that thou are going to use for pairing.

 Choosing the Automatic Setup process

Here, we are defining the process of automatic set up. Let’s have a look at this method.

  • First of all, you should look at whether you have done the unpairing method or not.
  • If you have not done yet from the old device, do it quickly.
  • After that, you are required to fix the new iPhone model from the iCloud.
  • Then, completing the entire setup procedure, you need to go to the Apple Watch app. After going to the Apple Watch option, click on it.
  • And then open it to fix the Apple Watch to get the backup details. But you have to check whether you can store the details to iCloud or not as you may lose the essential backup information.

The process of switching the Apple Watch’s LTE account to the new iPhone

Have you bought an LTE Apple Watch? Then, you must have a cellular plan for your Apple Watch. It is because it can help you to attach the Apple Watch to the iPhone account. While doing this process, you don’t need to transfer the cellular plan to the new iPhone device you bought. Here, we have given some steps by following which you get to know how to pair an Apple Watch LTE account to a new iPhone.

We can assure you that you must get benefit by following this process.

  • First, go to the current carrier to delete the previous Apple Watch plan. But make sure that you are not deleting the current iPhone plan.
  • Then, look at the guidelines of the recent carrier to fix the latest plan.
  • After that, what thou have to do is to fix the Apple Watch. For this, you need to follow the instructions that you will get from the new carrier.
  • At last, add the new iPhone account to the Apple Watch.

Frequently Asked Questions:

  • How can you pair an Apple Watch with a new iPhone?

If you want to pair both an Apple Watch and a new iPhone, you need to keep them close. You need to check whether the airplane mode in your iPhone is off or not. But at first, keep the WiFi and Bluetooth turned on. Then go to the Control Center and switch the Airplane Mode off. At last, restart the Apple Watch and the iPhone.

  • Can I pair an Apple Watch without an update?

You can’t pair Apple Watch without updating. While updating the software, make sure it is fully charged. And at the time of updating software, keep the iPhone off.

  • What will I do if the Apple Watch gets stuck while pairing?

First, go to the Apple Watch app and then open the software update option. Then, remove all the updated files. After that, you have to restart your Apple Watch and iPhone.

read more
Do It YourselfTechnology News

Connect Multiple Bluetooth Speakers Android

Connect Multiple Bluetooth Speakers Android

Nowadays, there are many Bluetooth devices available in the market like Google Home, Amazon Echo, etc. If you want to connect multiple Bluetooth speakers Android at a time, you can take the help of apps such as AmpMe, Bose Connect, etc. These Apps also allow you to send any audio at the same time.

In this article, we are providing a procedure by following which you will be able to connect multiple Bluetooth speakers Android.

By following the method, you can pair multiple Bluetooth speakers with ease.

Using AmpMe app to Connect Multiple Bluetooth Speakers Android

Among all types of Bluetooth devices, AmpMe is the most helpful app as it can be used in a versatile way. And while using this app, you don’t need to have any specific brand Bluetooth. It is one of the special benefits that AmpMe offers to its users.

  • First, you need to install this application.
  • Next, use your Facebook account or Google account to sign up.
  • After that, check whether any of your contacts are using this AmpMe app or not.
  • Then, you can start enjoying with your friends and family.

Apple HomePod Stereo Pair:

The setup procedure of a HomePod stereo pair:

While setting up a HomePod, you get to see an option. It asks you to use both speakers as a stereo pair. Besides, if you are an Apple user, you can fix a stereo pair with HomePod speakers.

  • First, you need to place two HomePod speakers in the same room.
  • Then, go to the Home app. And press it for a while.
  • After that, make a stereo pair.
  • Next, you need to select the second HomePod that you use as a stereo pair.
  • Then, click on the HomePod on any side to identify it. And then, swap these two.
  • At last, click back option. And then, click on the ‘Done’ option.

Samsung’s Dual Audio Feature:

Want to pair two Bluetooth earphones into a single Samsung device? Then, Samsung Dual Audio can help you in this case.

 The process of using Samsung Dual Audio with dual:

  • First of all, you need to pair each headphone with the Samsung device.
  • Then, open the settings.
  • After that, what you need to do is to click on the Bluetooth option. And then, you need to switch on the slider.
  • After that, enable Bluetooth pairing mode available in your headset. Sometimes, thou may need to press and hold it for some time.
  • After that, go to the notification option. And then click on the media.
  • Then, you need to go to the Samsung device that you are going to use.

Android pie features

  • It helps to line up all the apps in a horizontal row.
  • For the pixel users, Android Pie allows us to copy and share it easily.
  • It has improved battery life. As a result, it can detect which apps we use most.
  • Besides, the battery saver mode closes all the apps that can consume much battery life.
  • Can you connect 2 Bluetooth devices to Android?

Yes, you can connect two Bluetooth devices at a time to Android. People who have Bluetooth devices like Android Auto; Smartwatch, Bluetooth headphones must get advantage from this latest update.

  • Is there any app to Connect Multiple Bluetooth Speakers Android?

Yes, there are a few apps that can assist you to connect multiple Bluetooth speakers. The names of the apps are AmpMe, Bose Connect, Ultimate Ears. However, if you keep your Bluetooth headphones and smartwatch with you always, you won’t require any app.

  • Can my phone connect to multiple Bluetooth devices at once?

Whether it is any smartphone, laptop, computer, or any tablet, thou can connect your phone to any Bluetooth devices at a time. For doing this, you have to go to the settings app available on your device. If thou are using Windows 8.1, you also have to follow the same procedure for setting up many Bluetooth devices.

  • Can you connect multiple Bluetooth speakers to TV?

The smartphone you have can quickly help you to manage the paired Bluetooth devices. The models of the speakers and TV sets are different. You should have a efficient app on your phone that can help connect multiple Bluetooth speakers to TV.

  • Can you Connect Multiple Bluetooth Speakers Android?

If you are using any old versions of Android, then click on the option’ menu’. You can get it at the top of the right side. Then switch on the dual audio toggle button. If thou want to use it, you have to connect it with two other speakers. But if you are using any Android pie, then you can experience an advanced process.

  • Can we connect 2 Bluetooth devices to one laptop?

Usually, you can pair your device with one headphone or music stream. But you cannot connect two speakers at a time with your device.

When you are using a laptop, you can pair it with multiple Bluetooth devices at once. But it is only for those devices that contain the “multipoint

functionality” option. In this case, it doesn’t matter which type of adapter you will choose.

  • How do I connect multiple Bluetooth speakers to my laptop?

To connect many Bluetooth speakers with a laptop, you can follow these steps given underneath.

  • At first, you need to collect some speakers which are of similar brand. If you get the same model, then it will be helpful for you.

However, you can use various models of the same brands. It doesn’t make any significant issues.

  • Then, charge the speakers to connect these laptops you have. Sometimes, people face difficulties while pairing their speakers with the computer. That is why we have given some simple but effective steps by following which you can pair Bluetooth devices with your laptop.
  • If you want to access the Bluetooth settings quickly, you should have an updated windows version. In case you have an old version of windows, then you need to press the Windows key. And click the “F” button at a time.
  • After that, you get to see a windows search option. Here, you need to write the name of the device that you want to connect. After that, tap on the ‘enter’ button of your laptop.
  • At last, you get to see an “Add Bluetooth

device” option. Tap on it.

  • How do I stream music to multiple devices?

If you want to stream music to many devices, then you can follow the instructions that we have given below.

Step 1:

At first, you have to pair all the devices.

Step 2:

Then, sync the clocks.

Step 3:

After that, you need to choose any time while going to start this process.

Step 4:

Next, share the starting time to all those devices where you want to stream.

Step 5:

Then, keep all the devices in sleep mode. And keep it until the time that you have set up will begin.

Step 6:

At last, you can play or stream music.

In case you face any problem in this entire process, thou have to fix it again. Besides, while using multiple devices, you should not keep many background apps in running condition. It is because these can reduce the playback speed of streaming music.

  • Can you play 2 Bluetooth speakers at the same time on an iPhone?

According to the latest updates, the iPhone is coming with a new double Bluetooth system. With the help of this system, one can send any audio or music to the other two connected devices. However, now Apple also allows us to connect multiple Bluetooth earphones, speakers, etc. But the difference is that you cannot play the audio in two devices at a time.

  • Can you use 2 Bluetooth headphones at the same time?

Yes, you can use and pair two Bluetooth earphones in a single time. Bluetooth multipoint can help you to use two Bluetooth earphones easily. For example, you can use your laptop or computer and your phone at the same time.

  • How do you connect two Bluetooth headphones at the same time?

Bluetooth multipoint is helpful in this case as it allows you to connect many devices at a time easily. Thou have to go to the settings option and click the Bluetooth multipoint option.

  • Can you pair 2 Bluetooth headphones at once?

It is a simple method. For this, the only thing you are required to do is to switch on the Bluetooth device at first merely. Then, connect these with Bluetooth multipoint earphones. You have to keep these both earphones in pairing mode. Then, pair the first earphone. Next, you have to keep these in pairing mode again to connect the second one.

read more
Do It Yourself

How to Turn your Old TV into a Smart TV!

How to Turn your Old TV into a Smart TV!

If you’re one of those persons who’s an ardent fan of cable TV, then this post isn’t for you. But if you happen to have an old TV and would like access to streaming services then keep on reading. There’s a lot of content now a days that stream totally online. Many movies nowadays too stream directly to apps rather than cinema. So it’s quite possible that you’d be missing out on a lot if you happen to watch only cable TV on your old set. But no worries with a small investment you can turn you’re old TV into a new smart version of itself. So stay tuned to learn how to turn your old TV into a Smart TV…(no pun intended)

Get yourself a Donlge or a smart stick in learning how to turn your Old TV into a Smart TV:

The best and most ideal solution to turning your old TV into a smart one would be to get a dongle or smart stick. These are simply USB devices that go into your TV and connects it to your WI-Fi. Pretty simple right? But wait it gets simpler yet. To know which one to get, all you have to do is to figure out which streaming services you like the best. If it’s Amazon prime or Netflix, your best bet is getting the Amazon Fire stick.

However if you’re a die hard Apple fan and all that’s Apple you can always lay your hands on the Apple TV range of dongles. Plus with the Apple TV dongles you can also seamlessly connect to your Mac or iPhone. For the Android users out there you can also use your Android phone as a controller and use Chromecast as well.

Or maybe just use some Cables…

The cheapest solution in learning how to turn your old TV into a Smart TV is by simply using some cables. This is the most cost effective solution so far, plus if you happen to have a spare HDMI cable lying around then it’s also free.

All you have to do is simply connect the HDMI cable from your TV set to your laptop to get what’s on your laptop screen onto your TV screen. It’s really that simple!

The thing with this solution is that it’s really affordable all you need is the HDMI cable and a corresponding port on your laptop and you’re done. If you don’t happen to have one, then getting one is very cheap. However if your laptop does not happen to have an HDMI port then you’d have to research some alternative solutions.

Another great thing with this option is that your laptop basically becomes a controller of sorts with your TV screen as the monitor.

Another option in learning how to turn your old TV into a smart TV is by using screen mirroring. This isn’t the best solution so far. The screen sometimes lags and gets’ stuck. So we won’t go into it in detail here.

read more
Do It Yourself

How to Connect AirPods to Windows 10?

How to Connect AirPods to Windows 10?

Yes you can connect your AirPods to your Windows 10 PC! It may take you a few extra steps for obvious reasons but in the end you’ll have both connected to one and another. In reality while it may take you a few seconds to connect your AirPods with another Apple device, with Windows 10 it may take you a minute or so. So without further ado let’s learn how to connect AirPods to Windows10.

Do AirPods work with Windows 10 PCs?

Yes of course! Just because their Apple made doesn’t mean that they have to work only with an Apple device. If you happen to have a gadget with a Bluetooth connection, you should be able to connect your AirPods to them. AirPods are just like other Bluetooth headphones. So just as you can connect those headphones to your Windows 10 PC, you will also be able to connect your AirPods as well and just as easily. In fact the steps are exactly the same. So now to getting back to how to connect AirPods to Windows 10……

Learning how to connect AirPods to Windows 10:

The first step in the process begins with connecting your PC to your AirPods. To do so you’ll have to first go on to the setting page on your PC. From there click on Bluetooth and other devices. From there on out click on Add Bluetooth or other Device. Choose the Bluetooth option.

Once that is done, now it’s onto the AirPods…

So Far…

  • Open the settings page on your PC
  • Go to Bluetooth and other devices
  • Click on add device
  • Ensure your Bluetooth is on

Now for the AirPods section:

To connect your AirPods to your Windows 10 PC and to ensure it is discoverable, you’ll have to place it in its box with the lid open. Once this is done, press the button at the back till you see the lights on your AirPods flash white. This is the status light showing that your AirPods are ready to connect.

After this, your AirPods should appear on the add a Bluetooth device section on your PC. From there on out click it and you’re good to go.


Once you’ve learnt how to connect AirPods to Windows10, here’s how to Reconnect the two again:

Once you’ve successfully connected your AirPods to your Windows 10 PC, you can listen to anything you have like YouTube, Spotify, iTunes, movies, you name it. But what happens when you finish and need to reconnect them again later on?

Reconnecting is simple enough. You have to head on to the Bluetooth and other device section which is back in settings. Once you’re there, you’ll see all your previously paired devices, one of them being the AirPods. Click on them to connect and you’re good to go.

Using USB Dongles to Connect your AirPods:

If for some reason you don’t have Bluetooth capabilities on your PC you can always use a USB dongle. They are cheaper than a new set of earphones and you can connect your AirPods just as easily.

read more
Do It Yourself

Download Free Audio books online Latest

Download Free Audio books online Latest

In this lock down period we’re running out of things to do, or are we? We just have to be creative when it comes to doing things. If you really look at it there’s lot’s to keep ourselves busy with. One of the things to keep us busy or simply pass the time is Audio books. What’s more in this post we’ll be showing you places where you can download free Audio books, with an emphasis on the word free. What makes Audio books more interesting than normal eBooks or physical books is that you can listen to them while doing your daily chores or while resting too. In this post we list some free Audio books websites that allow access to their books anytime, anywhere, provided you have internet access, of course. So without further ado let’s get to reading, no pun intended by the way.

Are downloading from these sites legal?

Yes, they are completely legal. Of course you can always get illegal copies everywhere if you just look. But they don’t really help anyone, the author or you, you know morally. Although these Audio books are free they are completely legal. So rest assured your moral compass will remain intact. Now onto the websites…

Download Free Audio books from Librivox

This website happens to be a free non- profit initiative. It is actually a public domain for books. This means that you can get most or all their Audio books for free. There are thousands upon thousands of Audio books to listen to. They have everything ranging from War and peace to Leaves of Grass to Anne of Green Gables. There is even a voluntary section where you can try out books in progress.

Features to check out:

  • Public domain of books
  • 10,000 projects to choose from
  • Voluntary section to read books in progress

LIT2GO for your literary perusal:

This website offers you everything from short stories, Audio books, poems and plays. This website is mainly garnered for a classroom setting. In that these short stories or Audio books are accompanied with word count, citations, play times and more. Some of the plays even come with PDF copies allowing you to read along with the text format.

Features to check out:

  • Mainly for a classroom setting
  • Has short stories, Audio books, plays and poems
  • Sometimes accompanied with a PDF file format

Stay Loyal with Loyal Books:

This site shares books that are already in the public domain. You’ll get everything ranging from Sir Arthur Conan Doyle’s The Return of Sherlock to John Milton’s Paradise Lost. This is besides others of course. There is also a section where you can see reviews given by other readers as well as leave a review yourself.

Features to check out:

  • Books made available from public domain
  • Broad range of books
  • Access to reviews

Download Free Audio books from Mind Webs

This is one of the websites to download free Audio books where you get a haunting radio dramatization of science fiction stories. If you’re a science geek, which we all are in different degrees, then you’ll be sure to like this website.

Features to check out:

  • Deals in science fiction Audio books
  • Perfectly executed to give you the spooks!

Open Culture:

In this website you’ll get a neatly placed menu of all the books that are available elsewhere. You may see some of the same titles as in other places. This is because of these websites taking Audio books from the public domain. But this is one website where you can search for Audio books categorically. You even get videos of readers reading a particular section of a book.

Features to check out:

  • Categorically placed Audio books
  • Videos of readers reading your favorite titles

Download Free Audio books from Overdrive:

This is one of the websites on this list of where to download free Audio books, that has the largest collection of books. You can get either the audio book variety or eBook type on this website. They have a larger collection than another website, as they have access to books in local libraries as well. They are in partnership with over 30,000 local libraries and have over 2 million titles to peruse.

You can even get some of the newest releases as Audio books, all free of cost too.

Features to check out:

  • Largest online collection of Audio books
  • Partnership with over 30,000 libraries
  • Access to new releases as well

Scribl to download free Audio books:

This is one of the websites on this list that gives you access to newer releases. In many instances too the books are read by the authors themselves. The Audio books in this website also come in serialized form so that you can break them into parts and read from that part later on.

Features to check out:

  • Newer collection of Audio books
  • Some read by the author
  • Serialized Audio books

Project Gutenberg:

If you’ve ever looked for free books online, then you probably would have heard this name before. This website is the first listing when it comes to free books online. Their free audio book collection now boasts of a large variety of books right from Charlotte Bronte’s Jane Eyre to the Book of Tea by Kakuzo Okakura.

You even get computer read Audio books on this site as well. But you can imagine something like Siri reading to you and you’ll steer clear away from this genre.

Features to check out:

  • Both human and robot read Audio books
  • Large collection of Audio books

There’s always Spotify Too:

Besides songs, Spotify also has a collection of Audio books to listen to. They constantly add to their collection as well. These are all completely free to listen as well. If you want to skip the ads then you can always go premium, at a cost of course.

Features to check out:

  • Has songs and Audio books as well
  • Ability to go premium without ads

These are some of the sites from which you can download free Audio books. Audio books are a great way to kill time while at the same time doing other stuff as well.

read more
1 3 4 5 6
Page 5 of 6