


You will note that your system fails to complete tasks as you use up the entire available memory on your computer. If you notice that your computer programs often crash and it takes more time to do basic tasks, you may be thinking about how to free up RAM on your device.
What is RAM?
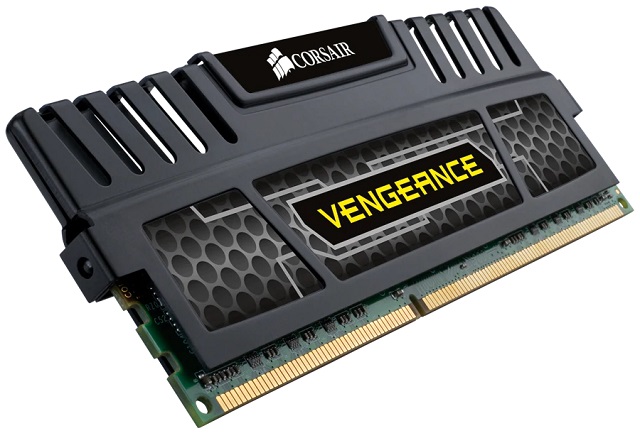
The Random Access Memory (RAM) of your computer is located on a memory chip and is usually located on the motherboard. This is where short-term data is saved on your computer. For all current and operating programs and operations, This memory chip is the center of storage. Your computer uses the data it has stored in RAM to complete tasks while obtaining and executing other functions at the same time.
The output of your computer will slow down when you use up all the usable RAM memory since it does not have the space needed to complete its tasks. When you clear RAM space, your computer gets the ability to execute tasks. There are various ways that you can free up RAM space, depending on your device.
How to Optimizing Your RAM
Using your RAM will be simple since it supports so many features. Try these fast solutions to free up RAM space before you start deleting programs from your computer.
Restart Your Computer
Restarting your device is the first thing you can do to free up memory. All of your Random-access memory (stored data) will be scrubbed away when you restart or switch off your device, and programs will restart. This will theoretically flush out certain systems and applications that eat up the RAM storage operating behind the scenes.
Update Your Software
It is critical that the most up-to-date versions of your computer program and applications are working. It can require more memory to handle older applications and app renditions, causing the computer to slow down.
Try a Different Browser
Switching browsers is something else that you can do, as some of the browsers use more data than the others. Start using a browser like Chrome or Firefox, which are usually decent memory management browsers, if you’re not already using them.
Clear Your Cache
The next thing that you can do is to clear your cache if you ever find yourself low on RAM. Often, since it utilizes RAM for memory functions, the cache will take up a lot of space. Instead of uploading them again, the cache keeps on to data that your computer uses to reload sites it has used before. This will save you time while browsing, but if you are low on Random-access memory, it’s something you can compromise with negligible effect.
Remove Browser Extensions
The use of browser extensions has made most of your everyday work and home computer operations easier. However, they still need memory, so you may want to think about deactivating your extensions or deleting them.
How to Free Up RAM on Windows 10
If you are still having difficulty freeing your memory storage, then you probably may have many programs and software on your device without even knowing. Consider these five ways to free up RAM storage for Windows 10 devices.
1. Reduce Visual Effects and Animation
With developing technology, there are even more options for computer effects and animations. For example, for applications and artifacts that use storage for unwanted effects, you can switch off the animations. There are some consequences you can shelve before you free up more memory if you happen to be running low on RAM capacity.
To open the visual effects on your computer:
- Go to the File Explorer.
- Right-click on “This PC” on the left-side column and choose “Properties.”
- On the left, press “Advanced system settings.”
- Choose the tab labeled “Advanced.”
- Under the Performance group, select settings.
- Change to “Adjust for best performance.”
This setting would disable all your computer’s animation functions. This will provide more room for you but will drastically restrict the aesthetic of your device. However, you can also modify the visual effects your computer can execute in the same tab to your tastes.
2. Keep Track Memory and Clean Up Processes
You can track the use of your computer RAM so that your capacity is not exhausted until you actually need it. You should navigate to the task manager to verify the processes in order to monitor the computer’s memory. This is where you can see which systems are running and what kind of storage they occupy.
To go to your computer memory:
- Open the Task Manager by pressing Ctrl+Alt+Del keys.
- Click the tab labeled ‘Processes.’
- To see how much storage they are taking up, press the ‘Memory‘ tab.
You will also see which of the applications on your computer takes up the most space and time. You can uninstall programs you don’t use, or if you find anything suspicious, that takes up your memory.
3. Control Running of Background Apps
Your applications that are scheduled to run automatically in the background are the next objects that could take up RAM. You could have used your device for years before realizing that these applications are eating up your RAM capacity. This will drain your memory, battery, and data capacity easily.
To stop the applications from running in the background:
- Go to your computer settings.
- Click on the category for ‘Privacy.’
- Scroll down to “Background Apps” on the left side panel.
- Switch off any apps that you are not using.
Applications are also automatically set to run in the device’s background. This makes it easier for them to view notifications and automatically update their apps. You will conserve RAM capacity by shutting this feature off for apps you don’t need.
4. Disable Startup ProgRAMs You Don’t Need
If you have been using your device for at least a couple of years, so you are likely to have downloaded a reasonable amount of applications that you have either missed or are no longer using. You would want to navigate to the startup tab to remove any you no longer need after the processes tab tells you which programs use the most space.
To disable startup programs:
- From the Task Manager, click the “Startup” tab.
- To organize the services from high to low use, click “Startup impact.”
- To uninstall any programs that you don’t use, right-click.
Startup programs are those that activate after booting up your computer. Without your permission, each one takes up a little bit of RAM in the background when these programs launch. All of the software and programs can add up after a while. Be sure to disable or uninstall the ones that aren’t required.
5. Always Clear Page File When Shutting Down
After you restart your computer, your page files will not be removed or reset because they are saved on the hard drive, unlike RAM. So it doesn’t get cleared with the others at shutdown as RAM gets stored on-page data.
Deleting page files will remove any RAM it has stored and help keep your computer running smoothly on your hard drive. This can be changed to clear automatically, much like the RAM, when your computer shuts down.
Open the Registry Editor to do this.
- Type “Registry Editor” into the search bar of the start menu.
- To open the Registry Editor to make changes to your computer, click YES.
- Scroll to the left and chose “HKEY LOCAL MACHINE.”
- Scroll down to pick “SYSTEM.”
- Choose “CurrentControlSet.”
- Find and choose ‘Order.’
- Scroll down to choose “Session Manager.”
- Look for “Memory Management” and select it.
- Choose “ClearPageFileAtShutdown.”
- Under the value data, enter the number ‘1’ and hit OK.
How to Free Up RAM on Mac
There are also useful applications for tracking and clearing up RAM capacity on your device for Mac users.
1. Free up Disk Space
If you learn that your Random-access memory is fully loaded, but you still need storage, you can use free space called virtual memory on your Mac drive. This extra storage can be found on the hard drives of Mac computers so that you can continue running applications. The feature is always on, so you would need to make sure that you have driver space available to swap in order to use virtual memory.
2. Check CPU Usage
To check your CPU health and utilization, you can also use the Activity Monitor application. The CPU is your Central Processing Unit, which carries out commands from the data stored as RAM in the computer program.
Just choose the ‘CPU’ tab next to the memory tab to manage your CPU. This is where you can see if the computing capacity of any app is greater than that of others.
3. Fix the Finder (Close Finder Windows Too)
The data each window shows are stored as RAM when you open a new window in the Finder. Instead of new finder windows, changing the finder settings will render the files open in tabs.
To open your Finder Preferences:
- On the top left of your screen, select “Finder.”
- Right-click from the drop-down options on ‘Preferences.’
- Check Open tabs for folders instead of new windows.
There is another way to clear the RAM storage; by combining your Finder windows. To do this, click the “Window” drop-down instead of the Finder. You’ll pick “Merge All Windows” from there to put all of your Finder windows in one place. This will declutter your desktop as well as conserve your storage.
4. Clean-Up ProgRAMs and Applications
You will want to keep your device clean and tidy if you are trying to retain a consistently safe amount of RAM storage. As macOS sees each screen icon as an active window, a cluttered desktop can consume storage far more quickly. And if you don’t think you should organize your files, it can free up a lot of RAM by throwing everything into one general folder.
5. Check Activity Monitor
You should check the Activity Monitor to keep track of your Mac RAM use, which tells you how much storage is being used and which apps are using it. To determine the applications that take up much of your storage, use the Activity Log. Delete the ones that you are not using anymore.
To Check the Activity Monitor:
- Search in the spotlight search bar for ‘Activity Monitor’ (command + space).
- Select the “Memory” tab
- Delete the unwanted apps.
How to Free up RAM on Windows or Mac – Additional Ways
Being proactive about the RAM of your computer is the safest thing to do so that you don’t have to think about clearing space. Use these additional ways to free up RAM on your Windows or Mac:
Increase RAM
You can still add more RAM to your computer if you have a huge amount of information you don’t want to remove. For a desktop computer, purchasing and downloading RAM is simple to do, but it can be difficult for laptops. Make sure you invest in the right kind of RAM for your device as well as the right amount for your individual storage needs.
Install a Memory/RAM Cleaner
There are memory cleaning applications to help you clean your computer if you feel that you do not have the time or you simply can not manage to arrange your files. Most of these cleaners have exclusive features or extension elimination capabilities that allow users to handle their startup programs.
Scan for Virus and Malware
When you download certain apps, software, or extensions to your computer, there is the risk that they may have a virus or malware added. If any malware or virus enters your computer, it will steal both your details and your RAM storage.
How To Free Up Ram In Android
Use these ways to clean up the RAM of your Android device and get decent performance out of it if you have been having performance problems on your device due to applications eating up all the memory.
1. Find the apps that are using the most memory
You should check the status of your phone to see how much memory (RAM) is actually being used and which applications are most used. Remember that RAM is supposed to be used, so it isn’t bad to have only a little leftover RAM available. As this is the most powerful use of it, Android will try to keep the bulk of your free Random-access memory in use.
- On your phone, open the Settings app.
- Scroll down and tap “About phone.”
- Click on “Memory.” This will show some simple information about the memory use of your phone.
- Click the button for “Memory used by apps.” The applications that use the most RAM will be shown.
2. Remove old apps
Deleting unused applications will help increase your Android’s free space, as well as free up RAM if the apps run a lot in the background. Free disk space and free RAM can also further boost the efficiency of your Android. Apps you bought or got for free can be downloaded from the Google Play Store again at any time.
- On your phone, open the Settings app.
- Select “Apps” or “Application manager.”
- Go through the list of installed apps to look for apps you no longer use.
- To delete it, select an app and then tap Uninstall. This will uninstall the app, removing it from your device. If there is no “Uninstall” option, then the app must be preinstalled on your phone, and you cannot delete it.
3. Disable apps that you don’t use and can’t uninstall
Many Android devices come with preinstalled loads of applications that run in the background and take up resources from the system. Since without rooting your phone, you can’t uninstall these applications, you can disable them instead. You’re not going to have the storage back, but they’re also not going to work either.
- On your device, open the Settings app.
- Select “Apps” or “Application manager.”
- Find the app that you’d like to disable. There are also carrier applications or combined applications that you have not downloaded yourself.
- If available, tap ‘Uninstall updates.’ Before you are offered the opportunity to disable the program, you’ll have to do this.
- Tap on “Disable.” This will turn off the app and stop it from working.
How To Free Up Ram in iPhone
1. Restart your iPhone on a regular basis
Restarting the iPhone will reset the device’s memory. This will repair apps that misbehave and take up too much memory. It can boost general efficiency as well.
- Press and hold the Power button until the screen displays the Power slider.
- In order to turn your iPhone off, slide the lever with your finger.
- Click and hold the Power button again after about ten seconds to toggle the iPhone back on.
2. Reset the RAM on your iPhone
To clean out the Random-access memory on your iPhone, you can use a quick trick, bringing you more free RAM for applications to use.
- Until the Power slider shows, push and hold the Power button. First, make sure your iPhone is unlocked.
- When the slider shows up, press and hold the Home button for five seconds. When you’re successful, you’ll be redirected to the home screen. This will disable the RAM currently in operation.
3. Delete unused apps
You can get better results on your iPhone if you have any free storage space accessible. Deleting applications, you don’t need anymore is one of the best ways to free up space. For applications that usually run in the background, this would open up disk capacity and free up Random-access memory. You will be able to download all of your paid or free apps again from the App Store.
- Find an app you would like to uninstall from your home screen.
- Until it begins to wiggle, click, and hold the app.
- To delete it, press ‘X’ in the corner of the app. For any other applications that you want to uninstall, repeat. It is not possible to uninstall system apps.
Conclusion
Now is the opportunity for you to bring an end to file hoarding. Without you noticing it, all of the files on your phone and device take up RAM space. Now you know how to securely declutter these redundant files from your device and how to free up Random-access memory so that it operates more effectively.
Frequently Asked Questions
Q: What is RAM?
A: The Random Access Memory (RAM) of your computer is located on a memory chip and is usually located on the motherboard. This is where short-term data is saved on your computer.
Q: Will doubling RAM improve performance?
A: If your device has less than 4GB RAM memory, we encourage you to add more RAM since it will greatly improve your device’s performance.
Q: How do I check RAM usage on Windows?
A: You can check your PC’s RAM usage by following some simple steps. Right-click on the Windows taskbar and open the Task Manager. Click on Memory, and you’ll be able to see the memory usage.
Q: What happens when phone RAM is full?
A: It’ll slow the phone down. Full RAM will slow your Android phone. To be exact, switching from one app to another will be like waiting for a snail to cross a path. Plus, it will slow down some apps, and the phone will freeze in some irritating situations.
Q: Is clearing cache harmful?
A: Cache files are temporary files that are created dynamically when your Android phone is used, such as when you access the internet, use applications, sync your mail, etc. You will delete the memory from the cache at any time. This will not damage your phone. It will free up your internal and external storage.


