close

Gadgets

GadgetsTechnology News

Unleash the Power: Top 5 Reasons to Upgrade to Thunderbolt 5

Thunderbolt 5

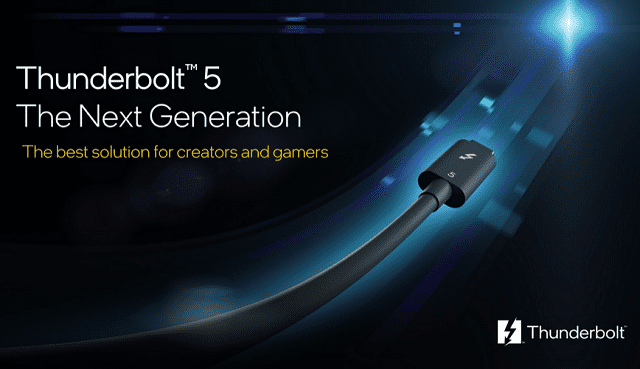
Intel recently confirmed the key details about Thunderbolt cable’s next generation, which is Thunderbolt 5 .  As per the company, it is expected that PCs & accessories with Thunderbolt 5 will be released in 2024. The 5th iteration of Intel’s connectivity standard will be available soon. So, it is ready to improve the display, data transfer & charging capabilities. Also, it seems we will find it reserved for premium machines. Jason Ziller, who is the general manager of the client connectivity division at Intel, said that the company is going to release technical collateral and development resources of Thunderbolt 5 to developers in the fourth quarter of 2024.

What is Thunderbolt?

It is a hardware interface which Intel developed. The purpose of designing Thunderbolt is to let users connect peripherals to their PCs. Previously, we can see the use of the Mini DisplayPort connector in initial releases. But later, Intel switched this to USB Type-C, starting with Thunderbolt 3. This one uses the same connector. Generally, Thunderbolt has provided much higher data rates than standard USB. Thus, the technology has become very compelling. Remember that these thunderbolt connections enable plug-and-play external GPUs such as the Razer Core X, in addition to external monitors & other peripherals.

It is a technology which is exclusive to Intel-based PCs. USB Implementers Forum, called USB4, has adopted Thunderbolt 3. Some non-Intel laptops, such as Lenovo’s ThinkPad Z series or Apple’s MacBook Air, support it. However, Thunderbolt is still Intel technology. This one is royalty-free and includes higher requirements.

What Is New In Thunderbolt 5?

Intel has begun teasing Thunderbolt’s next generation, and some of its capabilities are known to us already. However, we do not know the official branding yet. The Power Delivery requirements have not been discussed by Intel, but it is expected that it will boost the bandwidth to at least 80 Gbps.

80 Gbps Bi-directional Bandwidth (Or Up To 120 Gbps Uni-directional):

The big upgrade with this next generation will be the maximum bandwidth that has doubled from 40Gbps to 80Gbps bi-directional. In simple words, we can say that this one is going to use 4 data lanes, and every lane supports 40Gbps. A standard configuration is seen where two lines go in every direction to provide 80 Gbps of bandwidth.

When it comes to talking about special configurations like using very high-resolution displays, lanes are able to reconfigure dynamically to allow three lanes to send data in a single direction. It indicates that you can get 120 Gbps of bandwidth in one direction while you can get 40 Gbps from the other direction. When you use very sharp displays, you can drive them using a single Thunderbolt port, even if you use more than one.

The new bandwidth limit is going to support the existing Thunderbolt 4 passive cables, which are up to 1 meter long. And all credits go to a new signaling technology. If your device supports Thunderbolt 5, the cable must not be a concern.

All bandwidth improvements are available for devices which use USB4 version 2.0. But the main thing you should remember is that the nature of USB standards is flexible. Although USB4 version 2.0 has up to 80 Gbps of bi-directional bandwidth, you might not know which speed a specific device will support. Thunderbolt 5 will have all of these as a baseline requirement.

New DisplayPort, PCI Express, and USB specifications:

Thunderbolt 5 will double the bandwidth of PCIe and allow faster external storage & graphics cards. The speed of current Thunderbolt SSDs is up to 2,800MB/s. If it is doubled, the outcome will be around 5,600MB/s, which is going to be as fast as the internal SSDs available nowadays. For some months, the external GPU market has been in something of a lull because of the graphics cards, as these need more bandwidth compared to the previous version of Thunderbolt. The reason is that the capability has not changed since the introduction of Thunderbolt 3 in 2015.

USB4 version 2.0 specification comes with a new USB data tunneling specification, which can support up to 20 Gbps when it comes to talking about transferring data. It is actually the equivalent of USB 3.2 Gen 2×2. However, if you have an external drive that is able to support it, the transfers will be done much more quickly.

PAM-3:

Thunderbolt 5 moves from PAM-2 signalling technology to PAM-3 for increasing bandwidth because of the support from the USB4 Version 2.0 specification. Ziller explained that with PAM-2, every clock cycle has one eye and offers a 0 or 1 bit. Whereas, with PAM-3, every clock cycle has two eyes, and it helps to increase the clock rate.

PAM-3 lets Thunderbolt 5 run on the same USB-C connectors, motherboards & passive cables ( up to 3.56 feet, i.e., 1 m) as Thunderbolt 4. Do you use an older version of Thunderbolt? If so, then this new version will switch to PAM-2 signaling automatically.

Thunderbolt 5 Products:

According to Intel, this new version will land on each device category offering Thunderbolt 4 currently. Regarding the docking opportunities in different categories, Intel seemed excited. In an argument, Intel says that the Thunderbolt 5 dock is suitable to alternatives that use multi-function modes. According to them, this new version can enable the external AI accelerators in future. Ziller pointed to the push of AI in future rather than the cloud for video collaboration, audio effects, creator & gamer effects, & local AI inferencing.

The company displayed optimism about external GPUs, and all credits go to the bandwidth. Ziller also pointed to the use of the PCI bus of this hardware interface as enhancing performance potential. External GPUs didn’t take off with Thunderbolt 4 or Thunderbolt 3. However, the enhanced features of this new version allowed vendors to try more competitive products.

The company said that PC makers could design computers with up to four Thunderbolt 5 ports. But, the executive would not confirm which CPU platforms will implement Thunderbolt 5. However, this new version runs on updated silicon via a discrete chip. It indicates that the version is going to be feasible technically with Thunderbolt 4 for non-Intel PCs, like those that run AMD or Arm for supporting the new version.

However, the company never charges royalties for Thunderbolt certification. But, some testing fees are associated with Thunderbolt certification. USB4 Version 2.0 can provide almost the same potential as the new version. So, it might happen that non-Intel systems will opt for the USB-IF specification while seeking similar functionality of this new version.

Thunderbolt 5 Cables:

According to Ziller, the company will take Thunderbolt 4-branded cables. Intel will also put them via extra validation testing for the new version of this hardware interface. We expect that the cables will pass at the point where they will earn Thunderbolt 5 branding.

These active Thunderbolt 5 cables need more time to arrive as they need a USB driver change. However, the company expects to get passive Thunderbolt 5 cables of up to 2 m long ( 6.56 feet ).

Will Your Devices Support It?

People who want to get the full benefits of this next generation, will need devices which support it. You should know that passive Thunderbolt 4 cables are compatible with this upcoming generation, and the length of the cables is up to one meter.

Most Premium laptops that come with Intel processors are expected to include Thunderbolt 5 built-in.

Thunderbolt 5 is expected to be backwards compatible with Thunderbolt versions that already exist. Therefore, accessories depending on Thunderbolt 4 will still work. However, the bandwidth will be limited to whatever the earlier Thunderbolt device supports. That’s why you can not benefit from this next generation of older devices. Thunderbolt should be compatible with Windows 11, macOS, Chrome OS, etc.

When Is Thunderbolt 5 Coming Out?

We still have not received any updates from the company about the availability of this next generation. The company has shared only some general information about bandwidth, but we still don’t know about the Thunderbolt 5 release date.

Conclusion:

The company has introduced the 13th-generation processors for laptops & desktops. However, Thunderbolt 5 is not still available in the market. But we can expect that it will make its debut very soon, at the end of the year.

Frequently Asked Questions

  • Is Thunderbolt Intel or Apple?

Intel has developed Thunderbolt 5 with the collaboration of Apple.

Thunderbolt which is the brand name of a hardware interface, used to connect external peripherals to a computer.

  • Will there be a Thunderbolt 5?

Yes, Intel has announced that Thunderbolt 5 will be released very soon.

  • What is the Thunderbolt port used for?

You can use the port for connecting a display, a TV, or an external storage device.

read more
GadgetsDo It YourselfTechnology News

How to Clear DNS Cache on Android

How to Clear DNS Cache on Android

Is there any network problem on your Android device, such as DNS resolution issues, slow network speeds, or wrong IP addresses? A solution is there that will help you in resolving the problems. The DNS cache can hold information about the IP addresses & domain names that were accessed recently. However, this information can get corrupted or become outdated, leading to internet connectivity issues. When you experience this kind of problem, you have to flush the DNS cache on your Android device. We will let you know how to Clear DNS Cache on Android in this article.

What Is DNS Cache On Android Devices?

It refers to a temporary database saving IP addresses of websites you have visited recently on an Android mobile. As soon as you visit a website, your Android device sends a request to a DNS server. Later, this server’s task is to convert a domain name into an IP address. Once your Android device gets the address from the DNS server, it will store this in the DNS cache to let you access it easily in the future.

As your Android device does not need to seek up the address each time, it helps to increase the speed of the procedure of accessing previously visited websites. When the DNS cache gets outdated or corrupted, you can experience slow internet browsing. In addition, it can let you face challenges when you try to access specific websites, or it might result in internet connectivity problems. Hence, you need to clear the DNS cache to alleviate the problems and improve the device’s overall efficiency.

Why Is It Important To Flush The DNS Cache?

Over time on using an Android device, the DNS cache gets corrupted or outdated. As a result, it causes network connectivity problems and reduces the browsing speed. It may cause problems like the following:

DNS Resolution Problems:

You can face the issue for different reasons, like a corrupted cache or outdated records. Try to clear the DNS cache to solve the problem and permit your device to connect to the website or domain without any issues.

Slow Internet Speeds:

If you face this problem, you should clear the DNS cache on your Android. Remember that a corrupted DNS cache reduces the speed of your mobile’s network connectivity. As a result, you will experience slower browsing speeds. Clearing this cache allows you to free up valuable memory as well as improve the network speeds. Thus, it helps to smoothen your browsing experience.

Incorrect IP Addresses:

Your Android device may use the wrong IP address for a website or domain. In this case, clearing the DNS cache is necessary to fix the problem. It may happen if the DNS cache is outdated or becomes corrupted. When you clear the cache, your device will start finding the correct IP address for the website or domain to let you connect without any issues.

Benefits You Will Get After Clearing the DNS Cache On Your Android Device:

Improved Internet Performance:

If you see that your device is facing trouble to get connected to the internet or to load pages, clearing the DNS cache is essential to get rid of old or broken DNS entries.

Troubleshooting Connectivity Issues:

If you face challenges in connecting to a specific website or app, you should try to delete the DNS cache, as it will force your Android device to acquire the most recent DNS information.

 Improved Privacy:

Clearing the DNS cache eliminates any DNS information saved on your Android device and helps to preserve your privacy.

Enhanced Security:

Try to erase DNS data that is kept on the device and clear the cache, as it is an effective privacy measure. Remember that online behavior & habits can be monitored with the data.

Faster Browsing Experience:

Clearing the DNS Cache on Android devices enables your device to receive the most recent DNS information immediately for applications & sites to enhance the browsing experience.

How To Clear DNS Cache On Android?

By following the given methods, clearing the DNS cache on your Android device is possible. This process will help to fix any connection issue you are facing. You should remember that the steps are a bit different depending on what Android version you use & your device manufacturer.

Method 1. Clear DNS Cache Using Chrome:

Google Chrome includes an internal DNS cache. Hence, you should follow the steps to clear the DNS cache of the Chrome web browser.

  • First, you have to open the Chrome browser on the Android device you use.
  • Then, your task is to type chrome://net-internals/#DNS into the Chrome search bar.
  • Choose DNS in the DNS lookup page’s left pane.
  • Then, your job is to choose the Clear Host Cache option from the right-hand panel to flush the cache on the Android device.

Method 2. Modify The Wi-Fi network To Static:

You can try to change the Wi-Fi network settings to Static for flushing the DNS cache. The process which you need to follow in this case is as follows:

  • First, your job is to open your Android phone’s Settings application.
  • Then, you need to click on Wi-Fi.
  • After that, your job is to click on the network name or the gear icon which is located beside it.
  • Next, you need to click on IP settings. Then, you have to choose Static from the dropdown menu.
  • Now, you should put some details like IP address, subnet mask, gateway, and DNS servers you are willing to use. The information can be obtained from the router’s configuration settings or network administrator.
  • Finally, your job is to reconnect to that network. Then, wait until the Android device obtains the new IP address & DNS information. It will flush the DNS cache on the Android mobile.

Method 3. Clear DNS Cache Through The Settings App:

  • First, you have to open the Settings app on the Android mobile you use.
  • Now, your job is to click on Wireless & Networks or Network & Internet (depending on your Android mobile).
  • Next, you should click on Advanced or More, depending on the Android version.
  • Then, you need to click on Private DNS or Private DNS provider hostname.
  • If you get to see any hostname or DNS address, you have to remove it.
  • In order to clear the DNS cache, you need to click on Save or Apply.

 Method 4. Clear DNS Cache Using The Android Terminal Emulator App:

If you are a rooted user, using a single command, you will be able to clear the DNS cache on the Android phone.

  • From the Google Play Store, you have to download as well as install the Android Terminal Emulator app.
  • Then, your job is to launch the application. Now you need to type this given command:

su

  • You have to grant root access as soon as it is prompted.
  • Next, you need to type the mentioned command for clearing the DNS cache:

ndc resolver clearnetdns wlan0

  • To allow the DNS cache to get cleared, you have to wait for some seconds.
  • Then, you need to type this command to exit the Terminal Emulator app:

exit

Method 5. Empty The Cache From Chrome’s Settings Page:

Although most people believe that clearing Chrome’s browsing data lets you remove cached pictures and files, a few users think that emptying the app cache helps to fix several DNS issues. In case, the processes we have mentioned above didn’t work, you can empty the cache from Chrome’s app info page.

  • Your first task is to tap & hold Chrome on the Android mobile to see a quick shortcut menu. Then, you can open the information page of Chrome by clicking on the “i” or “App Info” option.
  • After that, your task is to open “Storage usage,” and then your job is to click on “Clear cache” on the next page. It deletes all local cache which are stored on your Android mobile and fixes DNS-related problems.

Method 6. Clear Site Storage:

It is the easiest process that you can follow to clear the DNS cache on an Android device. If you visit a site, it will store some information in the browser. While a few of them are known as cookies, sometimes these are called cache. Do you want to remove both from the browser? Before that, you need to know that for different browsers, you need to follow different processes for clearing site storage or deleting cache & cookies.

  • For Google Chrome Users:

  • If you are a Google Chrome user, you need to navigate to Settings first. Then, you have to move to Site Settings and then Storage.
  • After that, an option called “Clear Site Storage” will appear in front of you.
  • Then, you have to hit that button. Now, choose the affirmative option for clearing site storage on Google Chrome.


  • For Mozilla Firefox Users:

  • If you are a Mozilla Firefox user, first you have to navigate to Settings.
  • Then, your job is to go to Privacy.
  • Now, your task is to find out the “Clear Now” button under CLEAR PRIVATE DATA. Then, your job is to click on it.
  • An option will appear to select what to delete and what not to. Your job is to choose what you are willing to delete. Then, click on the “Clear Now” button.


  • For Opera Users:

If you are an Opera user and willing to flush the DNS cache in this browser, you should follow the below-mentioned steps:

  • First, you have to open this browser on the smartphone you have.
  • After that, your task is to click on the Opera icon at the app’s bottom.
  • Then, you should tap on the option — Clear browsing data.
  • Once the pop-up screen appears, you need to tick or untick browsing history, cookies & data, and saved passwords.
  • At last, your task is to hit the OK button for clearing the DNS cache from the browser.

Method 7. Change The DNS Server On Android:

When the DNS server can’t resolve the lookup despite clearing the DNS cache, you need to change the DNS server. You definitely know that Android 9 was released recently and Google officially added a system-wide DNS setting. Go through this section properly to learn the procedure of changing the default DNS server on your Android phone. The steps you need to follow in this case are as follows:

On Android 9 And Above:

  • Your first task is opening Settings on your Android. Then, you have to navigate to “Connecting & sharing.” Then, you can see the option “Private DNS” option.
  • Now, your job is to select “Designated private DNS” and click on “Modify.” Next, your task is to enter your preferred DNS server. For instance, you can use Cloudflare’s DNS hostname, which is 1dot1dot1dot1.cloudflare-dns.com.

On Android 8.1 And Older:

Those who are using Android Oreo and older versions, need to follow this procedure.

  • Hence, you need to open Settings and head toward “Wi-Fi.”
  • Next, your task is to open the Wi-Fi access point to which you are connected. After that, you need to change the “IP settings” to “Static “.
  • Now, your job is to change these DNS 1 & DNS 2 addresses for the Wi-Fi connection. In this case, one thing you should know is that changing the DNS server is necessary for every Wi-Fi connection manually.

Method 8. Using A Third-party App:

  • Your first job is to install the DNS Changer app from the Play Store on the Android mobile. Then, you have to open it. Next, select the custom DNS server from the list.
  • Click on “Start.” The application uses the VPN API of Android to route all traffic through the custom DNS server. So, a pop-up will appear for the approval of a VPN connection.

Method 9. Clear Cache from the device Application Management Settings:

  • Navigate to the ‘Settings’ app first on the Android device. Then, you need to open the ‘Applications’ tab. Or you have to choose the ‘Application Management’ tab.
  • Next, you have to click on the web browser to clear the cache.
  • After that, you should click on the ‘Storage’ option that you can find on the app settings window.
  • Next, you should choose the ‘Clear Cache’ option.

These are all the processes you can follow to learn how to clear the DNS cache on Android.

Conclusion:

In order to fix connectivity problems, enhance internet performance, and safeguard privacy, clearing the DNS cache is necessary. In this article, we have given detailed information to let you learn how to clear DNS cache on Android and make browsing safer.

Frequently Asked Questions

 Does using a VPN clear the DNS cache on Android?

No, it doesn’t clear the DNS cache on Android.

Does clearing the DNS cache on Android delete browsing history?

It doesn’t delete browsing history.

Is it safe to clear the DNS cache on Android?

You can clear the DNS cache on Android because it is really safe.

read more
GadgetsDo It Yourself

Wired vs Wireless Mouse

Wired vs Wireless Mouse

Although trackpads are becoming larger & more responsive on laptops, several people prefer to use a mouse for comfort. If you have a desktop, you need to use a mouse. When you purchase a mouse, you need to decide whether you require a wired or wireless one. This article will let you know the difference between wired vs wireless mouse.

What is a wired mouse?

It connects to your laptop or desktop directly via a USB port & transmits information through the cord.

What is a wireless mouse?

A cordless mouse connects to a computer without use of cables. Rather than that, these use wireless technology such as Bluetooth, RF, or infrared radio waves.

Wired Mouse:

Pros:

  • The users don’t have to charge their mouse because it is connected directly to the PC through a wire.
  • Because of the direct connection, these can give the quickest response time. That’s why these are perfect for gaming or other tasks needing fast responses
  • Less expensive than wireless counterparts

Cons:

  • You can use the mouse within the range of the cord.
  • When you keep the wires unorganized, you may need to untangle them constantly.
  • You can not use these in various locations. These are not suitable for specific tasks like presentations.
  • It doesn’t last like a wireless mouse.

Wireless Mouse:

Pros:

  • These don’t need cords, so you can move them around or take them when travelling.
  • Durable enough
  • These enable you to move your hand freely without getting tangled up in cables.
  • It can cover a longer range than a wired mouse.
  • These are ergonomically designed to fit in hand.

Cons:

  • Losing the receiver leads you to replace the whole set
  • These need battery power, and their batteries have limited life. It may annoy you when you don’t charge them.
  • These cost more than the wired ones. So, a wireless mouse is not your budget-friendly option.
  • Sometimes, wireless signals interfere with home wireless devices like routers or Bluetooth headsets. It can cause connectivity problems.

Wired Vs Wireless Mouse— Overview:

You should go for a wired mouse if you are looking for a classic traditional option. These models come with a USB cord that plugs into the computer. The main reason why the users prefer to use wired ones is that these models can perform consistently and have a direct connection to the computer. It is important for the gamers or those who require precise mouse movements.

On the flip side, wireless ones provide convenience. These come with more lightweight and compact designs. Several wireless models have a dongle or USB receiver through which you can connect your mouse to your computer without wires. But the battery life is short, which is a drawback of these models. Therefore, it is necessary to replace the batteries frequently.

Difference between Wired Vs Wireless Mouse:

Compared to a wired mouse, a wireless one works more slowly. Besides, users can not notice slight lag. But if you are into gaming, you can feel its slow speed because response time in gaming is a vital point.

Lag, Latency & Interference:

If a mouse uses a cable to connect to the computer, it has a more or less direct connection to the device. But wireless connections go through the air to create communication with your computer. A wired connection is like giving a letter from one hand to the other and these models provide more consistent communication with the computer.

In the world of lag and latency problems, most wireless mice work fine. Several gaming mice use Lightspeed technology which sends out signals constantly to “check in on” neighboring devices.

Freedom of Movement:

Regarding freedom of movement, there is no comparison with wireless mice. A wired mouse lets you use it from the computer as much as the wire length allows. Although the wire length is adequate, gamers using these mice can be annoyed by the snags and the weight of the wire. That’s why you need to use a wired mouse with a long enough wire.

If you play games with a wired mouse, the first setup accessory upgrade you should purchase is a mouse bungee which will help to raise the cable and help to decrease your struggle.

Battery:

When it comes to talking about a wired mouse, remember that you don’t need batteries as the power travels through the wire. Batteries are essential for wireless ones and most of the time, the batteries come in AA or AAA form.

If it comes to talking about a rechargeable mouse, plugging in things when not in use has become the norm. Like we plug our mobiles and laptops when not using them. If battery life is about to die, the mouse indicates this with a red sign. On average, the battery life is 80-120 hours. However, a few models come with more than 400 hours of battery life.

Speed and Performance:

As wired ones come with enhanced response times & lower latency, these can provide smooth and precise movements. Those who play competitive esports games and many FPS titles need higher response times. For them, these models are beneficial.

However, wireless ones gave a tough competition to the wired ones. But these lag behind slightly. Besides, the difference is negligible regarding response time and latency only when you use a 2.4GHz wireless one, not a mouse with Bluetooth connectivity. If you use a wireless mouse with 2.4GHz receivers, it can provide polling rates up to 1000Hz, whereas the Bluetooth counterparts max out at 125Hz.

The polling rate refers to the speed at which a mouse communicates the position of it (or input) to the PC. If the polling rate increases, the mouse will be faster and more responsive. Several esports players like to use wireless ones, and it proves how much these have developed themselves. However, if your primary aim is not gaming and you are looking for a mouse for productivity tasks, either option can serve you excellently.

Reliability:

People still prefer to use wired mice. You don’t experience connection loss because these communicate directly with your computer via wire and the transfer of information will be very fast.

On the flip side, wireless mice are subject to interference. If you see any obstruction between the mouse and its receiver, you won’t get the signal easily and will experience delays or lag.

Additionally, you should not connect multiple wireless peripherals with wires to your computer simultaneously. Otherwise, wireless signals will interfere with each other. As a result, you will experience signal loss. The issue becomes worse with Bluetooth mice because they have more latency than 2.4GHz wireless mice. Gamers playing a lot of esports and FPS games should not use these. If you want to use a wireless mouse, it is advised to stick with a 2.4GHz wireless mouse.

Convenience:

Compared to wired mice, wireless mice are more simple to use. These are small and portable. Besides, no cables are there to get tangled up in your bag. That’s why wireless mice are perfect for travelling. Wireless mice can be used away from the receiving device. Whereas, a wired mouse works if you are within reach.

If you are using a TV as a monitor, and a wireless mouse, then you will be able to control this from your couch. You can use a wireless mouse as an input device when the tablet doesn’t have a USB port. In case the computer is too far from the mouse & keyboard, like under a desk or against the wall, you should use a wireless mouse.

Batteries are not essential for wired mice as the computer is the power source. A few wireless mouse manufacturers use a docking station to circumvent the problem. However, it will consume desk space. A few people don’t want to lose the receiver or be left with a non-working mouse. That’s why they might turn down a wireless mouse in favor of a wired mouse. A few wireless mice include placeholders which will help to hold the receiver and prevent the mouse from being lost.

Versatility and Aesthetics:

Proponents of cordless mice cite their versatility. The models which come with the Logitech unifying technology usually feature a receiver which you can pair with many devices. It indicates that you should buy Logitech devices for all peripheral requirements. You can move a wireless mouse easily, if you are willing to use the same mouse on your desktop & laptop. But it’s not simple to unplug a wired mouse. However, it should not be a single reason to purchase wireless mice. Although a combo of a wireless keyboard & mouse is better than having cables everywhere.

Pricing:

Hence, the difference between these two kinds of mice isn’t as drastic as it used to be. If you don’t have too much money and are looking for a budget-friendly option, choose a wired mouse. These are usually less expensive. If you want, purchase a wireless variant of that mouse for 10-odd bucks over it.

Who Should Get a Wired Mouse?

People who prioritize performance and reliability factors more than a cable-free aesthetic aspect need to use a wired mouse. As these remain connected directly to your computer, you will not experience interference from other devices.  Besides, these perform better according to the price range. Moreover, you don’t need to charge them. Esports players prefer using the wired ones.

Who Should Get a Wireless Mouse?

A wireless mouse will be your priority if you want a clutter-free desk setup. You can easily keep your workstation tidy with this. In addition, you will be able to use a wireless mouse from across the room. That’s why it is an excellent option for media centers or HTPCs (home theater PCs).

There is minimal difference between wired and 2.4GHz connections in response time until you experience any interference. If you are a casual gamer, there is nothing to be worried about.

The Bottom Line:

People who prioritize convenience & versatility should use a wireless mouse which is great to carry while traveling. Whereas a wired mouse is the best if you are searching for an inexpensive and reliable mouse.

Frequently Asked Questions

  • How do you connect a wireless mouse?

If you are willing to connect your wireless mouse to Windows, your first job is to head toward Settings. Then, you need to move to Devices and Bluetooth & other devices. Now, you should click on Add Bluetooth or another device. If you use a Mac, you need to put the wireless mouse into pairing mode. Then, your task is to navigate to the Apple icon. Now, you need to go to System Preferences and then Bluetooth.

  • Why is your mouse not working?

Sometimes, the mouse will not work, and the reasons are irreparable hardware damage, power or connection loss, interference between the work surface & the mouse, outdated software, etc.

  • How do you connect a wired mouse to your iPhone or iPad?

To use a mouse with an iPad or iPhone, you need to connect it to the device’s charging port through a USB-C cable. You need to use an adapter when the mouse does not support USB-C.

read more
AppsDo It YourselfTechnology News

How to Create a Contact Poster On iOS 17?

How to Create a Contact Poster On iOS 17?

In June, Apple announced iOS 17 at WWDC. It is going to be released in the fall alongside the iPhone 15 models. Contact Posters is a feature belonging to the new software update. It is one of the communication upgrades brought by iOS 17 to the latest iPhones. If you use an iPhone 14 Pro or an older model, you can benefit from these features while updating. If you call someone who has saved your contact information in their address book, they can see your Contact Poster On iOS 17 entirely on their screen, instead of the old small thumbnail.

As soon as you set up, your selected contact picture & the personalized poster will become visible to someone with your matching phone number or Apple ID. NameDrop, developed by Apple, is a method that can exchange contact information across Apple devices. Just like AirDrop, for sharing contacts, it uses Bluetooth technology, and every person’s contact poster will be showcased as a visual representation of their identity. Let’s learn how to create a contact Poster on iOS 17.

What is contact poster iOS 17?

Contact Poster in iOS 17 is a new feature allowing you to customize how your contact card will appear when calling someone. You can customize the call screen appearing on other users’ iPhones, including the photo, name, typeface, style, pronouns, etc., for unfamiliar users. In this way, it is possible to present yourself & express your identity.

How To Create A Contact Poster On iOS 17:

You need to enable the beta software updates to get the Developer Beta in Settings. Beta software is not stable and can drain your battery life. In addition, it can carry the risk of data loss. You can expect a public release of iOS 17 this September.

Contact Posters work with NameDrop, a way through which we can exchange our contact info with someone new quickly. It is necessary to hold the mobiles together to exchange the name, number, and email.

Set up your Contact Poster—

  • First, your job is to move to Contacts app or the Phone app’ Contacts tab where you can get to see the contact card at the top. Then, you need to click on My Card and Contact Photo & Poster.
  • Next, you need to click on Edit so that you can generate or change contact posters.
  • Three slots will be available to make a Contact Poster. Then, you need to click the + for creating a new one.
  • Users can generate a Photo poster, a Memoji poster, or a Monogram poster. Once you click on Camera, you can create a Photo poster with an image that you have taken on the spot.

Create a Photo Contact Poster:

  • This interface is almost the same as making a Lock Screen. First, choose an image from your library, preferably a vertical photo. Try to take photos with Portrait Mode because the phone easily separates you from the background while applying color effects.
  • You need to swipe left & right between different filters on the picture separating you from the background. Then, your task is to click on the color circle which can be found in the bottom right corner so that you choose an accent color.
  • Next, customize font, and color by clicking on the name at the screen’s top. Use your two fingers to zoom the image and drag it around on the screen.
  • Then, you have to click on Done. Then, a preview of the contact image will appear. Now, you should click on the Crop option to reposition the photo. Otherwise, you can click Customize Photo to choose a different one. Once you complete the steps, you need to tap on Update or click on Skip to leave this as the default.
  • Once you complete the steps, a pop-up will appear and it will ask if you are willing to have this new contact poster and image to sync across all your devices.

Create a Memoji Contact Poster:

Use the Memoji contact poster when you are unwilling to present a picture of yourself. Hence, you can select a Memoji from the list. For instance, you can choose an animal or something you made of yourself. Has your Memoji fallen out of date? Then, try to update this with the available instructions. You can choose a preset face like winking, tongue out, thumbs up, etc. Besides, it is possible to capture your face’s expression. Some Memoji come with torsos and arms.

  • First, you need to tap on Memoji.
  • Then, your task is to select and click on the Memoji you prefer.
  • If you want to create a new Memoji, you need to tap the + icon.
  • You can pose as you want and then once you are ready, you need to click on the Shutter icon.
  • If you want to try again, you need to tap the Bin icon which you can find in the bottom left corner. However, you will be able to click and choose from the presets that can be found at the bottom of the screen.
  • Then, your task is to tap on Next in the top right corner.
  • You can use the pinch gesture, if you are willing to to resize and reposition the Memoji.
  • You have to tap on Cancel if you want to try again. Otherwise, you need to tap on Choose if you are okay with the image.
  • Now, what you need to do is to choose a background color for the Memoji.
  • Then, your task is to click on Next.
  • Now, the memoiji will be assigned to the Contact Poster. You need to click on the icon in the bottom left corner, if you want to change the background color.
  • After that, you need to tap and select your preferred color.
  • If you are willing to choose a custom color, you can click on the color wheel.
  • For adjusting the vibrancy of the background color, you can use the slider at the bottom.
  • Now, your job is to click on the X icon after customizing the background.
  • Next, you need to tap the contact name at the top to customize the same.
  • Now, you need to swipe and select your preferred font.
  • After that, your task is to use the slider so that you can adjust the font weight.
  • Now, you need to change your font color. To do so, tap the color wheel and select a custom color.
  • Then, you need to click on the X after customizing the contact name.
  • If you are willing to change the Memoji, you need to tap the icon in the bottom right corner.
  • Now, you will be able to select your preferred Memoji and customize it.
  • Then, you need to tap on Done in the top right corner after you finalize the Contact Poster.
  • After checking everything, you need to click on Continue at the bottom.
  • Finally, the poster will be assigned to the contact you have selected. Now, you need to tap on Done so that you can save the changes.

Create a Monogram Contact Poster:

The monogram contact poster lets you enter only two initials and choose a color. You will have a limited font selection: the system font, a rounded version, a condensed version, and a nice serif font. If you wish to create your name’s monogram, use the fancy serif font. You can see a shimmery bevel effect changing the light when you tilt your mobile. But it will appear so subtle that the letters seem blurry. You can expect this to change before iOS 17 releases this fall.

You need to follow this procedure to create a Monogram Contact Poster.

  • First, you have to launch the Phone application on your iPhone, and then your task is to navigate to the Contacts tab.
  • After that, your task is to click on the contact card at the top.
  • Next, you have to head toward the Contact Photo & Poster section.
  • Now, you should press the Edit button.
  • Then, you need to hit the plus (+) button at the bottom.
  • After that, you have to choose between Camera, Photos, Memoji, & Monogram.
  • You can then change the style by swiping horizontally.
  • Next, you have to change the style, color & typeface by clicking on your name at the top.
  • Press the Done button located in the top right corner once you do this.
  • After that, you need to hit the Continue button.
  • You can optionally set a profile image for iMessage & other Apple services.

It is very simple to create & customize a Contact Poster. As soon as you set up this, you are able to pick whether it’s shared automatically with all contacts or only those whom you approve.

Use your Contact Poster to share your contact info:

If you find a person who is using the iOS 17 beta, just bring mobiles together to exchange contact info. Then, both can view each other’s Contact Posters. Moreover, using the same feature, you will be able to start SharePlay. Once you receive a call from a person you know, their Contact Poster will appear on a beautiful new incoming call screen.

The bottom line:

People were previously able to share iMessage profile photos. And the availability of a Contact Poster On iOS 17 is certainly a welcome bonus that enriches iOS. The feature lets you recognize a caller by the larger photo and custom-made design. However, your contacts have to run iOS 17 or a later OS version to see your creation.

Frequently Asked Questions

  • What is a contact poster?

It is something through which Apple redefines the way you see your contacts & interact with them.

  • How do contact posters work?

You can customize how you will be represented when you call someone with the help of this new feature. Just like customizing your lock screen, changing your name’s font type, color, and full-screen image is also possible.

  • What is the poster template?

It refers to a basic template that can lay out what your finished poster will look like.

read more
Do It YourselfInternet

How to Translate a Page in Firefox: 5 Easy Tips

How to Translate a Page in Firefox

Something happens that while browsing the internet, you might end up with a specific website which is in a different language. A website can support many languages and cater to a global audience. People who want to translate the page need to hit a button or flag icon and view the content in their desired language. A few websites are not optimized properly or don’t support the option of many languages. Hence, it is essential to translate a web page into Firefox. Let us know how to translate a page in firefox.

You can try to translate the website’s content manually. Using the Google Chrome browser, you can easily translate entire web pages. But what if you use a famous browser such as Mozilla Firefox? This browser includes a default translation feature letting you translate web pages into your preferred language. You may translate the entire page or the chosen text and select languages you must translate from and to. It is possible to access the web more easily using the feature. To learn how to translate a Page in Firefox, check the entire article.

How Does Firefox Translations Work?

You may be familiar with the Interpreter mode in Google Assistant, but you will feel excited to learn the working process of translation tools. Cloud-based services will send data to centralized data centers when you want to translate any language. In these centers, GPU clusters deploy big language models so that it can handle the translations.

But it doesn’t happen with Firefox Translations because they locally deploy all essential language Machine Learning tools. These also automatically translate websites directly into the browser and can give you complete privacy. Therefore, you can translate websites without giving away personal data to third parties in the procedure. Firefox Translations let you fill out a web form in your language. Additionally, you can have it translated dynamically to the page’s language. Moreover, it flags low-confidence translations in red to make you aware about potential translation errors.

Firefox Translations are compatible with eight major languages, which are:

  • Spanish
  • Estonian
  • English
  • German
  • Czech
  • Bulgarian
  • Portuguese
  • Italian

Additional languages are in the works, including Russian, Persian (Farsi), Icelandic, Norwegian Nynorsk, and Norwegian Bokmål.

How to Install and Use Firefox Translations:

The procedure to install Firefox Translations and use them to translate websites in Firefox is as follows:-

  • Your first job is to open the Firefox browser.
  • Then, you need to move to the Firefox Browser add-ons page.
  • Now, you have to tap on Extensions.
  • After that, your task is to use the search box to find Firefox Translations at the page top.
  • Next, you need to tap on Firefox Translations from the available options. Otherwise, it is possible to navigate directly to the Firefox Translations page.
  • After that, you need to tap on Add to Firefox.
  • Next, you should review the information in the permissions pop-up. Thereafter, you should tap on Add.
  • Now, you will get to see the add-on on the address bar near the Bookmarks icon.

How To Translate A Page In Firefox with a translation extension?

 While there does not exist any default translation tool in Firefox like Google chrome, the browser is compatible with many translation extensions. And these extensions let you achieve the same purpose. ‘Google Translator for Firefox’ and ‘To Google Translate’ are the most famous translation extensions. Google Translate powers both of these.

As per your wish, you can download any of these two translation extensions. After that, you need to install this to translate webpages in the browser. Once you install any extensions, you will get to see a new context menu item inside the Firefox menu. Sometimes, you may not like the interface or extension’s performance. In that case, your task is to visit the Firefox Add-Ons page by installing another translation extension. Then, you need to search the ‘Find add-ons’ search bar.

Use the ‘Google Translator for Firefox’ extension:

 As soon as you download the extension, you will get to see a Red T icon appearing on the Firefox toolbar. If you are willing to use the tool, you need to choose the text portion or paragraph to translate. After that, you have to hit the Red T icon. Alternatively, it is possible to tap on the icon and choose the “Translate this text with Google Translate” option. Once the translation procedure starts, the Red T will turn into Green T.

After the end of the process, you will get to see that the Green T icon is reverting back to the Red T icon. Next, you will see the translated text replacing the selected text. Hit the Red T icon if you are willing to translate the whole web page. Then, you should choose the ‘Translate the full page’ option. This tool will identify the source language automatically. It is possible to specify the translation language in the options.

Use the ‘To Google Translate’ extension:

Once you complete downloading this extension, a new option – ‘To Google Translate,’ will appear in the context menu. In this case, your task is to tap on the option you want to translate & choose the ‘Translate’ option for sending this to Google Translate. Alternatively, selecting the ‘Listen’ option can send the text to Google TTS so that it can listen to the words’ pronunciation.

Use Add-on:

This browser comes with many translator add-ons on its Add-on site. You need to find a translator and choose any as per your choice. Ensure that you see the reviews and ratings before making your decision.

Follow the below-mentioned steps to learn how to translate a page on Firefox using Add-Ons.

  • First, you should launch the browser on the computer.
  • Then, you need to head toward the Firefox add-ons page to find Google Translate.
  • After that, you have to tap on Install. Now, you should go through the steps allowing you to install the add-on to your browser.
  • When you go to the address bar, you need to enter the link to the webpage you are willing to translate.
  • Now, you have to move to the Translate icon. Then, you will get to see the letter T at the top right-hand corner and tap on it.
  • You need to choose the Translate page option with Google Translate so that you can open another tab with a translation for that webpage.
  • Changing language is possible when you want. For instance, it has given you the result of the Dutch to English translation, whereas you need Dutch to French. In these cases, changes can be done easily. You can use the Firefox translate page add-on to meet your requirements.

The Bottom Line:

You can use the Google Translate feature for translation procedures because it is compatible with up to 109 languages. And people prefer it over the Add-Ons. Hope, you have learnt how to translate a page In Firefox. Still, if you have any queries or doubts, let us know via comments.

Frequently Asked Questions

  •  What is the shortcut for translating in Firefox?

Shift + enter works as a binded translate button. Otherwise, you can right-click on the extension icon at the address bar.

  • How do you turn on Google Translate in Firefox?

Your first job is to tap on the text section and tap on the Translate icon adjacent to this. It lets you text, translate or listen to this in your language.

  • How do you right-click translate in Firefox?

Your job is to choose the specific text on any page. Then, you need to tap on this and choose the option: “Translate Now” to open another new tab using Google Translate.

read more
AppsDo It YourselfTechnology News

What is Mkv File? How to Open Files SKV File Extension?

What is Mkv File? How to Open Files SKV File Extension?

You may encounter MKV files when you download any video from the web or get any video from a person. These files especially appear when you download HD videos. It is not a popular video format like AVI or MP4. This one is often a puzzle where you have to find a process to play it. Let’s dive into this article to learn about mkv files like what is an mkv file, how to open it and so on.

What is an MKV File?

Mkv file is actually a multimedia container format instead of an audio or video compression format. With the help of this MKV container, it is possible to incorporate audio, video, and subtitles into a single file despite different encoding types being used by those elements. For instance, you can have a .mkv file which has H.264 video and MP3 or AAC for audio.

The primary purpose of the design of MKV container files was to make them future-proof. It means that these files will never be outdated. Many key features are included by the developers to make these things happen, like:

  • Fast seeking
  • Chapter, menu, and metadata support
  • Different chosen audio and video streams
  • Online streaming compatibility
  • Subtitle (hard-coded and soft-coded) support
  • Error recovery allows for the playback of corrupted files.

It is compatible with any audio and video format. Therefore, the format becomes simple to use & highly adaptive.

History:

These files are called Matroska Video files, originating in Russia in 2002. Lasse Kärkkäinen is its main developer who worked with Steve Lhomme ( Matroska’s founder) and a team of programmers for making the comprehensive multimedia container file format. The naming was done from the Russian word for Nesting Dolls, matryoshka.

Developers created the Matroska project, an open standards project. It indicates that this one is open source and free for everyone willing to use it personally. This company has several resources on their website, such as a list of playback options. The more time passed, the format got improved. Later in 2010, it became the basis for the WebM multimedia format.

How Can You Play MKV Files?

These files are not industry standard. Therefore, all media players do not support it though support has grown rapidly. There are several choices to play MKV files, which are as follows.

  1. Use VLC Media Player:

The preferable option, in this case, is using a VLC media player. You will like to use this mostly as it does not need you to install anything else, and it also comes with built-in support. Following the proper method, you can download & install the program easily. You need to start the process by visiting the official download page at videolan.org. Ensure that you are not going anywhere else, as many crapware vendors contain fake VLC download sites.

  • You need to run the file you downloaded for installing VLC. The whole process of installation needs up to two or three minutes.
  • Once you complete the installation, you can see any mkv file. Although VLC associates itself with all supported video & audio formats during the installation, it doesn’t register as a preloaded application for the file types.
  • If you want to watch an MKV file with this media player, you should first tap on the MKV file. Then, direct this to “Open With” and select “VLC Media Player.”
  • If you are willing to make VLC the default player for mkv files, tap on an mkv file, direct to “Open With,” and tap on “Choose Another App.”
  • You must choose “VLC media player” in the app selection window. Then, turn on the “Always use this app to open .mkv files” option, and hit “OK.”
  • Your task is to double-click an MKV file so that you can open this in VLC.
  • If you can not use the VLC player properly or it doesn’t suit you, use some suggestions from the Matroska website for Windows with built-in support.
  1. Use your mobile devices:

While on the move, you can get a chance to enjoy MKV videos & audio. When you are on the iOS platform, you can see the videos directly from the iPhone, iPad and iPod via the native PlayerXtreme Media Player. If you are an Android user, you should download and install the VLC’s mobile version or the Simple MP4 Video Player. Normal MP4 Player comes with a reader for other video formats.

  1. Download codecs for compatibility:

The media player can’t succeed at opening video files with an MKV extension. The reason is that it does not have the essential codecs to decide the file type. You should know that it is a viable option. So codecs let your media player decompress as well as play the MKV files.

You can turn the media player into an MKV file player, but remember that it can harm the PC. Ensure that you download codecs or other necessary software from the recommended sites. There are a few sites which hide crapware in famous software.

If you don’t know where to begin, navigate to Niite. It can offer free downloads devoid of any bloatware. When you go to Niite, you need to find a codec pack named Combined Community Codec Pack (CCCP). It can provide several codecs supporting many file formats.

If you are on the Niite landing page, your job is to choose the CCCP option. After that, tap on the “Get Your Niite” option. Then, the file starts downloading. As soon as it ends, you need to run this to install the codecs. You can select other apps from the site and install these, also. If you effect the changes, you should restart the PC. However, mkv files should mostly begin playing promptly.

  1. Converting to supported formats:

Sometimes, your MKV file reader does not detect mkv files despite downloading and installing the appropriate codecs. You can encounter an issue in your device that can lack the requisite resources to render MKV file formats. It is possible to convert MKV files to a format which hardware & software supports to solve the issue.

You can use a free video file converter to convert MKV files to other formats friendly to your device. It is possible to use the online version of some converters to save space on the device. However, ensure that it is not your first choice because video files are quite big. These take a lot of time to upload, convert and download the converted file.

You can use offline video converters when your device comes with ample storage space. But if there is no ample storage, it is possible to use external storage media, like thumb drives or external hard drives. Offline converters are cost-effective and fast enough because there is nothing to worry about bandwidth costs.

  1. Edit MKV files:

You can edit these files like other file types to apply changes you are willing to achieve. It is possible to include chapters & subtitles as well as delete them. Besides, you are capable of changing the video’s start & end points by trimming off unnecessary parts.

When you find a good video editor, your task is to start with the free versions first. There is nothing to pay for software if the free counterpart is capable of accomplishing as much. If you are willing, try MKVToolNix, a free program used for Windows, Mac & Linux. In most cases, free video editors suffer from major limitations. So you are unable to enjoy all the features.

How To Convert MKV Files?

Sometimes, any method you apply does not work. If so, try to convert the .mkv file to formats like MP4, AVI, etc. After that, play them on the preferable app.

1) Freemake Video Converter:

If you are a PC user, you may use Freemake Video Converter. This tool comes with a simple user interface. There are also many formats for output options.

It is the procedure following which you can convert MKV to MP4 or AVI with Freemake Video Converter:

  • Your first job is downloading and installing this tool in your system.
  • After that, you need to hit the +video button. Now, you should add this MKV file. It is also possible to drag and drop the file.
  • If necessary, edit the video.
  • The software comes with a default editor to cut, rotate, or join videos.
  • You can choose the output format, likely AVI or MP4.
  • While it is possible to choose from a ready preset, you can also custom-create one.
  • Tap on convert so that you can transform the MKV file into the selected mkv file format.
  • You can get a converted file in minutes and see it offline or upload it.

2) Handbrake:

Do you want to know how to open these files on Mac? If you are a Mac user, you can use Handbrake. Compared to the previous one, this one is a little complicated. However, it is not so hard to use.

Converting MKV file to MP4 or AVI is possible with Handbrake in the following way:

  • Your first task is to download Handbrake and install it on Mac.
  • Then, you should launch this.
  • After that, you must navigate to the Open Source button to add files or drag and drop the .mkv file.
  • You need to choose the output format, especially MP4, and a ready preset if you need this.
  • After that, your task is to head towards the Audio and Subtitles tabs so that you can choose the tracks to keep for future files.
  • It is possible to customize Codec, Framerate, bitrate, etc.
  • You should tap on Start to run the process of conversion.
  • After that, you will receive the converted MKV file.

3) CloudConvert:

Follow these steps to Convert MKV to MP4:

  • You need to open its website first and Signup.
  • Then, head toward Convert.
  • Choose MKV in the first box, and in the other box, you should choose MP4. Using this is possible to convert MP4 to MKV.
  • After that, head toward the Select File option. Now, choose the file that you are willing to convert.
  • It is possible to customize the Options.
  • Tap on Start Conversion.
  • Finally, your file is ready for downloading.

4) Wondershare Uniconverter:

All Media Player fans have to convert the MKV file to a format which allows to open & play this because Media Player doesn’t support MKV format. With the help of this tool, you can convert MKV File To Media Player Supported format for both Windows and Mac.

  • First, you have to launch the mkv file converter.
  • Then, hit the Add File icon on the toolbar.
  • After that, you should navigate to the folder with your MKV file.
  • Tap on Open to import the file. Otherwise, you can drag and drop the file.
  • Now, head toward the Output Format option.
  • Once you see the dropdown menu, choose a format that Media Player supports, such as WMV.
  • Hit the Start All button to begin the conversion.
  • You can receive that file in the format you have chosen. Open this thereafter in the Media Player.

It is possible to use the free trial version. However, it is not so helpful. If you want, purchase its Annual Plan for one year, one PC at $29.95. Otherwise, choose its Perpetual Plan, one PC for a lifetime. You can purchase this at $45.96. If you want a business plan, buy it at $161.91 for 2 Pcs. Remember that the cost can vary if you want more than two PCs.

Conclusion:

A few files use the same file extension though the formats are not related. They appear to be for similar-looking suffixes. For instance, files which are available in the MKA format are Matroska-related audio, without video. You can use Matroska 3D video files (MK3D) for stereoscopic video.

Frequently Asked Questions

How do you extract subtitles from MKV?

Downloading the MKVExtracGUI-2 special MKV subtitle extractor tool can extract subtitles from an MKV file. With the help of the tool, you can import an MKV file. After that, you have to choose the subtitles to extract. The program can extract the files in ASS or SRT format on the PC.

How do you burn MKV files to DVD?

Your first task is to convert the file to a supported file format with the help of Freemake Video Converter or any other program. As soon as the conversion is complete, you need to burn that new file to a DVD. You may use BurnAware Free and WinX DVD Author in this case.

Is MKV a better format than MP4?

We know mkv for converting DVDs and Blu-Ray discs to video files. Most people prefer to use MP4 to play videos on a browser. Besides, this one has less file overhead. Each one is better for some uses, whereas not so good for others.


read more
Do It YourselfAppsTechnology News

What is lockapp.exe on Windows?

What is lockapp.exe on Windows?

If you power on your Windows PC, you can encounter several hidden system services and processes. How the windows will appear on the screen depends on these processes. Besides, these determine the way of accessing your local network & connected devices, signing into Windows, etc. Your PC will not work without them. lockapp.exe is one of these unusual processes you could encounter in Windows 10. It is the reason for drawing part of the lock screen, which you view before signing in.

What is LockApp.exe on Windows?

LockApp.exe is a crucial Windows file that overlays a graphical interface over the locked screen while your PC becomes idle for a long time. Before logging in, you can view the overlay screen. When you check Task Manager, the file can be seen running in the background. This file shows a beautiful background picture with the date & time when the screen is locked. Let’s dig into this article to learn about LockApp.exe.

What Does LockApp.exe Do?

It can make a beautiful graphical user interface used to overlay over the locked screen in Windows 10. Elements offered by the graphical user interface of LockApp.exe are as follows:

  • A background image
  • Date and time
  • Quick notifications
  • Preferences set by you to show on screen
  • Controls to shut down or restart
  • Network internet access status

Remember that you can execute this only when you are signed into your system and your PC is idle for a long time. Additionally, tap on Windows + L to manually execute this to lock the screen. Remember that the file process remains suspended the rest of the time while the PC is active.

How Much System Resources Does LockApp.exe Use?

You may wonder if it uses so many resources from your system or not. Sometimes you can find it running in the background, because of which the PC can be awake for a long time. It can consume only  12 MB of memory in the idle stage of the computer when the file’s process remains active.

If it’s not active, consumption goes down significantly. It indicates that your pc needs only 48 KB of memory when you work on a computer and when no lock screen is active. So, it can be said that LockApp.exe is a lightweight application.

Where is LockApp.exe located and what is its File Size?

People using Windows 10 can find this file in the “C:\Windows\SystemApps\Microsoft.LockApp_cw5n1h2txyewy ” location.

Then, you should tap on the file to check out the properties for further details. Around 3.41 MB is the file size.

Can LockApp.exe Be A Virus?

This one is a legitimate program and safe to use. Windows users did not complain & Microsoft Corporation has signed this digitally. There exist no suspicious activities linked with LockApp.exe.

As it is an executable file, hackers are capable of imitating the file to attack the system. You can check easily if this one is a virus or not. These are the steps you should follow to check this.

  • First, your task is to tap on Ctrl + Shift + Esc keys together to launch Taskbar.
  • After that, you have to navigate to the Details tab, where you can see all running files in the list. Then, you need to find LockApp.exe.
  • Now, you have to right-click on the file to select the Open the file location option.
  • Once you see this in C:\Windows\SystemApps\Microsoft.LockApp_cw5n1h2txyewy, ensure that it is safe.

If you find the location different, it may be spyware or a virus. That’s why it is recommended to use an antivirus program and run a full system scan. With the help of Windows Defender, you can perform a full system scan. These are the steps you should follow:

  • First, your job is to tap on the Windows + R together and type “ms-settings:windowsdefender”.
  • Next, you should hit Enter.
  • After that, your task is to choose the Virus & threat protection option.
  • At last, go for “Scan options” and choose the Advanced scan option.

Common Errors Regarding LockApp.exe

Here, we are going to mention some common Errors Regarding LockApp.exe:

  • exe – Bad Image.
  • exe Application Error.
  • exe could not be found.
  • exe could not be installed.
  • exe could not be launched. Class not registered.
  • exe could not be started.
  • exe failed to initialize properly.
  • exe has encountered a problem and needs to close. We are sorry for the inconvenience.
  • exe is not a valid Win32 application.
  • exe is not running.
  • Cannot find LockApp.exe.
  • Error starting program: LockApp.exe.
  • Faulting Application Path: LockApp.exe.
  • The file LockApp.exe is missing or corrupt.
  • Windows failed to start – LockApp.exe.

If you are willing to troubleshoot the error, it becomes essential to find the source of the file. In most cases, the error occurs during startup. So users can face a runtime error when they use Microsoft® Windows® Operating System. Hence, the reason may be poor programming on behalf of Microsoft Corporation, conflicts with other software or 3rd-party plug-ins, or outdated hardware. The error also occurs when you delete them accidentally or a malware corrupts them. Therefore, you need to confirm that your antivirus is updated and scanned daily.

 Is the LockApp.exe Process Safe?

Till now, there is no complain of viruses or

other malware which fakes themselves as the LockApp.exe process. It is possible if the location of the process is C:\Windows or C:\Windows\System32 folder. Usually, malicious programs tend to imitate legitimate system processes to blend in.

So, go to the Task Manager and start checking this by following the steps.

  • Your first job is to hit the Start button, and then you need to select the Task Manager.
  • After that, you have to head toward the Details tab. Tap on the LockApp.exe process to select the Open file location.
  • Next, the File Explorer window will open. Then, check if the location of the process is: C:\Windows\SystemApps\Microsoft.LockApp_cw5n1h2txyewy.
  • If you find the process in another folder, it may happen that malware is running on your computer. We advise you to run a system scan to detect malware with the help of Windows Defender or other antivirus software.

How to fix the lock screen in Windows 10?

The lock screen is directly linked with the LockApp.exe process. Therefore, it may happen that some system files are corrupted. You can follow these two ways to fix the lock screen in Windows 10.

Install Windows updates:

Installing pending Windows updates will fix the problems by replacing old corrupted files with new ones.

  • If you are willing to update the operating system, you should head toward Start Menu -> Settings -> UpdateSecurity -> Windows Update.
  • Then, tap on Check for updates on the right. You can find your system scanning for pending updates.
  • If you find any updates, it will start downloading and installing them automatically. You should reboot the PC when asked to and see whether the lock screen has been fixed or not.

Scan for corrupted system files:

Windows 10 usually has a default tool to troubleshoot system files that may have been corrupted. With the help of the System File Checker (SFC), it can repair corrupted system files that are redundantly available on the computer.

  • If you are willing to perform the scan, you must open Windows PowerShell with administrative privileges. After that, you need to run this command: sfc /scannow
  • You should wait some time to run the command completely and scan the PC.
  • As soon as it is completed, you need to restart the PC. Finally, check if the lock screen starts behaving normally or not.

Restore computer back to the latest restore point:

You should follow these steps to start System Restore (Windows XP, Vista, 7, 8, and 10):

  • Your task is to press the Windows Start button.
  • As soon as you see the search box, your task is to type “System Restore” and hit “ENTER”.
  • Now, look for System Restore in the search results.
  • After that, your task is to enter the administrator password once prompted.
  • You should now follow steps displayed in the System Restore Wizard to select a relevant restore point.
  • Finally, your task is to restore the PC to that backup picture.

Uninstall Microsoft Office Access 2010 (or related software) and reinstall:

By following the steps or instructions of Windows XP, Vista, 7, 8, and 10, it is possible to uninstall Microsoft Office Access 2010 software and later try to reinstall this.

  • Your first job is pressing the Windows Start button.
  • Once you go to the search box, you are required to type “Uninstall” and hit “ENTER”.
  • When you see the search results, you need to look for the “Add or Remove Programs” option. Once you find this, you need to tap on it.
  • After that, you have to look for the entry for Microsoft Office Access 2010 14 and tap on the “Uninstall” option.
  • Now, your job is to uninstall this by following the prompts.
  • Once you uninstall the software completely, your task will be restarting the PC. Then, try to reinstall Microsoft Office Access 2010 software.

How to Disable lockapp.exe on Windows 10?

The process is not as important as dwm.exe and other critical processes. When you try to disable this, it will direct you in the login prompt.

  • If you are willing to disable the process, tap on a new Windows Registry entry. You need to tap on the Start menu to do this and choose Run.
  • Then, you have to type regedit in the Run dialog box. After that, you need to choose the option: OK.
  • You can use the registry editor to find the HKEY_LOCAL_MACHINE\SOFTWARE\Policies\Microsoft\Windows\Personalization key. If you can’t find it in this location, tap on the Windows key to create this. After that, you should choose New > Key. As soon as you create the key, tap on the white pane on the right. Then, you should choose the New > DWORD (32-bit) value from the list. Next, you have to name the new value NoLockScreen.
  • Tap twice the new value. After that, your task is to type 1 in the Value data box. Then, you should choose OK to save.
  • As soon as it is saved, the lock screen overlay will get disabled and LockApp.exe will not be activated. You will see the sign-in prompt when you lock your PC again or sign in —— the overlay will not appear.

How to Configure the Lock Screen?

It is possible to configure the lock screen that permits you to include certain notifications, like the number of unread emails in your inbox.

  • If your job is configuring the screen, you should use Windows Settings.
  • After that, you need to tap on the Start menu and choose Settings to begin.
  • When you open the Settings menu, choose Personalization > Lock screen. Then, your task is to change the lock screen background. Then, see “quick status” notifications like your calendar, inbox, news app, etc., to add other apps.

The bottom line:

In this article, we have covered everything that you need to know about LockApp.exe, such as what is lockapp.exe on Windows 10, how to check if the file is safe, how to disable this to save CPU & GPU usage, etc. However, if you don’t have a shortage of CPU usage, there is no need to disable it because it is a vital part of the graphical interface of Windows 10.

Frequently Asked Questions

 What is the LockApp exe process?

It is a Windows system component that displays the lock screen.

Why is LockApp exe using GPU?

It can happen if you set the Lockscreen to keep changing the wallpaper or keep the PC awake for a long time as you have not configured the monitor or PC sleep time.

Why does Lock Screen Keep consuming resources when the PC is idle?

It is essential to look into GPU Software. Then, select Windows to let it change settings instead of the driver doing that to reduce the usage. The reason is that rather than the driver, windows will decide everything.


read more
Do It YourselfInternetSoftwareTechnology News

How to Fix File Explorer Not Responding Windows 10

How to Fix File Explorer Not Responding Windows 10

Windows Explorer is the basic way through which you can navigate into your System. With the help of Explorer, you are capable of seeing, accessing, & managing all files on your device. But sometimes, the explorer does not respond, or it gets frozen or won’t open. Therefore, you will encounter several issues when you try to use your PC. When it doesn’t respond, you will no longer be able to interact with the app’s interface. Let’s see how to fix file explorer not responding windows 10 problem.

What Is File Explorer?

File Explorer, known as Windows Explorer is a default application in Microsoft Windows operating system. The graphical user interface enables users to access & manage drives, folders and files.

What causes Windows Explorer not to respond to errors?

No specific reason exists which could be the origin of the disturbing problem. Depending on user reports, it can be said that several causes can lead to this error.

  • Ensure that your File Explorer history is cleared. The history of File Explorer can be clogged, resulting in Windows Explorer behaving incorrectly. Try to clear the history. We have mentioned later how to do this in the solution section.
  • If there is any change to display settings like the font size, the issue can appear. Have you changed the settings recently or allowed an app to change them? Then, remember that reverting is the most effective way to do so.
  • If you use an outdated Windows 10 version, it can cause you the problem. Therefore, you must update the windows. The new update always comes with new bugs, which sometimes irritates you. It can patch up multiple existing problems and security holes. Ensure that you update to the latest release of Windows 10 if you run its older version.
  • File Explorer cannot work properly when your System drive runs out of space. Hence, it is essential to create some space to make windows explorer functional.

Solutions to resolve File Explorer not responding windows 10:

Solution 1. Restart File Explorer in Task Manager:

  • Your first job is tapping Ctrl + Shift + Esc to start the Task Manager.
  • After that, you need to tap on Windows Explorer in Task Manager. Then, you should select the End task.
  • Next, your task is tapping File on the upper left corner. Now, you should select Run new task.
  • Now, you have to input explorer.exe in the box. You should tap on Enter thereafter.

Thus, windows explorer can restart. Finally, check if the file explorer is not responding Windows 10 problem has been fixed or not.

Solution 2. Manually Restart the Explorer.exe Process via Command Prompt:

 According to some people, it is possible to restart file explorer through Command Prompt commands. If you are unable to launch file explorer normally or facing the windows explorer not working issue, restarting the explorer.exe process is possible with some easy commands.

  • You should go to the Windows 10 Cortana box and input cmd in it. Then, you have to tap on the most suitable match to open the Command Prompt window.
  • Next, input taskkill /f /im explorer.exe in the CMD window. Then, you need to tap on Enter. Once you apply the command, you can end the explorer.exe process. Then, a blank screen will appear behind the Command Prompt window.
  • You should type start explorer.exe in Windows for starting the procedure again. Therefore, tap on Enter.

Now, you can see desktop icons, Taskbar, etc.

Solution 3. Run System File Checker Scan:

It is a default tool to scan for corruption in Windows system files and restore corrupted files. Sometimes, your drive’s corrupted files can be behind the problem. Several people say that performing System File Checker scans allows them to fix the problem. You should try the scan to see if the process works.

  • Enter cmd into the Cortana search box of Windows 10. Then, you need to look for the most suitable match and tap on it. Then, you should select Run as Administrator.
  • Now, your task is to input sfc /scannow and tap on Enter.
  • Once the scan completes, try to restart the PC to check if the problem has been fixed.

Solution 4. Clear File Explorer History:

⅘ th of the users encountering the problem said that clearing its history can help you to fix the issue. If you have tried the above fixes and can’t resolve the issue, you must try this.

  • Your first job is to type Control in the Cortana search box of Windows 10. Thereafter, tap on the Control Panel from the Best Match result.
  • Now, your job is to look for File Explorer Options from the interface. Then, you need to tap on it.
  • Next, tap on Clear. After that, you have to tap on OK so that you can clear File Explorer history.
  • Finally, you should again try to open file explorer.

Solution 5. Change Display Settings:

The display setting usually doesn’t have any relation with the file explorer not responding Windows 10 problem. However, it can affect your PC if not configured to the recommended sizes of text, apps, etc. In this it needs to be mentioned that the screen’s unaccepted size & text can crash the file explorer.

  • Your first task is to hit the Windows Start button and select the settings. After that, select System while the interface of Windows settings will appear.
  • If you are on the Display Panel, you should try to change the text size to 100% or reset the size to the Recommended Point.
  • Finally, you need to check to see if File Explorer is accessible.

Solution 6. Extend System Partition If It Is Full:

 You can encounter an error when the system drive doesn’t have sufficient space. Hence, using third-party software is possible to extend the partition. You can use any famous partition manager that can offer better performance than the Windows default Disk Management and using which you are capable of extending partitions, formatting partitions, resizing partitions, checking file systems, converting MBR to GPT without data loss, etc. Additionally, changing cluster size, copying the disk, and converting NTFS to FAT are possible.

Solution 7. Create a New User Account:

 You should create a new user account to deal with the problem. As soon as you create a new account and log into this, you will see the Windows 10 File Explorer working normally. People with one user account on their computers need to follow Microsoft’s instructions that let them generate another new local user account. Now, check if file explorer is working or not.

If you use a new account, it allows you to remove the currently used files in Quick Access. If you fix this issue following this process, you may try to move all data from the old account to your new account. But there exists an issue that you might have to reinstall a few applications for a new account.

Solution 8. Keep Windows 10 updated to the Latest Version:

 Ensure that your Windows is running its latest version. If not, we recommend you upgrade this to the latest version. Microsoft can resolve popular problems like file explorer not responding Windows 10 via updates.

  • Your first task is to tap on the Windows Start menu and select Settings.
  • After that, you need to select Update & Security once you get the Windows setting interface.
  • Tap on Windows Update. Next, you should hit the Check for updates button for installing the latest updates.

Solution 9. Restore Windows 10 to an Earlier Date:

 Is the System Restore feature active on your PC? If so, you have to restore Windows 10 to a previous date when it was offering smooth performance. You must follow these steps to restore your operating system to an earlier date when Windows Explorer usually works.

  • Go to the Cortana search box of Windows 10 and type create a system restore in it. Then, you are required to select the best match for opening System properties.
  • Tap on System Restore in the System Protection section. Disabling the System Restore greys out the System Restore button.
  • At last, your task is to follow the instructions on the screen. Then, you should choose a restore point for the System’s restoration to an earlier date when it works accurately.

The bottom line:

These nine solutions can help you to resolve the file explorer not responding Windows 10 issue. You need to try each method individually to check if the problem is resolved or not.

 Frequently Asked Questions

What do you do when Windows Explorer is not responding?

You can try to clear the history of file explorer to deal with the problem. Hence, your task is to open the Control Panel. After that, your task is to set the view by large icons. Now, tap on File Explorer Options from the interface. Hit the Clear button. Then, tap on OK to clear Windows Explorer history. Finally, you should try to open file explorer again.

How do you fix File Explorer problems in Windows 10?

 These are some methods that you can try to deal with the problem, and these are as follows—

  • Restart File Explorer in Task Manager
  • Manually Restart the Explorer.exe Process via Command Prompt
  • Run System File Checker Scan
  • Clear File Explorer History
  • Change Display Settings
  • Extend System Partition If It Is Full
  • Create a New User Account

What to do when File Explorer stops working?

 If it happens, you need to restart windows expo via Task Manager. Now, your task is to hit Ctrl + Shift + Esc so that you can start Task Manager. Then, you should look for File Explorer in the Task Manager and select End task. Next, you need to tap on File in the upper left corner. Then, your job is to select the option Run new task. Now, you have to type explorer.exe in the box. Restart this immediately by hitting Enter.


read more
AppsDo It YourselfInternetTechnology News

How to Fix Hot, Stuck or Dead Pixels on Your Screen

How to Fix Hot, Stuck or Dead Pixels on Your Screen

Millions of pixels comprise all display devices. The pixels are responsible for changing colors as per the projected image. But it can die or get stuck sometimes, and you will see a dark spot on your display. People wrongfully call a stuck pixel a hot pixel, also. Basically, you can see hot pixels only in digital cameras when any electrical charge leaks into the sensor wells of the camera. If it comes to talk about a dead pixels, all the sub-pixels remain permanently off.

As a result, the pixel looks black. It may happen due to a broken transistor. Are you seeing a colored or white pixel? Then you can fix it. But if you are seeing a black pixel, then the chance of getting fixed is low.

How to Fix Hot, Dead or Stuck Pixels on Your Screen

Let’s see how to fix a dead pixel on your monitor or smartphone.

What are Dead or Stuck Pixels?

A Dead or stuck pixel refers to a fixed spot on display. These are pretty harmless and not permanent. Compatibility problems with software apps, technical errors, or manufacturing defects can cause the problem. Generally, a stuck pixel is green, red, or blue. On the other hand, a dead pixel is black.

How are dead/stuck pixels an issue for the users?

Sometimes stuck or dead pixels remain in a corner, and we think they won’t grab our attention, but it does. Therefore, they can irritate you and take away your focus. In addition, these can point to a more serious issue like monitor failure.

What causes dead pixels?

A manufacturing defect is the most common problem. In addition, any physical damage to the display device may damage your laptop’s one or more pixels.

Will dead pixels go away or spread?

These don’t usually spread. If these do spread, you should replace the screen. Otherwise, you can hire a specialist. You can see the portions permanently malfunctioned, resulting in these not going away with time.

How to Test New Screens for Stuck or Dead Pixels

Testing a new monitor for a bad pixel is essential, and it could be done by running your screen through a palette of basic colors. Moreover, you need to run the screen black & white in full-screen mode with the help of the EIZO Monitor Test.

  1. EIZO Monitor Test:

With the help of this online tool, you can find stuck pixels and eventually fix them. It includes a wide range of options and makes all of these available in a single test window. However, as soon as you learn a basic idea about this, you can use it easily.

If you are willing to test the screen, you should check all those boxes which you need to include in your test. It is recommended to go with the default setting, where you need to check all boxes. When you test many monitors, opening the test is possible on an extra monitor. Once you are ready, you should tap on Start test so that you can launch the full-screen test window.

Now, you can see the first test pattern. Every display has an explainer in the bottom right detailing what you need to find. After that, a menu will be available, allowing you to move from one test to the next on the left. After moving through the black & white screens and solid colors like green, blue, and red, you need to check the screen. If you want to exit, you should hit the ESC key. Otherwise, you can tap on the exit symbol in the top right corner. If you find a bad pixel, it is recommended to use UDPixel or JScreenFix to flash it.

  1. Online Monitor Test:

Performing the thorough test not only helps you to identify bad pixels but also lets you test your monitor quality. Most browsers don’t support Flash. However, you can make it a try and use it with the executable version to make this functional.

Selecting between three different modes is possible to test the screen. Once you run the executable, you can see the screen differently.

Your task is to take the mouse to the test window’s top portion. Then, you can see a menu appearing. After that, you can see an info window which you can turn off with a button in the menu’s top right corner. Now, you should tap on the Homogenuity test point. Then, you must move through the three colors and black & white.

How to Fix Dead or Stuck Pixels:

It is not possible to fix a dead pixel. However, if you want to fix a stuck pixel, you can try this process mentioned below-

  • Your first task is to detect dead or stuck pixels and to do so, you need to see your monitor in different color palettes.
  • After that, to fix that pixel, you should use a third-party tool that flashes the pixel with many colors. Using UDPixel (Windows) or LCD (online) is recommended.
  • Finally, you should try a manual process where you must use a damp cloth to rub the stuck pixel, or you can use a pointy. In this case, make sure that you are using a soft item, like the rubber/eraser at the pencil’s end.

Tools that you can use to Fix Hot, Dead or Stuck Pixels on Your Screen:

  • JScreenFix
  • Pixel Doctor Pro
  • Aurelitec PixelHealer
  • Rizonesoft Pixel Repair
  • Dead pixel
  • Filehorse Pixel Repair

What to Do If You Can’t Fix Your Stuck or Dead Pixel?

If you make all the attempts to remove the bad pixel and nothing works, you should make peace with it. An ugly pixel will not break the screen, and soon you will forget about this matter. But when the defect affects more than one pixel, you should replace your monitor. You should check the warranty. Sometimes, the marketplace from where you bought the product covers dead pixels.

The Bottom Line:

If you want to detect any stuck pixel, you can take help from a few online monitoring tests or third-party apps & tools. You can see some ways mentioned in this article, along with some effective tools that you can try. If the tools don’t work, you should follow the manual guide. But when nothing works, you may need to take your device to a hardware engineer.

Frequently Asked Questions:

Do stuck pixels go away?

No. However, these pixels are temporary. You may need to attempt a few effective ways to remove them.

Can all stuck pixels be fixed?

These pixels are seen in colors except black or white. A few methods can help you to fix the problem. But if the pixel is dead, you can’t fix this. However, if you fix a stuck pixel somehow, you should know that the fix is not guaranteed.

Can hot pixels be fixed?

You should apply pressure on the screen where you have seen the stuck pixel. Ensure that you don’t apply pressure anywhere else because it can increase the production of more stuck pixels. When you apply pressure, you should power on the PC and screen. Then, you need to remove the pressure. We hope that then you will not get to see the stuck pixel anymore.

read more
Do It YourselfInternetSoftwareTechnology News

How to Enable TPM 2.0?

How to Enable TPM 2.0

Several users who have downloaded Microsoft’s PC Health Check app encountered the “The PC can’t run Windows 10” error message. This app is available on the new Windows page after the new OS version was announced. It happens especially when TPM 2.0 is not enabled in the BIOS.

Remember that the TPM 2.0 chip, which can be found on the PC’s motherboard, is necessary to run Windows 11. It is a security chip used to handle the task of encryption for your fingerprint, other biometric data, and other things like Windows BitLocker. In most computers, it is already enabled, and people can find this in most modern systems which they bought in the last few years.

After the launch of windows 11, TPM 2.0 has become a key feature. It was present in computers for a long time but gets important when Microsoft says that it must be in the PCs to install Windows 11. Modern motherboards usually come with TPM, but it remains disabled sometimes. Don’t you know how to enable tpm 2.0 in Windows?  Then, just go through this article.

What is a TPM?

It is a security technology that can improve the pc security against software vulnerabilities.

Why will you Enable TPM 2.0 of Motherboard in Windows?

Usually, people enable it so that their PC can support the Windows 11 upgrade. TPM stands for Trusted Platform Module, indicating a small chip installed on the motherboard to offer an additional security layer to the PC when it’s booting up. If someone has hacked your pc or broken th security, this module prevents the PC from booting. Firefox, Outlook, Chrome, Thunderbird, and many apps use this feature to handle the encryption. If you turn on this feature, you can get several advantages. Thus, you can make your PC suitable if you want to install Windows 11 OS.

How to Enable TPM 2.0 and Secure Boot to pass PC Health Check:

You must enable Secure Boot in the mobo BIOS for a PC health check. Ensure that you use a TPM 2.0 chip. Let’s know how to enable tpm 2.0 on your PC.

Check for TPM using the Windows Security App:

You need to confirm that you have a TPM 2.0 chip on the computer. It is possible to do this manually via the Windows 10 settings. It informs you if it is possible to continue with the Windows 11 install method.

Step 1: Your first job is to open Windows 10 settings by tapping on Windows Key and I on the keyboard. After that, head toward Update and Security.

Step 2: Go to the Update and Security section to tap on Windows Security, followed by Device Security and Security Processor Details. If a Security Processor section does not appear on display, there is a chance that your TPM 2.0 chip is disabled or unavailable. A spec lower than 2.0 does not allow your device to run Windows 11.

How to Enable TPM 2.0 in BIOS:

When you are willing to check the status of the current rig, you should move to the BIOS. Although BIOSs are made differently, these may have a few similar features. AMD and Intel have different terminology.

Intel = PTT

AMD = FTPM

STEP 1) Enter the BIOS:

If you use the system’s BIOS regularly, it can be a trial which takes about keypress timing. Hence, you should restart the operating system. Whether you don’t know which key you need to hit to access the BIOS, it starts flashing up on display for some seconds. The rule says that you should hit the DEL or F2 key.

Hit the key a few times as the display appears. If you get successful, it will direct you to the PC’s BIOS screen.

STEP 2) Switch Your BIOS into ADVANCED Mode:

People usually boot into an EASY mode in most bios because it is the place where it causes serious problems. You can head toward ADVANCED Mode. Then, tap on any button to switch the mode. In this case, you should try to hit F2.

STEP 3) Inside the MISCELLANEOUS Option, Enable TPM 2.0:

For an Intel board, you should find the PTT option. It indicates Intel Platform Trust Technology or Intel’s TPM. But for AMD, it is different. You may find it disabled. Hence, you should tap on this to turn it on from the drop-down option.

SAVE & EXIT your BIOS. After that, reboot this. Alternatively, you can hit F10.

Enable Secure Boot:

You should ensure that you keep Secure Boot enabled, like enabling TPM 2.0. Otherwise, it will not be possible to complete the installation of Windows 11.

STEP 1) Enter the Bios:

Once you restart, your job is to start again. After that, you should use the same process to enter the bios – usually F2 or DELETE.

STEP 2) Select Advanced Mode:

After booting into an EASY mode in most bios, you can head toward ADVANCED Mode. Tap on something to switch the mode again. Try to tap on F2 in this case.

STEP 3) Select Boot Options in Bios:

You can see the option on an AMD motherboard under Security instead of Boot Options. For the Intel board, it is available in the right place where you need to go.

STEP 4) Choose Secure Boot from the options:

Head toward the Secure Boot tab and choose it.

STEP 5) Enable Secure Boot:

Tap on Secure Boot. Then, you should change this to Enabled from Disabled. After that, you should press F10 or choose Save & Exit. Finally, you should reboot your computer. It is possible now to pass the PC Health Check.

How to Enable TPM / TPM 2.0 in Windows 11, 10, 8, 7?

Before enabling TPM 2.0 on your motherboard, ensure that it is in disable mode. Hence, you should follow the steps to check the status of TPM on the PC.

  • Your first task is to hit the ‘Win’ + ‘R’ keys on your keyboard so that you can open the Run dialog box. Next, you should type ‘tpm.msc’ and hit the ‘OK’ button.
  • If you view ‘Compatible TPM cannot be found’ in the Trusted Platform Protocol Management window, ensure that the feature remains disabled on the motherboard. Therefore, you should enable it.

Enabling the feature of a Gigabyte motherboard has two main options: AMD motherboards and Intel motherboards. Usually, for both cases, you need to follow about the same steps.

Method 1) Enable TPM for AMD Motherboard:

You should follow the steps to enable it.

  • Your first job is rebooting the PC. After that, you must put the BIOS of the Gigabyte motherboard. Now, you need to hit the ‘F2’, ‘F12’, ‘Delete,’ or any button you want to tap to enter the BIOS.
  • As soon as you enter the BIOS, you will hit the ‘Peripherals’ or ‘Settings’ tab.
  • You need to find the ‘AMD CPU fTPM’ option inside the Peripherals or Settings. You can see ‘Disabled’ in front of this. After that, you should tap on the option.
  • Next, select the ‘Enabled’ option in the pop-up box.
  • After that, the option ‘Enabled’ can be seen in front of the AMD CPU fTPM option.
  • You should hit the ‘Save & Exit’ tab.
  • Your job is to tap on the ‘Save & Exit Setup’ option.
  • Confirm what you’ve selected by tapping on the ‘Yes’ option. Then, you should try restarting the PC.

We have discussed how to enable tpm 2.0 Gigabyte AMD motherboard in Windows. Now, let’s dig into method two.

Method 2) Enable PTT for Intel:

If you have Intel motherboards, you can see the mention of the TPM feature as PTT or Intel Platform Trust Technology. You should go through the steps for enabling the PTT of this motherboard.

  • You should restart the PC first. Then, you need to hit the ‘F2’, ‘Delete,’ ‘F12’, or other buttons to enter the motherboard’s bios. Then, enter the BIOS.
  • After that, you should hit the ‘Peripherals’ or ‘Settings’ tab in the BIOS.
  • Then, your job is to find the ‘Intel Platform Trust Technology (PTT)’ option in Peripherals or Settings. Then, ‘Disabled’ can be seen in the front. Once you see it, tap on the option.
  • Next, you should select ‘Enabled’ in the pop-up window.
  • After that, the option ‘Enabled’ is available in front of the Intel Platform Trust Technology (PTT) option. In this case, your job is to hit the ‘F10’ key on the keyboard.
  • Hit the ‘Yes’ button if you are willing to save the settings. Then, you should restart the PC.

Following the above mentioned steps, it is possible to enable the PTT of the motherboard in Windows.

Method 3) Verify TPM is Enabled:

You should undergo the process to confirm that the feature is activated in Windows. These are the steps you must follow to perform the procedure.

  • You should first open the Run dialog box by hitting the ‘Win’ + ‘R’ keys on the keyboard. Then, you should hit the ‘OK’ button after typing ‘tpm.msc’ in the dialog box.
  • Go to the Trusted Platform Protocol Management window. Then, suppose you view under ‘Status’ that ‘The TPM is ready for use’ & under ‘TPM Manufacturer Information’ that ‘2.0’ is the Specification Version. It indicates that the PC is ready to run the operating system.
  • Finally, you can say that the PC can support Windows 11 upgrades.

How to enable TPM on Dell?

If you are willing to enable the feature on the PC in bios, these are the steps you should follow.

  • First, your task is to restart the PC.
  • Once you see the Dell logo, you need to hit F2.
  • After entering the BIOS, you should indicate the section corresponding to the brand of the PC for more instructions.

In this regard, you should know that you might need to head toward BIOS using a mouse, but it relies on the PC model. If not, use the up or down and left or right arrow keys to go here & there. You need to choose options by using the Enter key.

The menu options can be different because it is based on the pc model.

Latitude, OptiPlex, Precision, Vostro, and select XPS:

  • Your job is to expand this Security section.
  • Then, you need to choose TPM 2.0 Security.
  • Choose TPM On.
  • After that, you have to choose Apply.
  • Finally, you should choose Exit.

Alienware:

  • First, your task is to choose Security.
  • Then, you must set the Firmware TPM to enabled.
  • Next, you should choose Exit.
  • Now, choose Save Changes.

OR

  • Your job is choosing Security.
  • Enable the Firmware TPM.
  • Now, save this by hitting F10 and Exit.

Inspiron:

Step 1: You should choose Security.

Step 2: Switch On the toggle located below Intel Platform Trust Technology.

If your PC has the Aptio Setup Utility, you should go through these steps. Head toward the upper right corner to check if the pc uses this. You should first choose Firmware TPM. Then, your task is to choose Enabled. It is essential to use the up or down arrows and then hit the Enter key.

Step 3: You must choose Apply Changes. If your PC has the Aptio Setup Utility, follow these steps.

  • First, you need to hit the F10 key.
  • Next, you should save by choosing Yes and exit. Hit the Enter key.

Step 4: Now, you need to choose the Exit option .

You can see the PC restarting to the Windows desktop.

Conclusion:

In this article, we have elaborated on how to enable TPM 2.0 easily. After following the methods, you should not face any issues. Try the solutions to enable the feature.

Frequently Asked Questions

  1. How do I enable TPM 2.0 in Win10?

Hence, your job is to head toward the System Utilities display and choose System Configuration. Then, go to BIOS/Platform Configuration (RBSU), then to Server Security and Trusted Platform Module options. You should check if the “Current TPM Type” keeps the feature turned on.

  1. How do you enable TPM 2.0 ASrock BIOS?

These are the steps you should follow to learn how to enable tpm 2.0 asrock bios.

  • Your job is to continuously hit ‘Del’ or ‘F2’ on the PC startup to enter bios.
  • After that, you should go to the ‘Advance’ Tab and tap on “CPU Configuration.”
  • Now, your task is to tap on the option “Security.”
  • Next, you should tap on the “Intel Platform Trust Technology” option.
  • Set this to the ‘Enable’ option.
  • Head toward the Exit tab. Now, you should choose “Save changes and exit.”
  1. How do you enable TPM 2.0 in Intel BIOS Asus?

Steps that you need to follow to learn how to enable tpm 2.0 in Bios Asus are:-

  • You should hit “Del” to enter bios once you see the ASUS or ROG logo.
  • After that, you should navigate to the Advanced\AMD fTPM configuration page. Then, you need to switch the “TPM Device Selection” option to “Firmware TPM.”
  • Finally, you need to save the changes by hitting F10 and after that you need to reboot the PC.


read more
1 2 3 4 15
Page 2 of 15