


Recently, we have been experiencing filename extensions that leave us scratching our heads. For example, files like HEIC, XAPK, and standard FLAC files can turn up; therefore, you might not know what to do with them. A perfect example of this is the ASPX file, where you might not know what an ASPX file is used for. But it can irritate you as Windows does not know what to do with them by default. So Microsoft made the file format. However, it is possible to open the .aspx files.
But it isn’t necessary to do this if you work in IT on web servers or web development. You should know that .pdf, .jpg, and other file types can sometimes appear as them. Let’s dive into the article to learn what is a .aspx file and how do I open it.
What is an ASPX file?
ASPX, Active Server Pages, is a file format that web servers use. It is created using Microsoft ASP.NET, an open-source development framework. Web developers use it to make dynamic web pages using the .NET and C# programming languages.
It iterates on the ASP, a technology that precedes it. But it never uses Microsoft’s .NET language. Rather than that, you can find the File written in other frameworks. For example, it is known as a .NET Web Form. Besides, it is possible to determine if a web page is written in ASPX while a ‘.aspx’ suffix is applied to the URL.
These files can contain different scripts or other open-source files browsers receive from web servers. In addition, these are web service components that can offer dynamic elements on a page. If you are an end user, you cannot see or interact with these file types during the online experience. But when they do it, you can experience an error with the web service’s configuration. Let’s know more details about what is an aspx file extension.
More Information:
These pages are known as “.NET Web forms.” It is possible to recognize these pages in a web browser using the URL in the address field ending in .aspx.
Microsoft developed and released it in 2002 to succeed Active Server Pages (ASP). Web developers use this web app framework to create dynamic sites and apps.
Common ASPX File Names:
Default.aspx is a default webpage. It is loaded if a client browser requests a web server directory on a Microsoft IIS-based server. In this case, the server, which is Microsoft IIS-based, must use ASP.NET.
For instance, if a client requests HTTP://www.sampledomain.com/, the server will load the following URL HTTP://www.sampledomain.com/Default.aspx unless you configure it to load another one.
How Do You Convert .ASPX to HTML?
The HTML ones are static. Therefore, if you convert this type to HTML, you might lose all the dynamic elements of the page. If you are willing to convert it, load the page in your browser and tap on it. After that, you should tap on the View Page Source and save that to the local HDD. You may try to load this. It will appear on your page, but nothing will work.
Programs to Open ASPX File on Different Devices:
Programs depend on which type of device you use. Therefore, we have given names of the supported programs for different devices.
Windows:
- File Viewer Plus
- Microsoft Visual Studio 2019
- ES-Computing EditPlus
- Adobe Dreamweaver 2020
- Any Web browser
Mac:
- Adobe Dreamweaver 2020
- Any Web browser
Linux:
- Any Web browser
Android:
- File Viewer for Android
.ASPX File Format:
ASP.NET web forms depend on the event-driven model to interact with the web app. In this case, the browser submits a web form to the server as an end user. In return, the server returns a full markup page or HTML page. Besides, the ASP.NET component model can provide an object model for these pages. The model describes:
Thre are server side counterparts of all HTML elements or tags, like <form> and <input>.
Server controls are used to develop the most challenging user interface, like the Calendar or the Gridview control. These use the ASP.NET Code Behind model to create pages.
In-Line Code:
It is a sample code that can offer all the functionality for user implementation. This code displays a sample ASP.NET page with inline code:
<%@ Language=C# %>
<HTML>
<script runat=”server” language=”C#”>
void MyButton_OnClick(Object sender, EventArgs e)
{
MyLabel.Text = MyTextbox.Text.ToString();
}
</script>
<body>
<form id=”MyForm” runat=”server”>
<asp:textbox id=”MyTextbox” text=”Hello World” runat=”server”></asp:textbox>
<asp:button id=”MyButton” text=”Echo Input” OnClick=”MyButton_OnClick” runat=”server”></asp:button>
<asp:label id=”MyLabel” runat=”server”></asp:label>
</form>
</body>
</HTML>
Code-Behind:
You can write the code and store it in separate class files for clean separation of HTML from presentation logic. As a result, the presentation layer becomes independent of the executable code. It is the code-behind for presentation purposes.
<%@ Language=”C#” Inherits=”MyStuff.MyClass” %>
<HTML>
<body>
<form id=”MyForm” runat=”server”>
<asp:textbox id=”MyTextBox” text=”Hello World” runat=”server”></asp:textbox>
<asp:button id=”MyButton” text=”Echo Input” Onclick=”MyButton_Click” runat=”server”></asp:button>
<asp:label id=”MyLabel” runat=”server” />
</form>
</body>
</HTML>
The genuine logic’s C# implementation for the presentation layer is as follows:
using System;
using System.Web;
using System.Web.UI;
using System.Web.UI.WebControls;
namespace MyStuff
{
public class MyClass: Page
{
protected System.Web.UI.WebControls.Label MyLabel;
protected System.Web.UI.WebControls.Button MyButton;
protected System.Web.UI.WebControls.TextBox MyTextBox;
public void MyButton_Click(Object sender, EventArgs e)
{
MyLabel.Text = MyTextBox.Text.ToString();
}
}
}
How do you open an ASPX file as a PDF?
If you want to open it as a PDF, you should first open it with the standard app on the computer. Next, navigate to File and then Print. You should, after that, choose “Microsoft XPS Document Writer” as your printer. After that, tap on “OK” or “Print.” Now, you should select a destination for the XPS file and tap on the “Save” option.
How to open an ASPX file:
While downloading any file from the internet to your system, you will see the download in a .aspx format though you were expecting other formats like PDF. In this case, renaming this can work for you. Besides, you may change the type to the one you expect to have, like .pdf.
If the File you want to open is in the correct format, several options are available. Microsoft initially wanted it to be available in its open-source integrated developer environment (IDE) Visual Studio Code. However, there are other programs, both free and paid. So, you may use an alternate.
Open ASPX files with Notepad++:
It is a free source code editor. As it is compatible with many languages, it becomes a perfect replacement for Notepad. This editor can support even CGI format. While the code is in C++ programming language, it depends on the editing component Scintilla. In addition, it can provide a higher execution speed and smaller program size for using Win32 API and STL.
Rename the ASPX File:
If you find your Windows unable to open this, try to rename it. Renaming it to PDF allows you to open and view it. Here are the steps you should follow to rename it.
Before renaming this, set up the PC to see the file extensions. Then, go through these steps to do so.
- First, your job is to tap on the “Windows” + “R” key on the keyboard to bring up the Run box.
- After that, write “control folder” in the text field.
- Hit the “OK” button or tap on the “Enter” key on the keyboard to bring a “File Explorer Options” window.
- Move to the “View” tab.
- Next, tap on the “Uncheck” where the box asks, “Hide extensions for known file types.”
- Then, hit the “Apply” button.
- Now, hit the “OK” button.
- Thus, it is possible to view the file extension on the PC.
Let’s know how to rename it to PDF:
- First, find the .aspx File on the pc and tap on it.
- After that, select the “Rename” option from the context menu.
- Next, change the file extension to PDF.
- Now, the prompt appears to confirm your action, and tap on “Yes.”
- It helps you to change this to PDF. Then, it is finally possible to see and read the PDF. But renaming it can make your content corrupted. Besides, you might not see the content in PDF format.
Open ASPX File with Adobe Reader:
Using Adobe Reader to open it is a simple way to see it. In this case, ensure that you have successfully installed the software on your laptop or computer. Then, follow these steps to learn how to open it.
- Tap on the “Start” menu on the pc.
- After that, you should tap the “View by” option on the window top.
- Next, you should select “Small icons” and tap on “Default Programs.”
- Then, you should tap “Associate a file type or protocol with a program” and find the “.aspx” protocol.
- Now, your job is to tap on “Change program” and select “More apps.”
- Head toward the “Adobe Reader” program.
- Finally, you should hit the “OK” button to switch the program.
Thus, once you implement the steps, you can set this with Adobe Reader to see it. This software is also compatible with other formats.
Convert the .aspx into PDF File:
You can use browsers, including Google Chrome, Firefox, etc., to see and open it on your PC because it is an Internet media-type document. If you can use the web browser to see the File, go through these steps.
- Tap on the one which is in the extension format.
- After that, tap on Open within the menu bar.
- Choose Google Chrome below the Open with context menu.
- Next, you should tap on Google Chrome.
- Now it becomes easier to open it locally in the browser. Select other browsers such as Microsoft Edge, and Firefox, if you want.
- Finally, you can view it in any web browser supported by Windows 10. However, if you wish to see it on the computer, it is essential to convert it into pdf format. After that, you can see the contents of it.
What if Google Chrome is not available?
- If this web browser is unavailable in the menu option, tap on the “Choose another app” option.
- After that, you should browse it under the “Program” file.
- Choose the “Google Chrome” folder. Thus, you can select the app to see this type.
How to open the .aspx File if you use windows 7?
If you use Windows 7 and are willing to know how to open it, go through these steps.
- First, look for it on Windows 7.
- Then, you should tap twice on it. Hence, an error pops up asking, “Windows can’t open this file.”
- Afterward, you should choose the “Select a program from a list of installed programs” option.
- Hit the “OK” button.
- Then, browse to select “Google Chrome” from the list.
If you are willing to convert it to pdf, these are the steps you should follow.
- Open it in Chrome. Then, tap on the Ctrl + P key to open the Print page pop-up window.
- Navigate to the Destination drop-down and choose the “Save as PDF” option.
- Once you select the Save as PDF option, hit the Save button marked in blue color. Thus, you can convert it into a pdf.
- You will see this converted into a pdf as soon as you perform these steps.
- Thus, it is possible to open this on the computer and see its content.
Use online converters:
You can use the online converters’ help to convert these to pdf. The process may take some time, but you can download a PDF. These are a few online converters.
If you want to convert it into a pdf with online converters, try to upload it first. Then, hit the Convert to PDF button. In this case, its size is a dependable factor. Based on that, it will be converted into a PDF. Next, a download button appears. Tap on it. Now, you can see the downloaded PDF that you can open on Windows 10.
Other .ASPX files:
Suppose you see a URL ending with .aspx in a browser bar. It indicates that the page is run as part of an ASP.NET framework. Besides, you can not open it yourself because the browser has to do it automatically. The web server running ASP.NET usually processes the code inside the File. Instead, use Microsoft’s free Visual Studio to open and edit. It is possible to open it up with the help of a normal text editor.
Still Can’t Open It?
Ensure you must not confuse other names with the names of the .aspx file extensions. For instance, ASX files appear to have connections to them. However, they might be Alpha Five Library Temporary Index files supporting the context of the Alpha Anywhere platform. The same occurs for ASCX also.
Conclusion:
You cannot open these on Windows PC. But the given tricks allow you to open and read them. You can open it using Google Chrome and save it as a PDF. This one is the most effective way to open it. You can open this even in the future. It is all you can learn from this article what an aspx file pdf is.
Frequently Asked Question:
- How do you open ASPX files on Android?
Open it first, as usual, and head toward File. Then, go to “Print” and select print as a PDF.
- How do you open an ASPX file on a Mac?
Microsoft comes with a Mac version of its Visual Studio software to open it on Mac. You only need to download Visual Studio and install it on the company’s website.
- How do you create an ASPX file using inline code instead of code behind?
You should create a new web page using inline code in Visual Studio. Ensure that the Place code remains unchecked.


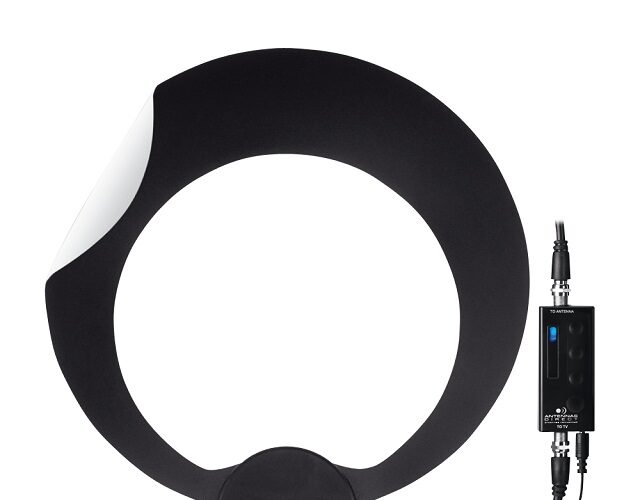
 Description: It is one of the most user-friendly options and probably the best indoor TV antenna available. The model is the perfect option if you don’t prefer to waste time or energy. Besides, the product allows you to skip right to browsing your free channels ASAP. All credits go to the setup app and Bluetooth pairing. Therefore, you can use the model if you are a new beginner.
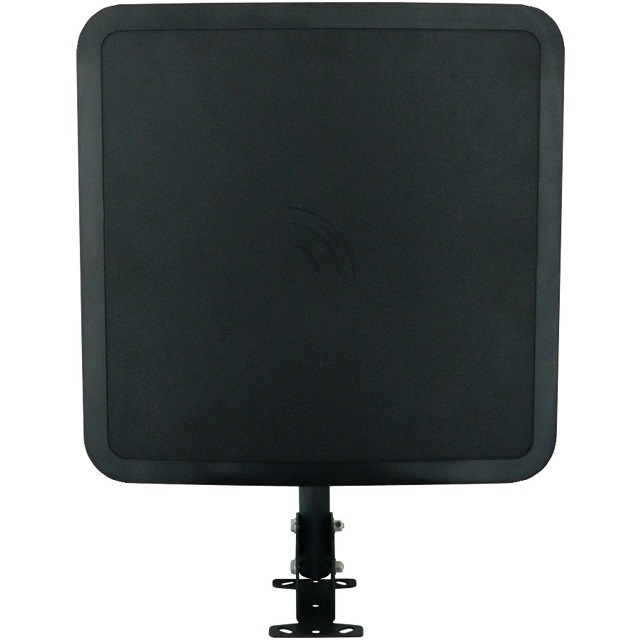
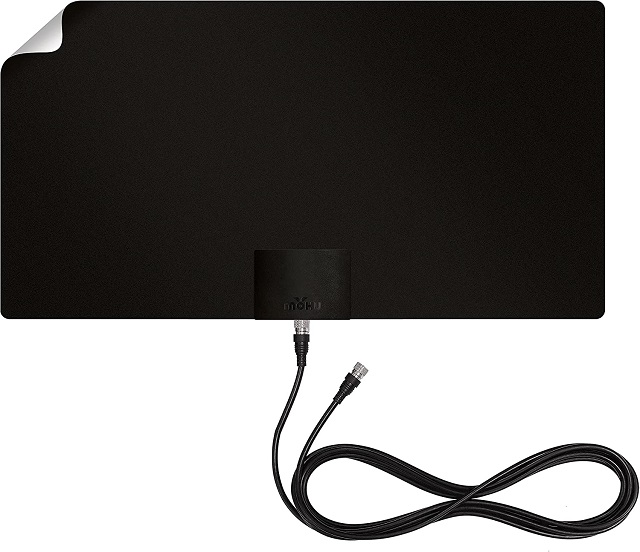 Description: The model is ideal for apartments, living rooms, dorms, and other spots. Its 65-mile range can let you know how efficient it is. In addition, the UHF/Hi-VHF multi-directional product comes in a broader range. Besides, it is entirely ready for 4K signals. Moreover, you can get a compact amplifier improving signal strength. Whether you are willing to ensure signal quality is an ideal choice.
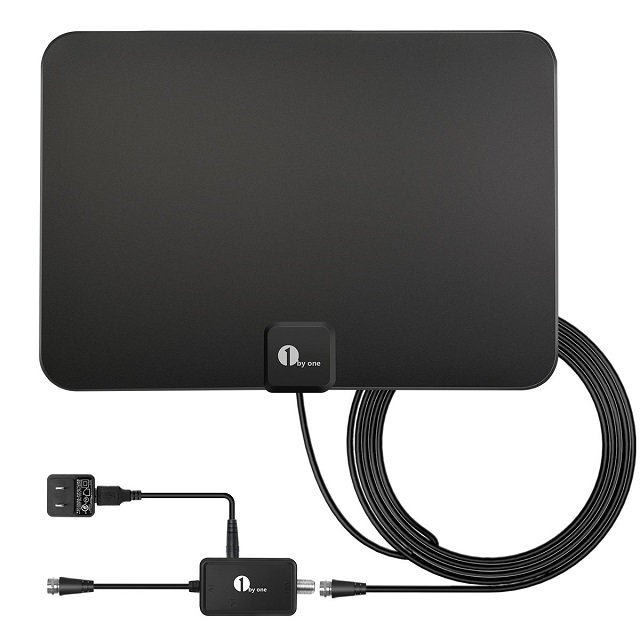 Description: The model comes with a vast 200-mile range. Therefore, you can pick up signals from multiple towers as much as possible. It is a perfect option if you live in small towns or rural areas. The model is an excellent adorable option and has an extra-long 17-foot cable. But it has a drawback: the product is bulkier than most dual fold-out sections.
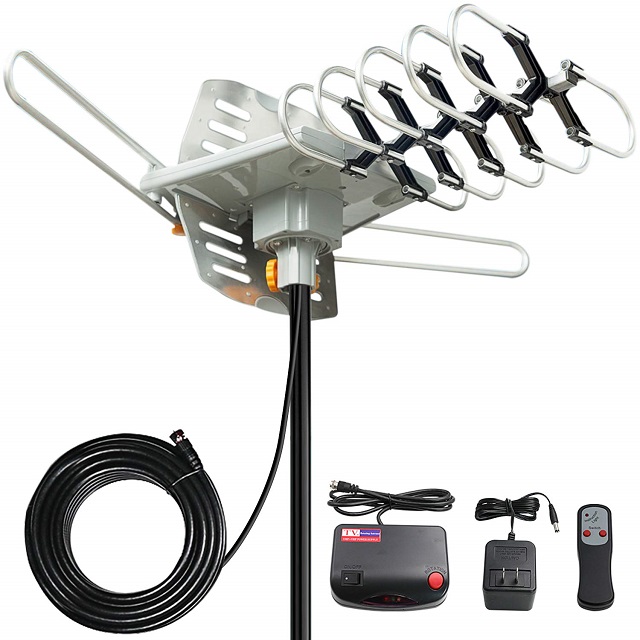
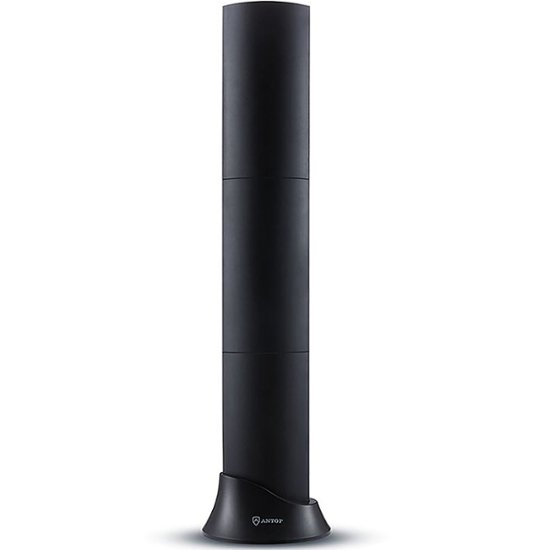 Description: The product is an excellent option if you don’t want to attach anything to the wall or window but want an excellent range. You can set it horizontally or vertically, and the model is stylish. Therefore, you can use it with other objects near your television. So, there is no need to hide anything. Its 80-mile range is impressive. If you want to have more channels, choose this one.
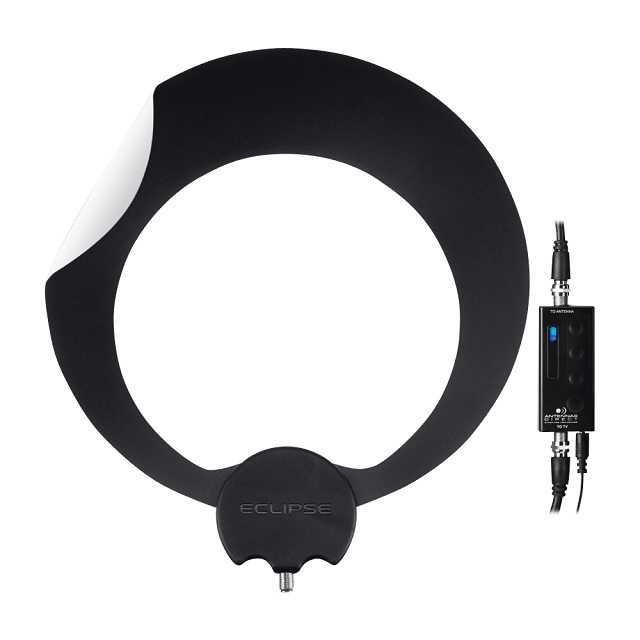 Description: It provides a smaller range at 35 miles and is mainly for people in more urban areas. Besides, a ClearStream Eclipse is a simple circle that you can stick on any nearby surface. Thus, it becomes useful for television setups with insufficient space. The model allows you to paint to match your wall or nearby décor. It includes a 12-foot coaxial cable offering multiple options to place the product away from your television.
 Description:
 Description:
 Description:
 Description:
 Description:
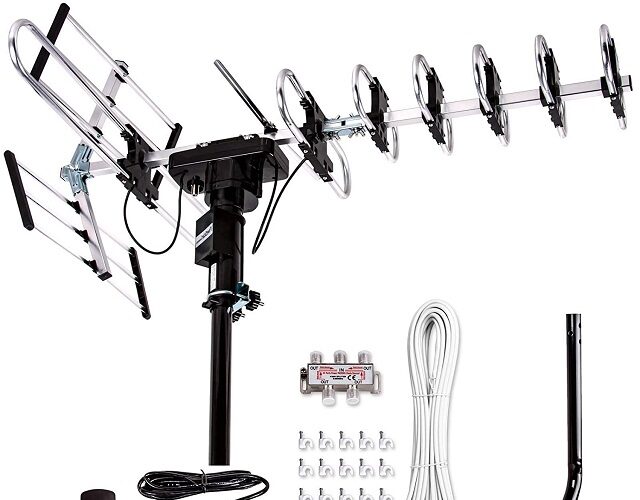
 Description:
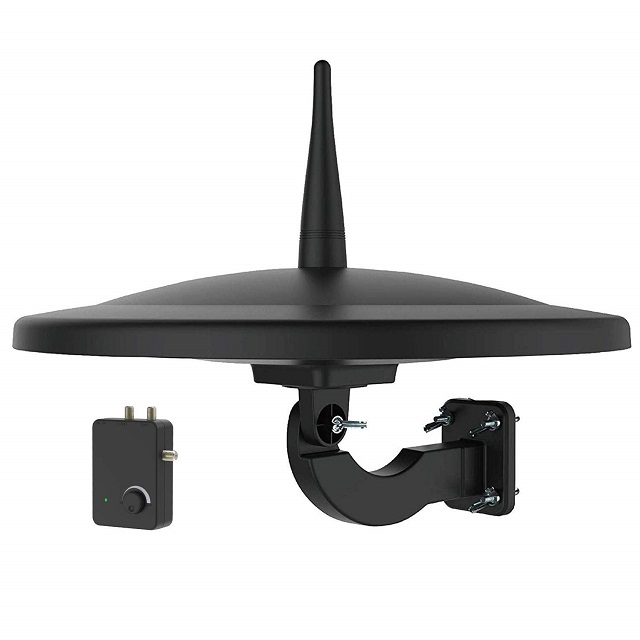 Description:
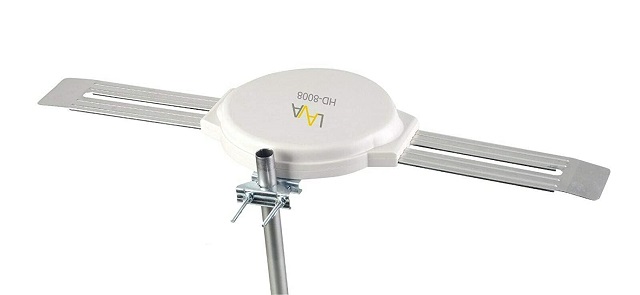 Description:
 Description: This model is a decent option for people willing to use a top-quality product. It is one of the models that enable you to install easily in your home. Besides, the product can offer a maximum range of up to 150 miles.
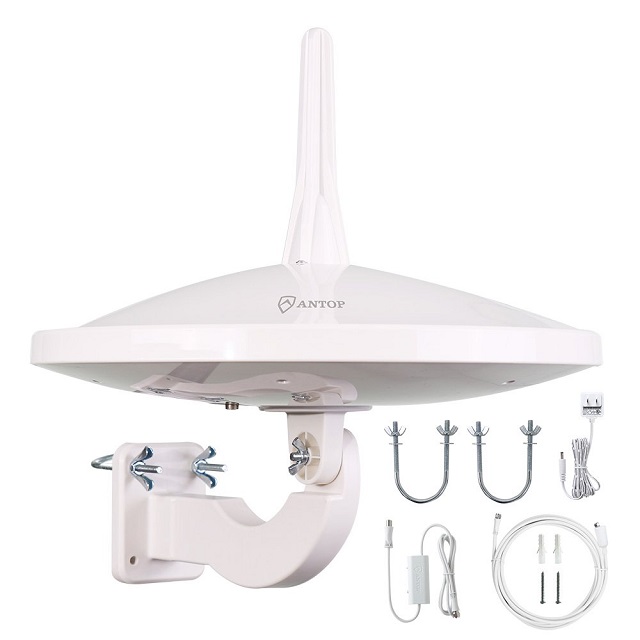 Description:
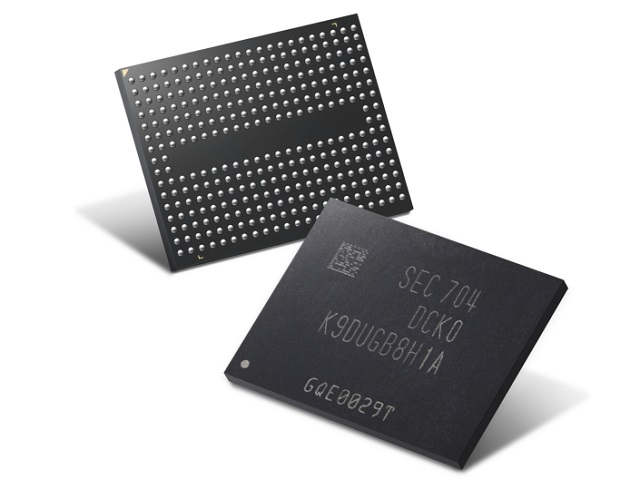
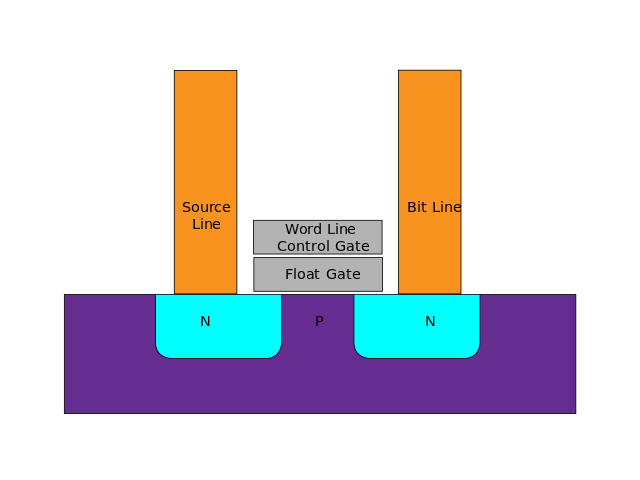 It comes with inbuilt solid-state chips. In addition, each chip has an array of flash memory cells.
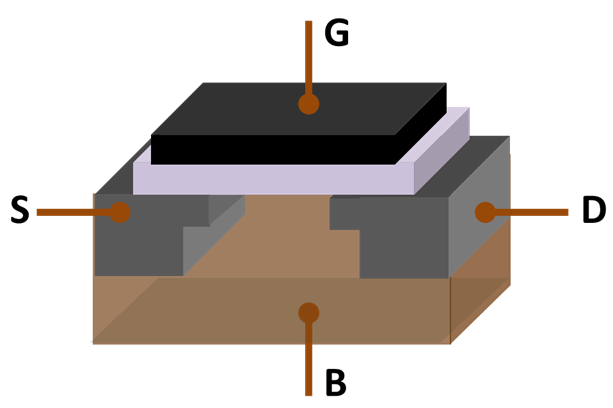 In flash memory, each cell resembles MOSFET (metal-oxide-semiconductor field-effect transistor). However, it varies with the MOSFET transistor gate. MOSFET has only one gate, whereas the other has two gates. Each cell works as an electrical switch in which current flows between source and drain. Further, it is controlled by a floating gate and a control gate. The control gate functions similar to the gate in the MOS transistor. But below the control gate, a floating gate is placed. The floating gate is insulated entirely using an oxide layer. The floating gate is placed between the control gate and the MOSFET channel.
 Each cell in the NOR Flash’s one end is directly grounded, and the other end is connected directly to the bit line. This arrangement behaves as the NOR gate. While one of the word lines connected to the control gate is brought high, the relative storage transistor will pull the output bit line low. For embedded applications that require distinct non-volatile memory, the NOR Flash suits best. Their low read latencies allow both direct code execution and data storage in single memory products.
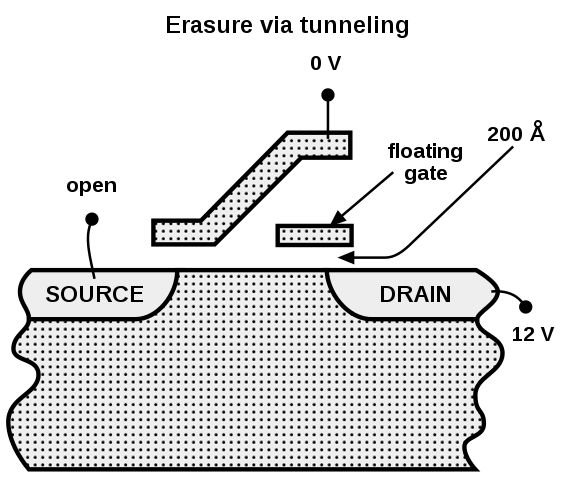 A high reverse polarity voltage is applied between the control gate and source terminal to erase the NOR-Flash cell and pulls the electrons off the floating gate through quantum tunneling. The latest model NOR chips are divided into multiple erase segments called blocks or sectors. The erasing operation can be done block-wise. Moreover, all the cells in the erase segment will be erased altogether. The Programming of NOR cells is done one word or byte at a time.
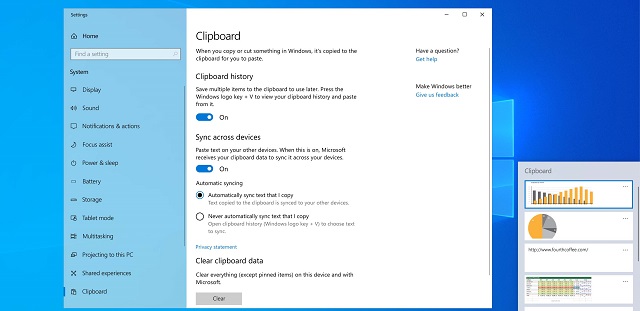 How to Enable the Clipboard App:
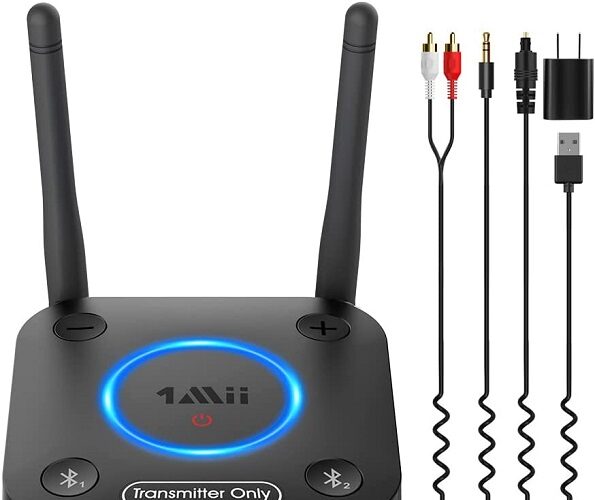
 Description: The product is aptX Low Latency certified. You can get the ultimate “no lip-sync delay” experience while using the device with a speaker or headphone supporting aptX Low Latency or FastStream. Thus, it makes you sure that you will get perfectly synced visual audio for every content you will watch on display.
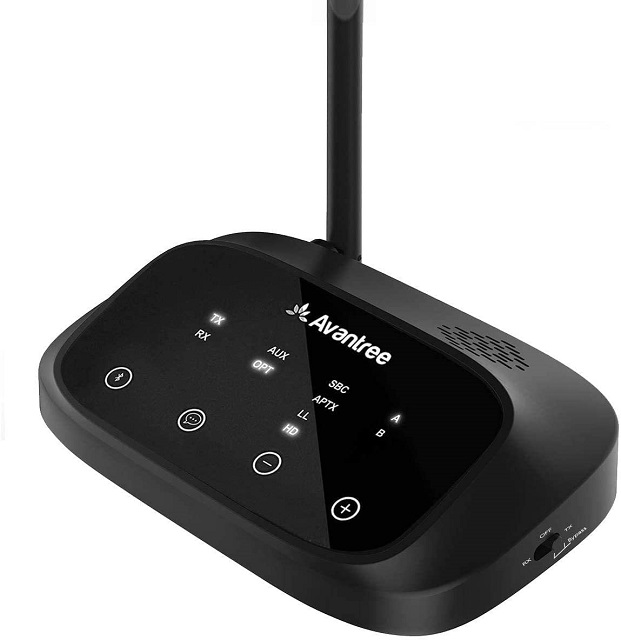
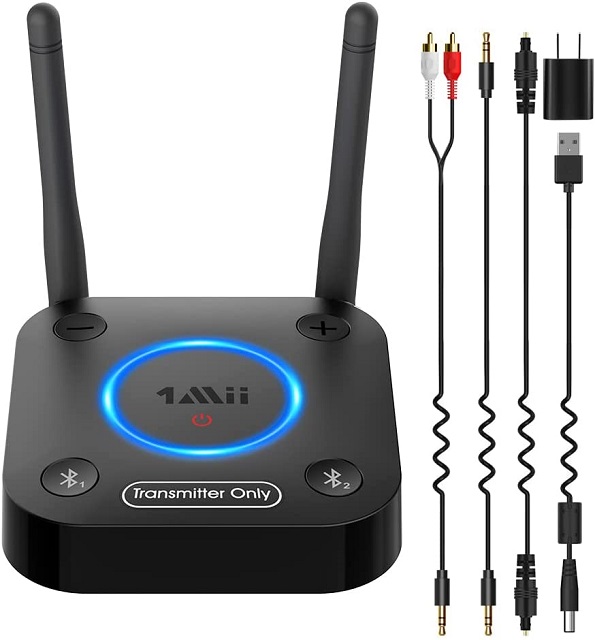 Description: The product comes with the recent Bluetooth 5.0 (CSR8675) version. Besides, it is compatible with Qualcomm aptX HD, aptX Low Latency, aptX, and AAC decoding. If you find the device supporting both codecs, you can switch them to alternate between HD and low latency.
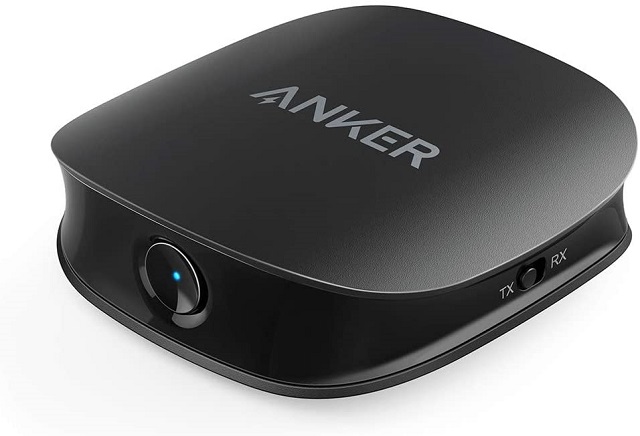 Description: The product comes with a 2-in-1 Design that means a transmitter and receiver in one body. As a result, the model can support Bluetooth functions.
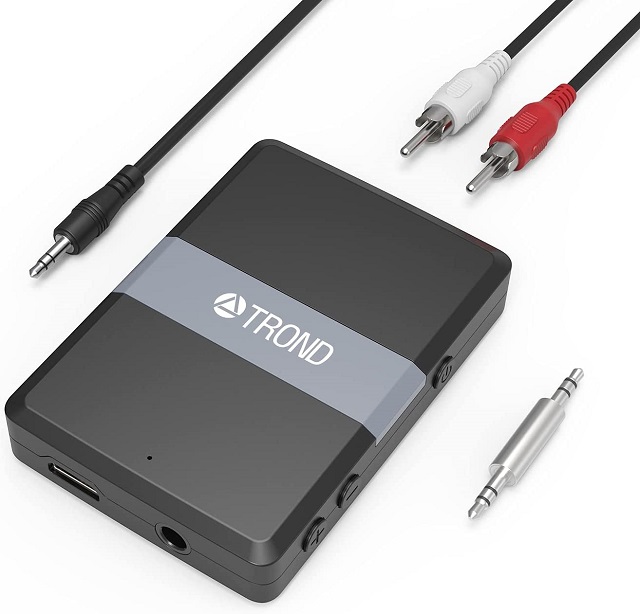 Description: Along with a premium CSR8670 chipset, the model is also compatible with the latest Bluetooth V5.0. Besides, it features aptX and aptX Low Latency applicable to both the TX and RX modes. The aptX enables you to enjoy CD-quality sound wirelessly over BT connections with TV, phones, tablets, and other aptX-source devices. Besides, the aptX Low Latency allows you to watch a video and hear audio wirelessly at a time in a synchronized fashion. Moreover, you will not experience any audio delay in this case.
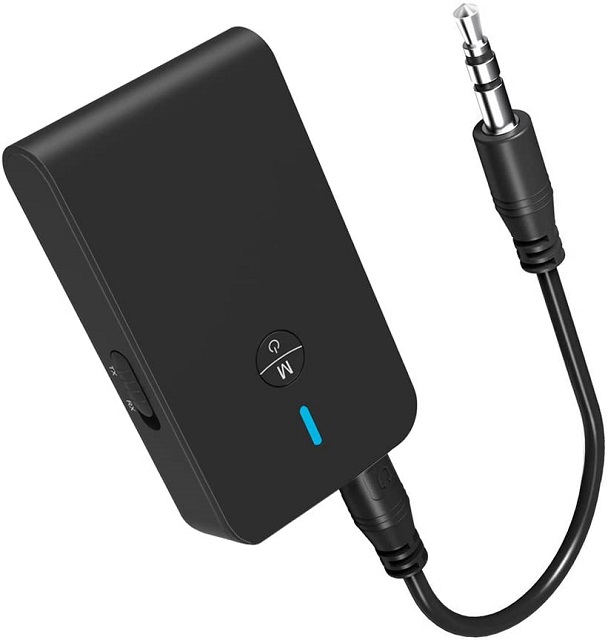 Description: The product allows you to relax on your couch and watch TV with headphones, and it will not disturb any person staying in the room. The model enables you to stream music from phone or tablet to speakers easily.