close

Gadgets

Do It Yourself

How to Turn your Old TV into a Smart TV!

How to Turn your Old TV into a Smart TV!

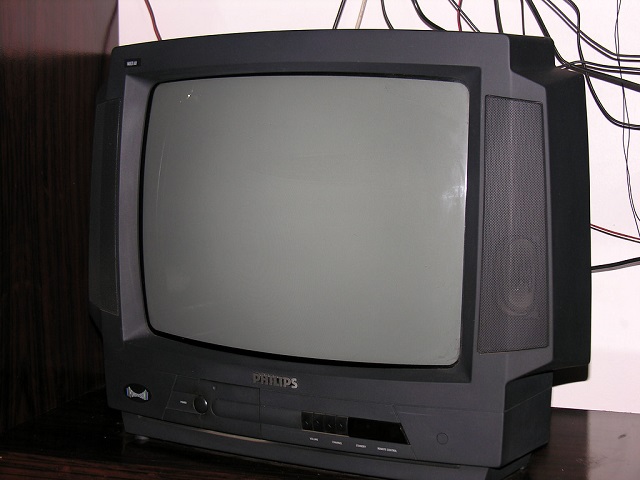
If you’re one of those persons who’s an ardent fan of cable TV, then this post isn’t for you. But if you happen to have an old TV and would like access to streaming services then keep on reading. There’s a lot of content now a days that stream totally online. Many movies nowadays too stream directly to apps rather than cinema. So it’s quite possible that you’d be missing out on a lot if you happen to watch only cable TV on your old set. But no worries with a small investment you can turn you’re old TV into a new smart version of itself. So stay tuned to learn how to turn your old TV into a Smart TV…(no pun intended)

Get yourself a Donlge or a smart stick in learning how to turn your Old TV into a Smart TV:

The best and most ideal solution to turning your old TV into a smart one would be to get a dongle or smart stick. These are simply USB devices that go into your TV and connects it to your WI-Fi. Pretty simple right? But wait it gets simpler yet. To know which one to get, all you have to do is to figure out which streaming services you like the best. If it’s Amazon prime or Netflix, your best bet is getting the Amazon Fire stick.

However if you’re a die hard Apple fan and all that’s Apple you can always lay your hands on the Apple TV range of dongles. Plus with the Apple TV dongles you can also seamlessly connect to your Mac or iPhone. For the Android users out there you can also use your Android phone as a controller and use Chromecast as well.

Or maybe just use some Cables…

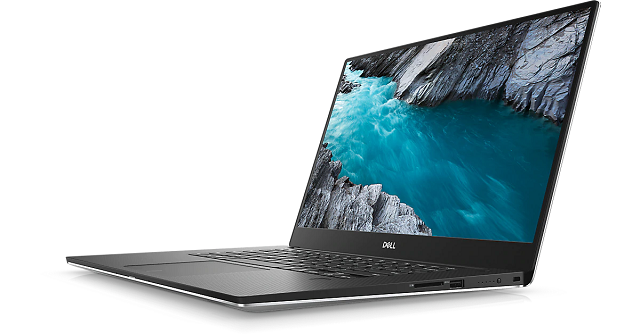
The cheapest solution in learning how to turn your old TV into a Smart TV is by simply using some cables. This is the most cost effective solution so far, plus if you happen to have a spare HDMI cable lying around then it’s also free.

All you have to do is simply connect the HDMI cable from your TV set to your laptop to get what’s on your laptop screen onto your TV screen. It’s really that simple!

The thing with this solution is that it’s really affordable all you need is the HDMI cable and a corresponding port on your laptop and you’re done. If you don’t happen to have one, then getting one is very cheap. However if your laptop does not happen to have an HDMI port then you’d have to research some alternative solutions.

Another great thing with this option is that your laptop basically becomes a controller of sorts with your TV screen as the monitor.

Another option in learning how to turn your old TV into a smart TV is by using screen mirroring. This isn’t the best solution so far. The screen sometimes lags and gets’ stuck. So we won’t go into it in detail here.

read more
Do It Yourself

How to Connect AirPods to Windows 10?

How to Connect AirPods to Windows 10?

Yes you can connect your AirPods to your Windows 10 PC! It may take you a few extra steps for obvious reasons but in the end you’ll have both connected to one and another. In reality while it may take you a few seconds to connect your AirPods with another Apple device, with Windows 10 it may take you a minute or so. So without further ado let’s learn how to connect AirPods to Windows10.

Do AirPods work with Windows 10 PCs?

Yes of course! Just because their Apple made doesn’t mean that they have to work only with an Apple device. If you happen to have a gadget with a Bluetooth connection, you should be able to connect your AirPods to them. AirPods are just like other Bluetooth headphones. So just as you can connect those headphones to your Windows 10 PC, you will also be able to connect your AirPods as well and just as easily. In fact the steps are exactly the same. So now to getting back to how to connect AirPods to Windows 10……

Learning how to connect AirPods to Windows 10:

The first step in the process begins with connecting your PC to your AirPods. To do so you’ll have to first go on to the setting page on your PC. From there click on Bluetooth and other devices. From there on out click on Add Bluetooth or other Device. Choose the Bluetooth option.

Once that is done, now it’s onto the AirPods…

So Far…

  • Open the settings page on your PC
  • Go to Bluetooth and other devices
  • Click on add device
  • Ensure your Bluetooth is on

Now for the AirPods section:

To connect your AirPods to your Windows 10 PC and to ensure it is discoverable, you’ll have to place it in its box with the lid open. Once this is done, press the button at the back till you see the lights on your AirPods flash white. This is the status light showing that your AirPods are ready to connect.

After this, your AirPods should appear on the add a Bluetooth device section on your PC. From there on out click it and you’re good to go.


Once you’ve learnt how to connect AirPods to Windows10, here’s how to Reconnect the two again:

Once you’ve successfully connected your AirPods to your Windows 10 PC, you can listen to anything you have like YouTube, Spotify, iTunes, movies, you name it. But what happens when you finish and need to reconnect them again later on?

Reconnecting is simple enough. You have to head on to the Bluetooth and other device section which is back in settings. Once you’re there, you’ll see all your previously paired devices, one of them being the AirPods. Click on them to connect and you’re good to go.

Using USB Dongles to Connect your AirPods:

If for some reason you don’t have Bluetooth capabilities on your PC you can always use a USB dongle. They are cheaper than a new set of earphones and you can connect your AirPods just as easily.

read more
Gadgets

How to Clean Your Laptop Inside and Out

How to Clean Your Laptop Inside and Out

Are you wondering how to clean your Laptop safely? Then you should check out this special cleaning guide that teaches you how to clean your Laptop properly.

In this article, you will learn how to clean your laptop screen and keyboard Safely. Usually, most of the people don’t just clean their laptops and use them for more extended periods. But, due to the coronavirus pandemic, almost all people are staying at home. They are searching for different ways to spend their time.

If you’re searching for that, means it’s ideal for spending some quality time cleaning your Laptop as it can help you. It’s that moment where you have to clean your Laptop inside and out to remove dust from your Laptop. This helps in this pandemic season you never know when and how this virus comes. It’s better to be safe by cleaning your Laptop as well.

Let’s check out how to clean your Laptop safely in this post. By using the ways in our post, you can keep your laptop germ-free and even make it shine. Not only that, but you can also get rid of debris that’s been residing between your keypad keys since years. By sanitizing it, you don’t need to worry about the spreading bacteria.

Before heading into the article, I do like to say one important thing that is “Unplug & Turn off your device”. This is a vital step you have to do before even cleaning your Laptop.

If you don’t follow this, then it might lead to severe damage to its hardware resulting you might spend some amount on repairing it.

Now, let’s get into the article How to Clean your Laptop.

How to Clean Your Laptop:

To perfectly clean your laptop follow the below points and make your laptop dust-free and grem-free. I have listed all the points which you need to clean your laptop, sanitize your laptop as well.

Carefully Vacuum Clean your Laptop:

Getting rid of dust is the external dust is the first thing you should do to clean your Laptop. So, to get rid of the dust particles carefully vacuum clean every part of your Laptop except Screen.

Never use a vacuum cleaner brush on your laptop screen as it can scratch your screen and make it look worse. Generally, LCD screens in the Laptop are very fragile and can be scratched by the vacuum brush bristles. So, never do vacuum cleaning to the screen.

To vacuum clean your Laptop, you need to use a vacuum cleaner on a very low setting. As you’re just picking up the debris and dust from your laptop setting, its low setting is good. If you’re setting it too higher or medium means, it can cause you trouble by damaging your keyboard keys. So, make sure you never use a vacuum cleaner in a high setting.

While Vacuum cleaning always makes sure you vacuum speaker holes and vents on your Laptop as these can build up lots of dust.

How to Clean Your Laptop with Soft Cloth:

After vacuum cleaning your Laptop take a soft cloth to clean your Laptop. Taking a microfiber cloth is best to clean effectively. After taking that cloth, just damp it with water slightly and start scrubbing your Laptop.

Always be careful while you are cleaning around ports as you should want any liquid to get into the ports as it can damage your Laptop.

How to Clean Your Laptop Screen:

After cleaning exterior parts, start cleaning your laptop screen by simply wiping it down with a dry cloth. Remember to always start cleaning your screen wiping with a dry cloth first and then use dampen cloth.

As you have finished cleaning with a dry cloth, now take the cloth and dampen it with some water to clean your screen. In case if you don’t want to use water to get your job done, then you can replace water with a cleaning solution.

However, using cleaning solutions also has a few dont’s so be cautious and go with water or use vinegar and water combination. Also, remember one thing if your cloth is dripping wet don’t clean the screen with that wet one. If you want you can wipe in wax on & wax-off motion but never overdo it as it can damage the screen.

Clean your laptop keyboard:

As you have already vacuum cleaned your laptop, it’s now time to clean your laptop keyboard. However, your keyboard will be dust-free to some extent because of vacuum cleaning.

Now, you should clean your laptop using a sticky and rubbish substance that can roll over the keyboard and quickly pick up all the debris that’s stuck between your keys. Don’t forget to roll putty over the holes of the speaker to remove dust.

Take the microfibre cloth, and then wipe your laptop keyboard again to apply more pressure to remove stains that are tough to get rid off.

Safely Clean Your Laptop Ports:

If you are striving to clean your laptop ports? Then you should check out cleaning it with a cleaning putty. It’s a great way to clean your laptop ports. This will remove the hotbed of debris and all the overlooked dirt as well.

In this process, you have to squish the cleaning putty into the various laptop ports and pick the debris out from them. Take a cotton bud stick and dip it on the isopropyl alcohol and then stick it into your laptop ports.

This stick will help you pull all the debris out of the ports, and it will sanitize them as well. After using this, you don’t have to worry about it because it evaporates the moisture instantly from your laptop ports.

Isopropyl is one of the best solvents that’s used to disinfect surfaces so you can use this to kill bacteria. Using 75% of isopropyl is more than enough to kill the bacteria in your system. This breaks down the microorganism cells, and it always takes longer to evaporate as it increases the exposure time.

Carefully Clean Laptop Screen:

With water, you might have cleaned the screen, but as we are sanitizing the laptop, you need to clean the laptop screen again with isopropyl alcohol.

Take a microfibre cloth with some isopropyl alcohol and then wipe the screen gently in a circular motion or even in straight line motions. This can help you clean your laptop screen correctly. But, if you have a touch screen laptop, then do avoid this method as it may slowly deteriorate the layer over time.

For touch screen laptops you should use a mild non-alcoholic screen cleaner. Once the isopropyl evaporates take an extra wipe and clean it with that. If you want, you can use screen cleaners such as Whoosh or Ecomoist. These screen cleaners are alcohol-free and are specially designed to get rid of the smudges.

Mouse:

In case you use an external mouse for your laptop? Then you should clean that as well. Optical mice, which generally use light to detect surface area, don’t require internal cleaning, but you should clean it outside.

Usually, the mouse is more susceptible to the dust particles, and as you use the mouse mostly for your operations, you should clean it when you are cleaning your laptop.

To clean your mouse, unplug the mouse from your computer and remove batteries if you have any. Then take a clean cloth with a bit of alcohol wipe to clean the mouse outside.

Always be careful with liquid, if it gets inside your mouse then it might not work perfectly. In case, if you have a mechanical mouse, then you should give it a quick clean by placing a piece of paper and rolling it. This might take some dust particles for the mouse.

For deeper cleaning, you should be using alcohol dampened cloth and clean both the ball inside the mouse and other areas of it.

Finally, you should sanitize your laptop.

Sanitize Your Laptop to be Safe:

As we’ve spoken about isopropyl alcohol, it’s a perfect solution for you to sanitize. This isn’t just the screen cleaning solution; this is an all-round surface cleaner which helps you to clean your laptop.

Take a microfibre cloth and dip it on isopropyl and simply wipe it down all over your laptop that includes keyboard, speaker holes, ports, vents, mouse and more.

The alcohol content in the solution of isopropyl will help you remove all the stubborn and tough stains and smears on your laptop. Along with that, you will be bacteria-free as well. Just rub it a little harder on tough stains that can clear the stains with ease.

Soon after wiping your laptop you isopropyl will evaporate soon, and it does kill all the dust and bacteria to make your laptop a germ-free laptop. It’s the best time to sanitize your laptop now because the COVID-19 is spreading like wildfire so you can protect yourself from that by sanitizing it.

As an extra measure, you should be washing your hands before and after you clean your laptop as well. It’s best to use these wipes at least two times a month at least in this coronavirus crisis.

This is all about how to clean your laptop and how to sanitize your laptop safely with ease.

read more
Do It Yourself

Download Free Audio books online Latest

Download Free Audio books online Latest

In this lock down period we’re running out of things to do, or are we? We just have to be creative when it comes to doing things. If you really look at it there’s lot’s to keep ourselves busy with. One of the things to keep us busy or simply pass the time is Audio books. What’s more in this post we’ll be showing you places where you can download free Audio books, with an emphasis on the word free. What makes Audio books more interesting than normal eBooks or physical books is that you can listen to them while doing your daily chores or while resting too. In this post we list some free Audio books websites that allow access to their books anytime, anywhere, provided you have internet access, of course. So without further ado let’s get to reading, no pun intended by the way.

Are downloading from these sites legal?

Yes, they are completely legal. Of course you can always get illegal copies everywhere if you just look. But they don’t really help anyone, the author or you, you know morally. Although these Audio books are free they are completely legal. So rest assured your moral compass will remain intact. Now onto the websites…

Download Free Audio books from Librivox

This website happens to be a free non- profit initiative. It is actually a public domain for books. This means that you can get most or all their Audio books for free. There are thousands upon thousands of Audio books to listen to. They have everything ranging from War and peace to Leaves of Grass to Anne of Green Gables. There is even a voluntary section where you can try out books in progress.

Features to check out:

  • Public domain of books
  • 10,000 projects to choose from
  • Voluntary section to read books in progress

LIT2GO for your literary perusal:

This website offers you everything from short stories, Audio books, poems and plays. This website is mainly garnered for a classroom setting. In that these short stories or Audio books are accompanied with word count, citations, play times and more. Some of the plays even come with PDF copies allowing you to read along with the text format.

Features to check out:

  • Mainly for a classroom setting
  • Has short stories, Audio books, plays and poems
  • Sometimes accompanied with a PDF file format

Stay Loyal with Loyal Books:

This site shares books that are already in the public domain. You’ll get everything ranging from Sir Arthur Conan Doyle’s The Return of Sherlock to John Milton’s Paradise Lost. This is besides others of course. There is also a section where you can see reviews given by other readers as well as leave a review yourself.

Features to check out:

  • Books made available from public domain
  • Broad range of books
  • Access to reviews

Download Free Audio books from Mind Webs

This is one of the websites to download free Audio books where you get a haunting radio dramatization of science fiction stories. If you’re a science geek, which we all are in different degrees, then you’ll be sure to like this website.

Features to check out:

  • Deals in science fiction Audio books
  • Perfectly executed to give you the spooks!

Open Culture:

In this website you’ll get a neatly placed menu of all the books that are available elsewhere. You may see some of the same titles as in other places. This is because of these websites taking Audio books from the public domain. But this is one website where you can search for Audio books categorically. You even get videos of readers reading a particular section of a book.

Features to check out:

  • Categorically placed Audio books
  • Videos of readers reading your favorite titles

Download Free Audio books from Overdrive:

This is one of the websites on this list of where to download free Audio books, that has the largest collection of books. You can get either the audio book variety or eBook type on this website. They have a larger collection than another website, as they have access to books in local libraries as well. They are in partnership with over 30,000 local libraries and have over 2 million titles to peruse.

You can even get some of the newest releases as Audio books, all free of cost too.

Features to check out:

  • Largest online collection of Audio books
  • Partnership with over 30,000 libraries
  • Access to new releases as well

Scribl to download free Audio books:

This is one of the websites on this list that gives you access to newer releases. In many instances too the books are read by the authors themselves. The Audio books in this website also come in serialized form so that you can break them into parts and read from that part later on.

Features to check out:

  • Newer collection of Audio books
  • Some read by the author
  • Serialized Audio books

Project Gutenberg:

If you’ve ever looked for free books online, then you probably would have heard this name before. This website is the first listing when it comes to free books online. Their free audio book collection now boasts of a large variety of books right from Charlotte Bronte’s Jane Eyre to the Book of Tea by Kakuzo Okakura.

You even get computer read Audio books on this site as well. But you can imagine something like Siri reading to you and you’ll steer clear away from this genre.

Features to check out:

  • Both human and robot read Audio books
  • Large collection of Audio books

There’s always Spotify Too:

Besides songs, Spotify also has a collection of Audio books to listen to. They constantly add to their collection as well. These are all completely free to listen as well. If you want to skip the ads then you can always go premium, at a cost of course.

Features to check out:

  • Has songs and Audio books as well
  • Ability to go premium without ads

These are some of the sites from which you can download free Audio books. Audio books are a great way to kill time while at the same time doing other stuff as well.

read more
Gadgets

Best Solar Power Bank- Complete Buying Guide

Best Solar Power Bank-  Complete Buying Guide

For most of the outdoor enthusiasts, the solar power bank is an essential gadget. It is an excellent option for charging your cell phones, cameras, and other gadgets. With the help of it, you can charge your devices even when there is no availability of power source. These ones are very convenient and portable as well. These chargers that come with one panel have a compact design. But these recharge themselves slowly using the Sun’s energy. Chargers that come with multiple panels increase the charging speed.

How Does Solar Power Bank Work?

Solar energy is an Eco-friendly way to generate electricity. The solar power bank is equipped with a small built-in panel that helps to charge a rechargeable battery. The panel is usually a photovoltaic cell. Here, phosphorus replaces the silicon and then creates a negative charge. And, boron replaces silicon to the other end that creates a positive charge. It helps to create an electrical field.

Due to the electric field, electrons can move around easily within the cells. When sunlight (a stream of photons) hit the panels, the photons strike the free electrons. And then, these knock it out of the circuit. Then, a conductive plate collects the electrons to create electricity and recharge the battery.

Most people prefer to choose Lithium based batteries. It is because Lithium has a high tendency to lose electrons. It indicates that electrons can move from one terminal of the battery to another terminal easily. These ones are ideal for charging your phone.

Benefits of Using a Solar Powered Battery Charger

The solar powered battery charger helps to store energy. And it allows the user to use the energy when it is a cloudy day. It is the primary benefit of this charger. You can even charge your cell phone battery without taking them out in the Sun.

The essential benefit of solar powered battery is that these ones don’t need external electrical sources to recharge your batteries. As there is no need for using an electrical source, you can get a few subtler benefits. The solar cells create no emissions, waste or byproducts. The photons pass through the silicon. And here, the electricity comes from the transfer of energy from photon to an electron. During the process, it frees the electron and allows it to flow. Electricity is an energy carrier, not a form of energy. You can generate electricity through the photoelectric effect.

What are the Types of Solar Energy Chargers?

You can get three types of chargers that are available in the market:

  • Simple 1 or 2 stage controls
  • PWM (pulse width modulated)
  • Maximum power point tracking (MPPT)

Simple 1 or 2 Controls: It comes with shunt transistors. These ones help to control the voltage in one or two steps. Its function is to short the solar panel while a certain voltage will arrive.

PWM (Pulse Width Modulated): It is a traditional type charger. Anthrax, Blue Sky, etc. are some examples of it.

Maximum power point tracking (MPPT): MPPT solar charge controller is very famous in today’s market. These ones can identify the perfect working voltage and amperage of the solar panel exhibit easily. The output you can get from this one will be more than 10-30% compared to a PWM controller.

Solar Power Bank Buying Guide

Multiple factors are there that you need to consider before buying the best solar power bank. Here, we have given a few tips that can help you to choose the right one as per your needs.

  • Battery Capacity
  • Solar Panel Specs
  • Portability
  • Charging Ports
  • Battery Type

Battery Capacity

You need to determine the battery capacity first. The battery stores energy. It is measured in mAh (Ampere-Hour) or Wh (Watt-Hour) units. It lets you know about the amount of power that the battery can put out at a certain duration.

Usually, we want to know how much charge our device is draining. How much we can charge a full battery depends upon the mAh number on the power bank. That’s why you should determine for which purpose you will use the solar power bank.

Solar Panel Specs

Usually, these banks can be charged with a standard power outlet. You don’t need to rely upon the power grid entirely. It allows you to store power using the Sun. While you’re going to determine the quality of the solar panels, you need to examine both the panel cells. Besides, you also need to test the panel size. The larger panel will collect more energy from the Sun. You need to look for the specs also of all solar panels that you are purchasing. And then, you need to find out the power output. Sometimes, you may need to pay a little bit extra for achieving the highest efficiency. Besides, you also need to consider the size of the solar power bank you are charging via these panels.

System Portability

As soon as you decide for which purpose you will use it, you need to consider its portability. You should buy lightweight ones that you can carry anywhere. In case you want a power source for a camper-van, then try to buy those things that you can move around. A few higher-capacity power banks are available that are slightly larger than a car battery.

Usually, panels are fold-able. And a few banks are there that come with panels built onto the battery.

Charging Ports

When it comes to the battery capacity and portability, the number of charging ports required depends upon you. A few users want to charge multiple phones or tablets at the moment. In this case, you can look for those banks that have multiple USB ports. The larger ones have numerous plug-in options ranging from USB, standard outlet prongs, to additional option. If you are looking for backup at home in emergency times, then try these ones. Families who are searching for an off-grid car camping solution can also use it.

Battery Type

Lithium-ion polymer power bank batteries are mostly available in the market. However, many variations are there, such as lead-acid or saltwater batteries. And plenty of factors are also there to consider before deciding the appreciate battery type. You need to know the depth of discharge and the entire lifespan of the battery.

The depth of discharge means the full storage capacity of the battery. Actually, it indicates the battery’s state of charge.

On the other hand, the Lead-acid batteries are traditional off-grid solar solutions. These ones have a shorter lifespan compared to the other battery types. Usually, these have a lower depth of discharge. Most people prefer to use lead-acid batteries while converting the entire household energy system to solar. And these are budget-friendly also.

Again, the Saltwater batteries are a homemade DIY solar solution. It is a perfect Eco-friendly option as the battery depends on saltwater electrolytes. There is no heavy metal. But the drawback is that there is no information available regarding its longevity.

Lithium-Ion Polymer batteries are the prevalent battery available in the market. These ones have a longer lifespan and a higher depth of discharge compared to other battery types.

How can I speed up my solar power bank?

Here, we have given you five easy ways to speed up the solar bank.

Charge outdoors

If you place it in a hotter place, then the charging speed will get slower. It is the most important thing that you need to know at first. The high temperature usually decreases the efficiency of solar cells. Therefore, if you want to increase the charging speed, you have to charge it outdoors. And the place should be well ventilated. When the solar panels are inside the backpacks, these can offer faster performance. And it will work a bit faster when you take these out from the backpacks.

Open windows if charging outdoors are not possible

While you are charging a solar power device, the efficiency reduces from 20% to 50%. Windows don’t allow the cells to get activated. Even, these can stop the activation state for some time. But it happens when the windows contain UV protection. That’s why it is better for you to open the windows while charging.

Make sure that solar cells are facing towards the Sun

Most of the time, we keep the solar panels flat on the table. And we think that it will work properly. But it is not going to happen. It can get merely half-power compared with tilting the panel towards the Sun. That’s why always make sure that you placed the solar panels facing towards the Sun. However, the charging speed can be reduced a little bit. It is because the inclination of the Sun in relation to your device changes constantly.

Every solar panel doesn’t have a similar efficiency

All panels are not similar although these look the same. You can choose the Crystalline panels that can charge two times faster than the thin-film panels. However, both come in the same size. Usually, the rigid ones are quicker and more durable than the flexible ones. Therefore, you need a flexible one that is 2× larger than the rigid panels. Thus, the same amount of power can be gotten.

Try to use shorter cables

If you’re using a shorter cable to connect the panel and your device, then it doesn’t increase the charging speed. However, always try to use a long cable for the panel so that it can reach full sunshine.

Solar Power Bank vs. Solar Charger

Here, we have given a perfect comparison between these two. The first one has portable chargers and internal batteries. The batteries store electrical energy and then power your phone. But it weighs lighter than the solar chargers. On the contrary, these chargers use solar panels and turn solar power into electricity to power your device.

Pricing

The price range of these portable chargers are from $30 to $250. However, it depends on the brands, the amount of energy in watts, and the charging capabilities. A few high-end chargers can provide power up to 200 watts. And these ones can charge car batteries. You can carry the banks from one place to another. You can choose the expensive ones also if you require large ones. But those who have a lower-end price range can offer approx 7-14 watts of power. A few chargers are there that need more than six hours of direct sunlight for charging your device completely. But it depends upon the exact watts number and the brands.

If you want to charge your device only, then you don’t need an expensive power bank. Portable ones are convenient in this case. The price range of these portable ones is from $20-$125. Hence, the price depends upon the brand and energy storage capacity.

Sizing

The size of chargers differs according to the brands.

Weight

If you want to buy lightweight ones, then you can choose lower-watt chargers. These are lighter than a pound. However, you can use a RAVPower 24 watt charger that weighs 1.65 pounds. A few models are available that have a larger capacity. These ones can weigh up to 13-14 ounces.

List of Top 9 Best Solar Power Bank

  1. Blavor Power Bank
  2. QiSa Power Bank
  3. Riapow Wireless Solar Portable Charger
  4. Addtop Solar Power Bank
  5. Yelomin Solar Power Bank
  6. Nekteck Solar Charger
  7. OUTXE W20 Wireless Power Bank
  8. Feeke Charger
  9. Hiluckey Charger

Best Solar Power Bank– Buying Guide

Here, we have given the top nine best solar power banks. Let’s have a look at these.

  1. Blavor Solar Power Bank

Best Solar Power Bank BlavorDescription: 

We have given this power bank the top position in our list of the top best solar power banks because of its highest maximum output rating of 18 watts. It can charge your phone very quickly. This inbuilt wireless charger of the product offers a decent output rating of 10 watts.

The battery capacity of the charger is 10000 mAh that is lower compared to other models. It comes with dual USB ports, USB Type C input, flashlight, compass, and even a wireless charger. The manufacturers offer a 1-year warranty on the product.

Features:

Qi Wireless & Solar Power

It is not only a 10,000mAh wireless power bank but also a wireless charger. This charger supports iPhone XR/ XR MAX/ XS/ X/ 8/ 8plus, Samsung Galaxy S9 or S9 Plus, S8 or S8 Plus and other mobile devices.

Reminder

The Blavor has a small panel size, large capacity and uncontrollable sunlight intensity into consideration. But the one thing you need to remember is that you have to charge it completely before you use it.

Extensive Tested Charging Times:

Blavor solar power bank can charge itself in 6hours using a 5V/2A adapter. The product can even charge iphone7 plus 2.2times, iPhone X up 2.3times, iphone8 up 3.5times.

Durable and Compact Size

The charger consists of premium ABS materials and a lithium polymer battery. It is both sturdy and durable. The charger comes with two USB, type C, dual flashlights and a compass kit. It weighs very light.

Dual Flashlight & Compass Kit

It contains a bright dual flashlight and a portable compass kit. It is ideal for outdoor activities such as camping, cycling, fishing, travelling, hiking and beaches.

Pros:

  • High charging speed
  • Wireless charger
  • USB Type C is available

Cons:

  • Requires a lot of time for charging itself.
  1. QiSa Solar Power Bank

Best Solar Power Bank QiSaDescription:   

We have given QiSa powerbank second rank on our list. The reason is the charger have the highest capacity rating. It comes with a maximum output rating of 15.5 watts. What makes it special is that the item has a battery capacity of 35800 mAh.

It enables you to use the dual USB output ports and the wireless charger. The QiSa charger comes with a 6-month warranty.

Awesome Features:

Fast charging:

The maximum Micro USB Input is DC 5V 2A whereas the USB Output is DC 5V 3.1A. It shows the maximum wireless output of 5V 2A. The material of the product is ABS+TPU. QiSa has a flashlight of 2.6W(210 lumens). And the power conversion rate is 70.5% or more than that.

Multi-Functional LED Lights:

It comes with a powerful light LED flashlight that makes it an ideal outdoor companion. The charger has a lights-Low light-Flash-SOS.

Waterproof:

You can use in wet environments or rainy days. But you should not pour water on it.

Upgrade Qi Wireless Charging:

QiSa  allows 10W fast wireless charging. It is a Qi portable charger. The product supports iPhone 11/XR/ XR MAX/ XS/ X/ 8/ 8plus, Samsung Galaxy S10/S9/S9 Plus S8/S8 Plus and all qi-enabled devices. The charger is completely cable-free and tangle-free.

High-Speed 3 Outputs:  

It can support up to three electronic devices to charge simultaneously. Qisa offers two fast output ports and one wireless output charging for your device, tablet or other electronic devices. USB-C Port & Micro USB Port are the two inputs available here.

Two times fast charge: 

It has an upgraded built-in smart chip. This charger allows you to charge two times faster than others. It is far more stable compared to other products. This charger converts Fluctuation voltage to Stable voltage. Qisa is able to stabilize the equipment.

Pros:

  • Dual USB ports and a wireless charging
  • Fastest charging

Cons:

  • Shorter warranty period compared to others.
  1. Riapow Wireless Solar Portable Charger

Best Solar Power Bank Riapow Wireless Solar Portable ChargerDescription: 

If you are searching for any portable charger, then it can be the right choice for you. We can say that it is a value for money product. The charger has a maximum output of 15.5 watts charging speed. It is only available over its USB ports as the charger has a lower output rating.

The charger contains four output ports that are high compared to others. What makes it very convenient is its 26800 mAh battery capacity. The Riapow wireless solar portable charger is very reliable to the people. The charger has a 1.5-year warranty.

Awesome Features:

Advanced Wireless Portable Charger:

Riapow wireless solar portable charger is a cable-free power bank with wireless output. The portable charger is compatible with QI-enabled phones for inductive charging. It supports iPhone 11 Pro Max / XS Max / 8 plus, Samsung Galaxy S20 / S10 / Note 10 Plus, and so on.

Ultra-High Capacity:

The 26800mAh battery capacity makes the product handy. The size of Riapow  charger is similar to the usual phones. It can charge iPhone 11 8 times, Galaxy S10 6 times and iPad mini three times. This charger can last up to eight days on a single recharge.

Fast Charging:

The charger has the ability to charge four devices simultaneously at full speed. It can detect your device automatically. The maximum charging speed is 3A. It can charge iPhone 11 completely within 1.3 hours.

2.5X Recharging:

With the USB C charger, you can charge this product within seven hours. It is 2.5 times faster than 1A input. These have USB C ports also that helps to charge your device.

Outdoor Essentials:

Riapow wireless solar portable charger is equipped with solar panels that are helpful in emergency times. You can charge your device via sunlight. It is equipped with LED flashlight along with “Steady-Flashing-SOS” 3 modes. This product is very durable, and it has a highly sturdy design.

Multi-Functional LED Lights:

It comes with a powerful LED flashlight. The Strong-SOS-Flash mode of this product helps the user to guide through darkness and ass well as in an emergency.

Waterproof and Dustproof:

You can use the battery pack in an outdoor wet environment. The product is splashproof, dustproof and shockproof.

Pros:

  • Different output ports
  • In-built LED flashlight
  • Offers high performance

Cons:

  • Slow charging speed
  1. Addtop Solar Power Bank

Best Solar Power Bank AddtoopDescription:  

One of the best things about this product is you need not spend too much on this product yet you can get decent capacity and performance from it.  Addtop comes with a charging speed of 10.5 watts. But it doesn’t provide a wireless charging option.

The battery capacity of the product is rated at 25000 mAh. The product comes with dual output ports that help to charge your device quickly. It has a warranty of one year.

Awesome Features:

25000mAh charger:

Addtop Power Bank comes with a huge battery backup that makes it perfect for outdoor usage. It can charge iPhone 6 around ten times, Samsung S6 around seven times and iPad Air around three times.

Four fold-able panels:

The charger is portable and it comes in a handy size. When you fold the power bank, it will look slightly larger than folded iPhone X. Addtoop Power Bank can absorb solar energy more than any usual charger.

Fast charging:

The dual USB output ports of the product allow to charge two devices up to 5V/2.1 with Quick Charge. Moreover, it can stop automatically when the device is charged fully. The charger assists to avoid over-heating & over-charging situations.

LED lights:

The emergency LED lights of this charger are very bright. Therefore, these help to guide you in darkness. You can carry it to any outdoor trip or any emergency events. The charger is very easy to carry. You can use it for traveling, hiking, and camping. It comes with a Micro-USB cable and a user manual.

Pros:

  • High charging speed
  • Excellent battery capacity
  • Dual output ports

Cons:

  • Wireless charging capability is unavailable.
  1. Yelomin Solar Power Bank 

Best Solar Power Bank YelominDescription

If you are looking for an affordable power bank, then Yelomin is an excellent option for you. The product has a maximum output rating of 10 watts. The output of the charger works for both 2A and 1A charging devices. Its battery capacity is 20000 mAh. Yelomin Solar Power Bank comes with dual USB ports, inbuilt LED light, and a compass. These make the product a great camping companion. But the product has merely a 90-day long warranty.

Awesome Features:

High-Quality Portable:

It consists of durable and reliable ABS+PC+Silicone material. Yelomin contains a Solar phone charger, compass and two bright LED flashlights. You can carry this product if you are going for any camping, hiking.

Works as a reminder:

The charging speed of the product depends on the intensity of sunlight, solar panel size, and panel conversion rate. That’s why it may take a long time to charge. The USB is the fundamental way to charge the battery bank. You can use the USB cable of this product for charging this charger only. But, you must not use it to charge other devices as it can slow down the charging efficiency due to incompatibility.

Compatible with Multiple Devices:

The product supports different Smartphones, tablets and other USB devices. It has more than 900+ recharge life-cycles. The charger comes with a Flashlight or a Carabiner. It is very durable and reliable.

Convenient Smart Express Charge:

Yelomin charger comes with dual USB and powerful LED light. With the help of it, you can charge two smartphones simultaneously or a tablet at full speed. It has two led lights that allow you to use flashlights using the Steady-SOS-Strobe mode. Besides, the Five pilot indicators of the charger indicate the status of the battery charger. The green light turns on while charging by a solar, blue light on when USB charging. The Yelomin has an external battery charger that helps to recharge by any outlet.

Pros:

  • Reasonable price
  • Decent performance
  • Comes with a flashlight as well as a compass

Cons:

  • Don’t have a long warranty period.
  1. Nekteck Solar Charger

Nekteck Solar ChargerDescription:

Are you looking for the best charger at a low-cost? Nekteck is a good option in this case. It comes with a large 10,000 mAh battery capacity. The product comes with two USB ports for charging devices continuously. Multiple one-panel chargers are there that take a long time to get fully charged. Besides, it is equipped with an efficient solar panel that helps to recharge very fast. It has a bright LED flashlight, side grips, and an anti-slip design. Nekteck Solar charger is both shockproof and rain-resistant. You can carry this product when you are going camping or hiking.

You can connect it to your phone directly for charging. The energy of the three High-efficiency panels makes Nekteck Solar charger effective. You can unfold it. And then,  its 21-watt panel. This charger also has dual USB charging ports. They permits two devices for charging at once at a maximum output current of 3 Amps total. It doesn’t matter how long you are going to make your trip – you can use Nekteck Charger whenever you need. It is best for backpacking.

Awesome Features:

High Efficiency:

It is equipped with 21 watts High-efficiency Sun-power panel. It can charge two devices at the same time. You can use this product for emergency purposes.

Fast charging Technology:

Nekteck Solar charger comes with an in-built- smart IC chip. The maximum charging speed of the product is up to 2.0A each port or 3.0 A max overall.

SmartIC Technology:

It comes with a new SmartIC Technology that has its own microchip. It detects those devices plugged into through USB PIN signals. These can give you output at full power and full charging speed.

Highly Portable:

Is weighs very light 18 oz. The dimensions of the product are 6.3x 11.1x 1.06 inches when folded or 26.3x 11.1 inches when opened. That means you can carry this product easily.

Highly Durable:

Due to constructed with superior material, this product becomes durable enough and suitable for outdoor use. Due to constructed with superior material, the exterior part of the charger won’t get damaged easily.

Package Content: The charger comes with a 21W Solar Charging Panel, 80cm Micro USB Cable, User Manual, and a 12 Month Warranty period.

Pros:

  • Includes user manual and 80 cm Micro USB Cable
  • 12 Month Warranty
  • Durable and portable

Cons:

  • Poor charging speed
  1. OUTXE W20 Wireless Power Bank

OUTXE W20 Wireless Power BankDescription:

It comes with a military-grade construction that makes the charger very durable. OUTXE W20 Wireless Power Bank is an ideal companion for hikers, kayakers, anglers, and other outdoor enthusiasts. It comes with an IP67 waterproof rating. It means that you can keep it in three feet of water for up to 30 minutes. The product is also dustproof as well as shockproof.

OUTXE W20 Wireless Power Bank is equipped with a powerful 20,000 mAh battery. The high battery capacity allows the charger to charge an iPhone XS up to seven times and a Samsung Galaxy S10 up to five times. The product has one more specialty that is you can charge it without wire. It has two extra charge ports— type C and micro USB cords. It enables you to charge up to three devices at a time. The charger can charge itself using the 2W high-efficiency panel under sunlight. It is perfect for emergency purpose usages.It is a best solar power bank for camping.

Awesome Features:

Long-lasting:

The OUTXE W20 Wireless Power Bank charger is designed in such a way so that it can last for a long time. The product is IP67 Waterproof, dust proof, shockproof, and non-slip. The reinforced rubber cap and military-grade construction protect the product from any kind of damage.

Truly Wireless Charger:

Now, you don’t need to use tangled cords. Just invest money in buying USB-C / lightning cables. It has 1 USB QC3.0 output,1 USB output 2.4A, and one wireless charging pad. These help to charge your phone without wires.

50% Faster charge:

The Type C and Micro USB offers the fastest overnight charge time. It usually takes 6.5 hours for a complete charge.

Pros:

  • Quick charging
  • Allows to charge without wires
  • Long-lasting

Cons:

  • Rubber covers are unable to prevent water.
  1. Feeke Charger

Feeke ChargerDescription:

If you want to buy a charger of high capacity, then it is a fantastic option. The charger can offer you a high maximum output rating of 15 watts. Feeke Charger can charge your devices quickly when you combine it with the wireless charging pad.

It comes with a high capacity rating of 32800 mAh. The dual input and the triple output ports of the charger allow you to enjoy a high battery capacity. It also offers an IP66 water resistance rating. The product comes with a 1-year long warranty. It is a best solar power bank for backpacking.

Awesome Features:

Large-Capacity:

The battery capacity of Feeke Charger is 32800mAh. The battery of this much high capacity allows you to charge multiple devices simultaneously. It is portable enough. Therefore, you can keep your mobile fully charged anytime and anywhere.

Powerful LED flashlight:

The built-in LED flashlight is very strong. And therefore, it can last for a long time with ease. The charger comes with three working modes. You need to double click your power button to switch into a strong light, flash, SOS. These can send the users emergency signals.

Qi wireless charging:

Feeke Charger comes with a great Qi wireless charging technology. This portable charger supports all Qi-enabled devices. It has in-built dual USB outputs that allow you to charge three devices at the same time.

Dual input ports:

It has dual input ports— high-speed Type-C and Micro USB. These ports help to charge devices at the same time. You can get the maximum possible charging speed. The charging speed of the product is almost 2× compared to ordinary ones that come with a single input port.

Heavy-duty IP66:

Feeke Charger is dust proof, shockproof, and waterproof as well. It consists of ABS material that makes the product durable. The charger comes with a certified IP 66 rating.

Multi-Protection:

The high battery capacity helps to keep your phone away from overcharging, over-current, over-voltage, and short circuits.

Pros:

  • Waterproof
  • Quick charging speed
  • Inbuilt LED

Cons:

  • Charges through the cable only.
  1. Hiluckey Charger

Hiluckey ChargerDescription

The maximum output rating of Hiluckey Charger is 15 watts. It comes with dual flashlights. Hiluckey is a best solar power bank for camping.

It has a battery capacity of 26800 mAh. The charger provides four output ports like a wireless charging one, and so on. The manufacturers offer 1.5-year-long warranty on the product.

Awesome Features:

Gigantic Capacity:

By using this charger, you can charge your mobile about ten to twelve times. If you have a tablet, then you can charge it 4-5 times for an average of nine days of usage per charge.

Fast Charging:

Using Hiluckey Charger, you can charge 4 devices at the moment. It can charge a 3000mAh phone within 1.5 hrs or a 6000mAh laptop within 2.5 hrs.

D&QC Tech:

It comes with a blue USB port and USB C port. These allow you to work with a 12V laptop. You can use a PD or QC adapter also to charge it properly. With the help of a USB-C port, the charger can charge your phone very fast.

Outdoor Use:

The charger has an in-built LED flashlight that comes with an SOS mode. You can use it as an emergency light. This product is both waterproof and dustproof. As a result, it is perfect for outdoor usages.

Pros:

  • Includes user manual, and user cable
  • Twelve-month warranty
  • Wireless charging
  • Multiple ports are available.

Cons:

  • A little bit expensive

Conclusion:

When you are traveling on long road trips, camping trips, trekking trips, you can find your power bank losing all charge. And that’s why you must have a high capacity power bank. You can choose any of these solar power bank as well. But before buying, you should definitely check the buying guide.

Frequently Asked Question

  • What are the best solar chargers?

The name of the best solar chargers are as follows:

  1. BigBlue 28W
  2. Hiluckey
  3. BEARTWO
  4. Nekteck 21W
  5. Anker 21W
  • Do solar chargers really work?

Solar chargers can charge your cell phone in emergency times. But these usually take a long time and work only in bright sunlight. The working function of a solar charger depends on your usages, and type of the phone battery.

  • What is the best solar power bank? 

Multiple different solar power banks are there that are best for different needs.

  • QiSa Solar Power Bank( best overall)
  • Nekteck Solar Charger( best for the budget)
  • OUTXE W20 Wireless( perfect as a waterproof)
  • Goal Zero Nomad 5( single panel)
  • FEELLE Solar Power Bank( fold-out)
  • Are solar powered power banks any good?

These solar powered power banks can recharge themselves completely using sunlight. If you are going for a vacation, then with these solar power banks, you can charge your device easily. Only a few hours of charging this bank can be enough for one-day usage.

  • What should I look for in a solar power bank?

When you choose a solar power bank, the surface area is the one that you need to consider. If the solar panels have larger sizes, then they can collect more sunlight. Therefore, it can store more energy.

  • What Phones Are Compatible?

The phones that are compatible with these solar power banks and chargers are as follows:-

  1. Google Pixel 4 series.
  2. Samsung Galaxy Note 10/10 Plus.
  3. OnePlus 7T and 7 Pro McLaren.
  4. Apple iPhone 12 series.
  5. Apple iPhone SE.
  6. Butterfly 2.
  7. Butterfly S.
  8. Desire 501.
  9. Desire 600
read more
Gadgets

Solar Motion Light and Solar Security Light for You

Solar Motion Light and Solar Security Light for You

Solar motion light is very cost-effective. Besides, you can use these products like energy-saving alternative illuminating solutions. As these products run on solar energy, you can reduce the electric bill by using these products. Apart from this, these can automatically detect any kind of movement. As a result, by installing this product, you can protect your home or property from thieves. You can easily mount these solar motion lights on the walls. Although most of the solar motion light manufactures offer a proper instructions manual that will let you know how to mount the light.

Working of Solar Motion Light

The entire system’s main parts are A solar panel, a battery, a controller, and a light. But before using, you need to make sure that the battery is charged enough by using the sun rays—no matter whether the battery is of lithium-ion type or any other type. You need to charge it with the solar panel. These panels take the energy of the Sun and then transform it into electrical power. After that, the battery stores electrical power.

When it detects any movement, it will turn on quickly. You can turn the mode on also. As soon as you turn on the product, it will illuminate the surrounding area.

Here, we have listed the top seven best solar motion lights. Besides, from this article, you will also get to know some new tricks that let you know how to select the best one.

7 Best Solar Motion Lights

Let’s have a look at these products.

  1. LITOM Solar Powered Motion Security Lights
  2. URPOWER Solar Powered Motion Security Lights
  3. Aootek Outdoor Solar Security Lights
  4. AmeriTop 128 LED 800LM Wireless LED
  5. Otdair Solar Security Lights
  6. Richarm Solar Flood Lights
  7. Eecoo Solar Light Camera with LED Lights

Best solar powered motion security light

LITOM Solar Powered Motion Security Lights— Value of money

litom solar powered motion security light
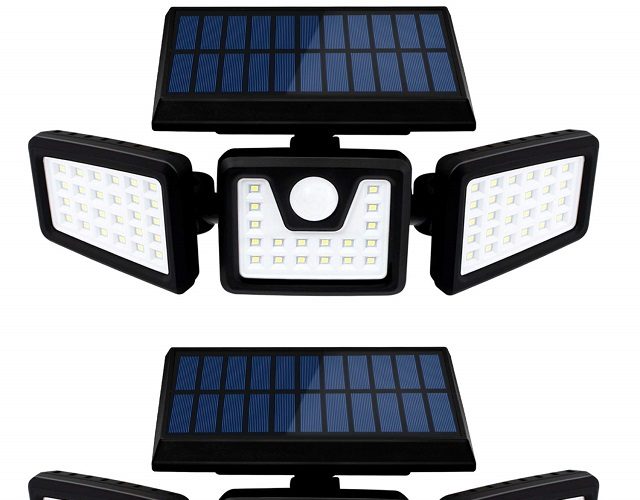
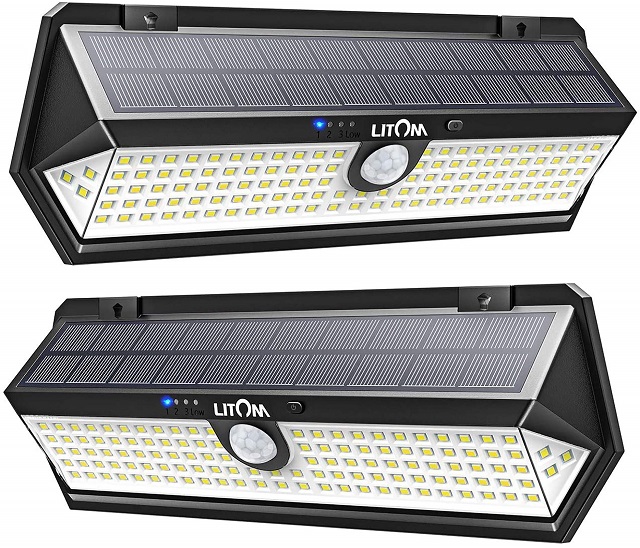
One of the leading brands available in the market is Liton. What makes the product exceptional is that it is equipped with combining the two most efficient and green technologies—LED and solar. Furthermore, it can harvest solar energy with ease. And then, it stores the energy in the battery to use later. By doing so, this product can brighten up for 20 seconds.

Usually, this Litom model can irradiate up to 200 square feet. And up to 800 square feet when you use four lights continuously. This product comes with approx 270° wide-angle design. Moreover, this lamp contains a sensing distance between 10m and 11m.

Features:

Durable

The lifespan of the product is more than 30000+ Hours. Besides, the model is equipped with premium ABS & PP material that makes it very durable. It is IP65 waterproof. That means this product is safe from rainstorms, blizzards, or daily heat also.

High-efficient Solar Panel

This product comes with a High-efficient Solar Panel. It allows the product to charge 25% faster than ordinary models available in the market.

Three Convenient Modes

This product comes with three different modes compared to other single-mode ones. As a result, you can mount it on the front door, back yard, garage, driveway, deck, pathway, porch, and so on.

Pros:

  • Three Convenient Modes
  • Durable
  • Saves electricity

Cons:

  • Doesn’t last long

URPOWER Solar Powered Motion Security Lights— best-overall

URPOWER Solar Motion LightThe long-lasting and durable model comes with an exceptional and unique design. Besides, this product comes with an outdoor motion sensor that helps boost your house’s security. This sensor remains in active mode only when someone moves. Moreover, it will switch off the model as soon as the movement stops. The sensor angle of the product is 120°, and it can cover up to 10 feet.

Features:

Excellent design: It comes with both positive and negative pole directions available on the product’s bottom.

Long-lasting: This product comes with eight LEDs. As a result, this model can give a brighter illumination. Besides, it can also last longer compared to other products.

Weather resistance: These models are heat-proof as well as IP64 waterproof. Therefore, these are easily suitable in multiple weather conditions. This model is perfect for the irradiation of your garden, yard, porch, patio.

Energy efficient

The main focus of the product is to save energy. Furthermore, it also helps to protect the environment. Besides, it comes with the latest design and innovation that can attract the most users.

Automatic switch: This product automatically turns on as soon as it detects any movement. And it turns off automatically, too, when the motion stops. It has a sensitivity range of 10 ft as well as a 120-degree sensing angle.

Pros:

  • Reasonable price
  • Simple to use
  • Both waterproof and heat-proof

Cons:

  • Dead within a few months of use.

Solar motion sensor light outdoor

Aootek Outdoor Solar Security Lights—the premium choice

Aootek Outdoor Solar Security Lights
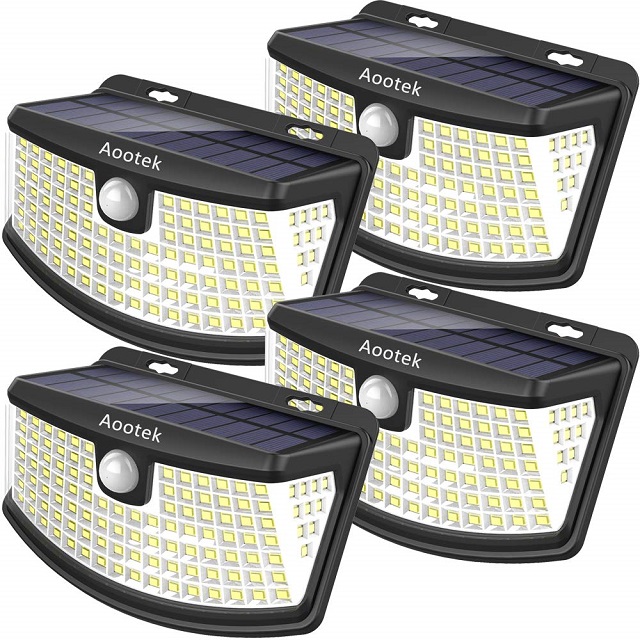
This outstanding model from the brand Aoote can detect motion at 26 feet of distance. A sensor angle of 120° helps this product to do so. Apart from this, it comes with a rechargeable lithium-ion battery. Due to being equipped with a powerful 2200mAh battery, the product can run for a long time.

Similar to the Litom LED product, this product has three modes of operation. These three modes are Bright mode, dim motion sensor, and sensor mode. The dim motion sensor indicates low brightness at night. When the product is in sensor mode, it turns into bright mode for up to 30 seconds.

Features:

Three Mode: The three modes are security mode, permanent On all night, and smart brightness control. It contains a motion sensor that helps to turn on and off the model automatically. The Permanent On all night mode turns on at night. And it will keep on all night. When the product is in Smart brightness control mode, it will turn brighter while detecting any movement.

Sensitive PIR Motion Inductor: This product can easily detect any kind of movement, taking the help of an upgraded Motion Sensor Detector and a Greater PIR sensor. It can detect movements up to 26 feet within an angle of 120 degrees. Furthermore, it comes with a 2200 mah rechargeable lithium-ion battery that is brighter and long-lasting.

Ultra Brightness: Compared to other models, it offers a more comprehensive detection range and brighter illumination.

High Efficient Solar Panel: This model is equipped with a PET laminated solar panel and premium LED. Additionally, this product lasts long and comes with very durable construction as well.

Waterproof IP65 and Heatproof: You can use this product for walls, patio, garden, porch, lawn, pathway, gutter, and so on. The design structure of the product is exceptional. This product is suitable for usages in different weather conditions.

Pros:

  • Long-lasting
  • Heat-proof

Cons:

  • Unable to hold the charge for a long period

Solar security light with motion sensor

AmeriTop 128 LED 800LM Wireless LED

AmeriTop 128 LED 800LM Wireless Solar Motion LED Light
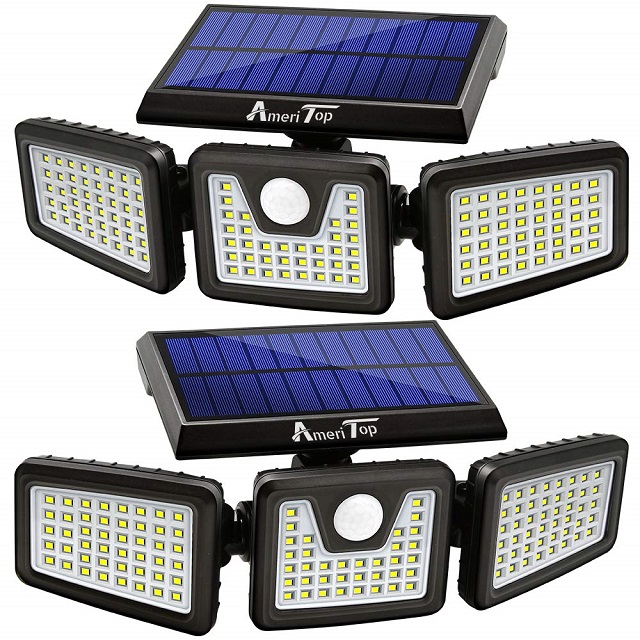
This product is equipped with 128 super bright LED beads. It can create up to 800lm 6500K high brightness output. Besides, the upgraded polycrystalline silicon solar panel has a 20% high conversion rate.

Features:

Enhanced PIR Motion Inductor – It has an upgraded wide-angle motion detector that can detect movements up to 26 feet. It remains off in the day and turns on at night automatically. And it will turn off at night when it doesn’t get any movement for 30 seconds.

Wide radiate Area – The model comes with an innovative wide-angle and three heads design. Besides, it has adjustable heads that can move upwards, downwards, and horizontally. Besides, it has Up to 270° wide angle along with a 16-26ft sensing distance. Moreover, this product comes with lens hoods and motion sensors with various angles.

All-Weather Resistant – The ABS material is used to make this product durable. This material makes this product suitable for bad weather. The IP65 waterproof rating ensures that users can use these products even in different weather.

Wireless Motion Sensor – The motion sensor is very easy to install. Hence, there doesn’t exist any wire or adapter.  You can use this product in your yard, garden, driveway, patio, entryway, and so on.

Pros:

Suitable in all weather

Improved PIR motor inductor

Cons:

Doesn’t last long

Unable to hold the charge for a long time

Otdair Solar Security Lights

Otdair Solar Security Light
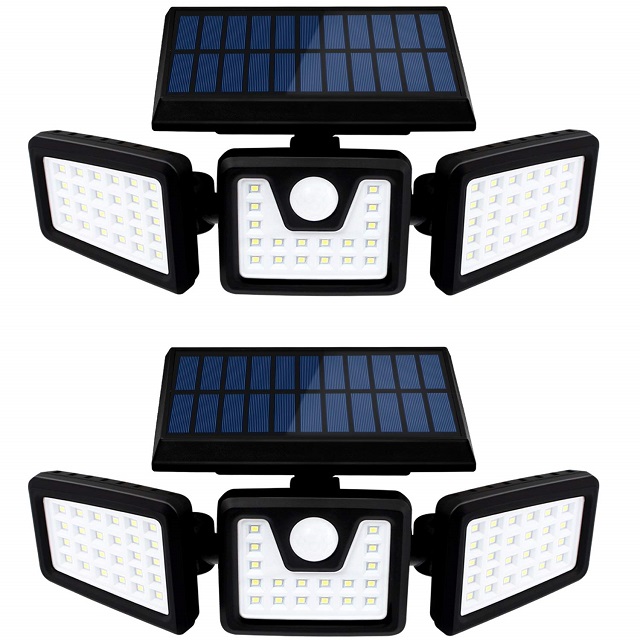
This product is both energy efficient and waterproof. The IP65 makes this model exact for outdoor usages.

The wattage of this model is 8W. Besides, it comes with a Li-ion Battery of 3.7V and 2200mah. By mounting the wall, you can install this product with ease.

Features:

Bright 360° Rotatable Design: It has three heads and a multi-joint rotatable design. This product has a 360° independently adjustable solar panel. As a result, you can rotate this product at any angle as per your needs.

2200mAH Eco-friendly Power: It comes with a built-in body motion sensor function and low sensor. With the help of the sensor, this product can detect up to 33 feet distances.

IP65 Weatherproof:  According to IP65 rating, you can use this model in snowy, and rainy weather. This product is suitable for patios, lawns, patios, etc.

Pros:

  • Easy to install
  • Adjustable solar panel

Cons:

  • The night mode is absent.
  • Doesn’t last long

Solar motion sensor flood light

 Richarm Solar Flood Lights

Richarm Solar Motion LightThis model comes with a 6-watt rating. And it contains 42 LED bulbs, whereas every bulb has about 800 lumens power rating. Besides, die-cast aluminum is used to construct the bulbs.
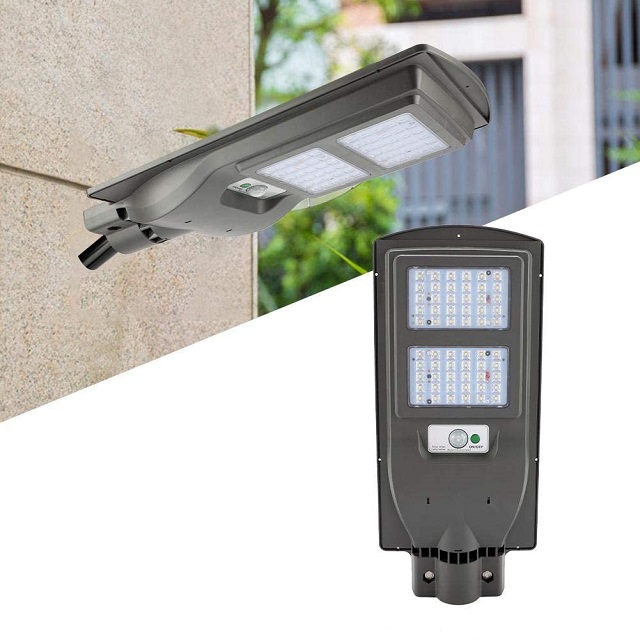
This product comes with a focus of 60 degrees wide angle. It enables you to illuminate anything in between 430 square feet. Furthermore, the efficient solar panel can easily convert 17% of the Sun’s rays into energy.

Features:

Automatic control: This model has an automatic controlling mode that turns it on at dusk and turns off at dawn. It has a bright led output at 60 degrees. As a result, it can cover a wider angle of 430 ft.

High Brightness: It contains 42 LEDs and a 3 V Battery. The beam angle of this product is about 120 degrees.

6W or 6V Polysilicon SOLAR PANEL: This model offers fast charging and gets completely charged within five hours. Furthermore, it has a 2200mAh, and 3.7V Rechargeable Lithium-ion Battery.

Pros:

  • Made of ABS material
  • Auto controlling mode

Cons:

  • Not suitable for security purposes

Eecoo Solar Light Security Surveillance Camera with LED Lights

Eecoo Solar Light Camera with LED LightThe Camera sensor of this Eecoo product is 1/2.7″ 1080P CMOS. And the angle view of the lens of the camera is 138°. Besides, the image resolution is up to 1920X1080.

The battery capacity of this model is the 8400mAH lithium battery. The camera only supports USB charging adapters. Furthermore, it has an output power rating of 5V/1.5A.

Features:

Monitor and detect movements: It can detect any motion with ease. As soon as it can get any movement, it will alert you on your phone, tablet, and PC.

Wider angle: This product comes with a Semi-arc design that makes it more convenient than an average solar camera. You can use it on the wall or any other larger area.

48LED: This product is equipped with 48 LEDs. With the help of this product, you will get bright illumination during the day and night. Apart from this, it can give clear images as much as possible.

Pros:

  • Offers clear image
  • Comes with Semi-arc design

Cons:

  • Unable to sync with Android device

Advantages And Disadvantages Of Solar Motion Light:

Before going to buy any product,‌ you must know the pros and cons of this product. Here, we have elaborated the details on the pros and cons of these types of lights. Let’s check out.

Pros:

  • These products don’t depend on conventional power sources. And it is one of the main advantages. These products are run by solar energy that further converts into electrical energy. And stores the energy in the battery. As a result, you can get rid of the extra monthly bills.
  • These products have a versatile use. It is not only for security lighting but also for making your landscape (home or property) more illuminating. You can install these products in the garden, patio, yard. It also helps to improve the security of your outdoor space. When it detects any movement, it will get turned on automatically.

Cons:

  • In too much rainy or snowy weather, the batteries can’t store up the sun energy properly due to lack of sunshine.

Solar Motion Light Buying Guide:

Nowadays, multiple brands are available in the market that comes with many different features. That’s why if you are looking to buy the best one, then you need to consider a few factors. Let’s have a look at those factors.

Capacity:

Perhaps you are buying this product to improve the security of your property or home. Therefore, you need to make sure whether it can detect movements properly or not. An efficient sensor light can detect every single movement and give you alerts at the right time. Furthermore, make sure that the product is very easy to install.

Intensity:

If you want to use this to illuminate your surrounding area, you should check the product’s lumen capacity. However, in case you need a dimmer one, then lower lumen lighting can help you.

Waterproofing Ability:

The essential thing which you need to consider is the waterproofing ability. Certainly, you are not willing to waste your money by buying these products again and again. Isn’t it? Therefore, you have to use those which are suitable for rain and snow.

Price:

It is a factor that you may consider first. But the price of the product varies according to the brand and the features of the product.

Warranty Period:

The next vital thing you need to consider is to check the warranty period of the product. It sometimes happens that you may face something wrong with the product. In that case, if the product has a warranty period, you can get assistance from customer service.

Battery Capacity:

The battery capacity is also a dependable factor. For how long the product will illuminate will depend on the battery capacity. As well as make sure that the product is equipped with the feature of dim mode.

These are a few factors that you should remember before buying the solar motion light. Don’t make a hurry. Take your time to think about which one you should go for and make the final decision.

Frequently Asked Questions:

  1. What is the best solar motion sensor light?

Some products are best for the budget when a few have the best sensor. The names of the products are as follows:-

  • LeonLite LED Security Lights.
  • Maxsa Motion-Activated Security Outdoor Spotlight
  • Baxia Technology Solar Motion Sensor Lights.
  • Sengled Smartsense
  • Mr. Beams Wireless Outdoor Spotlight
  1. Are solar motion lights any good?

These products are usually very reliable. And it can be charged even in bad weather conditions. The quality of these products depends on the solar panel and the quality of the battery.

  1. Do solar lights need the Sun or just light?

No, these products don’t take sunlight directly for charging. What these models need is light in such a form so that it helps to get turned on.

  1. How do you install a solar motion light?

If you want to install this product, the tools you need are Drill, Drill bits, Ladder, and Screwdriver. Now you need to follow the below steps:

  • First, all you need to do is position the light.
  • Then, you need to remove the mounting bracket.
  • Next, you have to mark and pre-drill the holes with the help of a drilling machine.
  • After that, you need to screw on the bracket.
  • Then, what you have to do is attach the sensor light.
  • After choosing the sunny spots for the panel, you have to mark the position of the holes.
  • After that, you need to pre-drill them.
  • Now you need to screw the panel. And make sure that the angling is towards the Sun.
  • Now, you need to plug it in the power cable. And wait for the sunlight to charge the batteries.
  1. Is solar motion security lights able to withstand rainy, snowy weather?

Due to being constructed with waterproof materials, these products can efficiently deal with any weather. But even if the product has waterproof ability, you should not plunge into the water intentionally.

read more
InternetDo It Yourself

How to Free Up RAM- Tips to Free Up Physical Memory

How to Free Up RAM- Tips to Free Up Physical Memory

You will note that your system fails to complete tasks as you use up the entire available memory on your computer. If you notice that your computer programs often crash and it takes more time to do basic tasks, you may be thinking about how to free up RAM on your device.

What is RAM?

The Random Access Memory (RAM) of your computer is located on a memory chip and is usually located on the motherboard. This is where short-term data is saved on your computer. For all current and operating programs and operations, This memory chip is the center of storage. Your computer uses the data it has stored in RAM to complete tasks while obtaining and executing other functions at the same time.

The output of your computer will slow down when you use up all the usable RAM memory since it does not have the space needed to complete its tasks. When you clear RAM space, your computer gets the ability to execute tasks. There are various ways that you can free up RAM space, depending on your device.

How to Optimizing Your RAM

Using your RAM will be simple since it supports so many features. Try these fast solutions to free up RAM space before you start deleting programs from your computer.

Restart Your Computer

Restarting your device is the first thing you can do to free up memory. All of your Random-access memory (stored data) will be scrubbed away when you restart or switch off your device, and programs will restart. This will theoretically flush out certain systems and applications that eat up the RAM storage operating behind the scenes.

Update Your Software

It is critical that the most up-to-date versions of your computer program and applications are working. It can require more memory to handle older applications and app renditions, causing the computer to slow down.

Try a Different Browser

Switching browsers is something else that you can do, as some of the browsers use more data than the others. Start using a browser like Chrome or Firefox, which are usually decent memory management browsers, if you’re not already using them.

Clear Your Cache

The next thing that you can do is to clear your cache if you ever find yourself low on RAM. Often, since it utilizes RAM for memory functions, the cache will take up a lot of space. Instead of uploading them again, the cache keeps on to data that your computer uses to reload sites it has used before. This will save you time while browsing, but if you are low on Random-access memory, it’s something you can compromise with negligible effect.

Remove Browser Extensions

The use of browser extensions has made most of your everyday work and home computer operations easier. However, they still need memory, so you may want to think about deactivating your extensions or deleting them.

How to Free Up RAM on Windows 10

If you are still having difficulty freeing your memory storage, then you probably may have many programs and software on your device without even knowing. Consider these five ways to free up RAM storage for Windows 10 devices.

1. Reduce Visual Effects and Animation

With developing technology, there are even more options for computer effects and animations. For example, for applications and artifacts that use storage for unwanted effects, you can switch off the animations. There are some consequences you can shelve before you free up more memory if you happen to be running low on RAM capacity.

To open the visual effects on your computer:

  1. Go to the File Explorer.
  2. Right-click on “This PC” on the left-side column and choose “Properties.”
  3. On the left, press “Advanced system settings.”
  4. Choose the tab labeled “Advanced.”
  5. Under the Performance group, select settings.
  6. Change to “Adjust for best performance.”

This setting would disable all your computer’s animation functions. This will provide more room for you but will drastically restrict the aesthetic of your device. However, you can also modify the visual effects your computer can execute in the same tab to your tastes.

2. Keep Track Memory and Clean Up Processes

You can track the use of your computer RAM so that your capacity is not exhausted until you actually need it. You should navigate to the task manager to verify the processes in order to monitor the computer’s memory. This is where you can see which systems are running and what kind of storage they occupy.

To go to your computer memory:

  1. Open the Task Manager by pressing Ctrl+Alt+Del keys.
  2. Click the tab labeled ‘Processes.’
  3. To see how much storage they are taking up, press the ‘Memory‘ tab.

You will also see which of the applications on your computer takes up the most space and time. You can uninstall programs you don’t use, or if you find anything suspicious, that takes up your memory.

3. Control Running of Background Apps

Your applications that are scheduled to run automatically in the background are the next objects that could take up RAM. You could have used your device for years before realizing that these applications are eating up your RAM capacity. This will drain your memory, battery, and data capacity easily.

To stop the applications from running in the background:

  1. Go to your computer settings.
  2. Click on the category for ‘Privacy.’
  3. Scroll down to “Background Apps” on the left side panel.
  4. Switch off any apps that you are not using.

Applications are also automatically set to run in the device’s background. This makes it easier for them to view notifications and automatically update their apps. You will conserve RAM capacity by shutting this feature off for apps you don’t need.

4. Disable Startup ProgRAMs You Don’t Need

If you have been using your device for at least a couple of years, so you are likely to have downloaded a reasonable amount of applications that you have either missed or are no longer using. You would want to navigate to the startup tab to remove any you no longer need after the processes tab tells you which programs use the most space.

To disable startup programs:

  1. From the Task Manager, click the “Startup” tab.
  2. To organize the services from high to low use, click “Startup impact.”
  3. To uninstall any programs that you don’t use, right-click.

Startup programs are those that activate after booting up your computer. Without your permission, each one takes up a little bit of RAM in the background when these programs launch. All of the software and programs can add up after a while. Be sure to disable or uninstall the ones that aren’t required.

5. Always Clear Page File When Shutting Down

After you restart your computer, your page files will not be removed or reset because they are saved on the hard drive, unlike RAM. So it doesn’t get cleared with the others at shutdown as RAM gets stored on-page data.

Deleting page files will remove any RAM it has stored and help keep your computer running smoothly on your hard drive. This can be changed to clear automatically, much like the RAM, when your computer shuts down.

Open the Registry Editor to do this.

  1. Type “Registry Editor” into the search bar of the start menu.
  2. To open the Registry Editor to make changes to your computer, click YES.
  3. Scroll to the left and chose “HKEY LOCAL MACHINE.”
  4. Scroll down to pick “SYSTEM.”
  5. Choose “CurrentControlSet.”
  6. Find and choose ‘Order.’
  7. Scroll down to choose “Session Manager.”
  8. Look for “Memory Management” and select it.
  9. Choose “ClearPageFileAtShutdown.”
  10. Under the value data, enter the number ‘1’ and hit OK.

How to Free Up RAM on Mac

There are also useful applications for tracking and clearing up RAM capacity on your device for Mac users.

1. Free up Disk Space

If you learn that your Random-access memory is fully loaded, but you still need storage, you can use free space called virtual memory on your Mac drive. This extra storage can be found on the hard drives of Mac computers so that you can continue running applications. The feature is always on, so you would need to make sure that you have driver space available to swap in order to use virtual memory.

2. Check CPU Usage

To check your CPU health and utilization, you can also use the Activity Monitor application. The CPU is your Central Processing Unit, which carries out commands from the data stored as RAM in the computer program.

Just choose the ‘CPU’ tab next to the memory tab to manage your CPU. This is where you can see if the computing capacity of any app is greater than that of others.

3. Fix the Finder (Close Finder Windows Too)

The data each window shows are stored as RAM when you open a new window in the Finder. Instead of new finder windows, changing the finder settings will render the files open in tabs.

To open your Finder Preferences:

  1. On the top left of your screen, select “Finder.”
  2. Right-click from the drop-down options on ‘Preferences.’
  3. Check Open tabs for folders instead of new windows.

There is another way to clear the RAM storage; by combining your Finder windows. To do this, click the “Window” drop-down instead of the Finder. You’ll pick “Merge All Windows” from there to put all of your Finder windows in one place. This will declutter your desktop as well as conserve your storage.

4. Clean-Up ProgRAMs and Applications

You will want to keep your device clean and tidy if you are trying to retain a consistently safe amount of RAM storage. As macOS sees each screen icon as an active window, a cluttered desktop can consume storage far more quickly. And if you don’t think you should organize your files, it can free up a lot of RAM by throwing everything into one general folder.

5. Check Activity Monitor

You should check the Activity Monitor to keep track of your Mac RAM use, which tells you how much storage is being used and which apps are using it. To determine the applications that take up much of your storage, use the Activity Log. Delete the ones that you are not using anymore.

To Check the Activity Monitor:

  1. Search in the spotlight search bar for ‘Activity Monitor’ (command + space).
  2. Select the “Memory” tab
  3. Delete the unwanted apps.

How to Free up RAM on Windows or Mac – Additional Ways

Being proactive about the RAM of your computer is the safest thing to do so that you don’t have to think about clearing space. Use these additional ways to free up RAM on your Windows or Mac:

Increase RAM

You can still add more RAM to your computer if you have a huge amount of information you don’t want to remove. For a desktop computer, purchasing and downloading RAM is simple to do, but it can be difficult for laptops. Make sure you invest in the right kind of RAM for your device as well as the right amount for your individual storage needs.

Install a Memory/RAM Cleaner

There are memory cleaning applications to help you clean your computer if you feel that you do not have the time or you simply can not manage to arrange your files. Most of these cleaners have exclusive features or extension elimination capabilities that allow users to handle their startup programs.

Scan for Virus and Malware

When you download certain apps, software, or extensions to your computer, there is the risk that they may have a virus or malware added. If any malware or virus enters your computer, it will steal both your details and your RAM storage.

How To Free Up Ram In Android

Use these ways to clean up the RAM of your Android device and get decent performance out of it if you have been having performance problems on your device due to applications eating up all the memory.

1. Find the apps that are using the most memory

You should check the status of your phone to see how much memory (RAM) is actually being used and which applications are most used. Remember that RAM is supposed to be used, so it isn’t bad to have only a little leftover RAM available. As this is the most powerful use of it, Android will try to keep the bulk of your free Random-access memory in use.

  1. On your phone, open the Settings app.
  2. Scroll down and tap “About phone.”
  3. Click on “Memory.” This will show some simple information about the memory use of your phone.
  4. Click the button for “Memory used by apps.” The applications that use the most RAM will be shown.

2. Remove old apps

Deleting unused applications will help increase your Android’s free space, as well as free up RAM if the apps run a lot in the background. Free disk space and free RAM can also further boost the efficiency of your Android. Apps you bought or got for free can be downloaded from the Google Play Store again at any time.

  1. On your phone, open the Settings app.
  2. Select “Apps” or “Application manager.”
  3. Go through the list of installed apps to look for apps you no longer use.
  4. To delete it, select an app and then tap Uninstall. This will uninstall the app, removing it from your device. If there is no “Uninstall” option, then the app must be preinstalled on your phone, and you cannot delete it.

3. Disable apps that you don’t use and can’t uninstall

Many Android devices come with preinstalled loads of applications that run in the background and take up resources from the system. Since without rooting your phone, you can’t uninstall these applications, you can disable them instead. You’re not going to have the storage back, but they’re also not going to work either.

  1. On your device, open the Settings app.
  2. Select “Apps” or “Application manager.”
  3. Find the app that you’d like to disable. There are also carrier applications or combined applications that you have not downloaded yourself.
  4. If available, tap ‘Uninstall updates.’ Before you are offered the opportunity to disable the program, you’ll have to do this.
  5. Tap on “Disable.” This will turn off the app and stop it from working.

How To Free Up Ram in iPhone

1. Restart your iPhone on a regular basis

Restarting the iPhone will reset the device’s memory. This will repair apps that misbehave and take up too much memory. It can boost general efficiency as well.

  1. Press and hold the Power button until the screen displays the Power slider.
  2. In order to turn your iPhone off, slide the lever with your finger.
  3. Click and hold the Power button again after about ten seconds to toggle the iPhone back on.

2. Reset the RAM on your iPhone

To clean out the Random-access memory on your iPhone, you can use a quick trick, bringing you more free RAM for applications to use.

  1. Until the Power slider shows, push and hold the Power button. First, make sure your iPhone is unlocked.
  2. When the slider shows up, press and hold the Home button for five seconds. When you’re successful, you’ll be redirected to the home screen. This will disable the RAM currently in operation.

3. Delete unused apps

You can get better results on your iPhone if you have any free storage space accessible. Deleting applications, you don’t need anymore is one of the best ways to free up space. For applications that usually run in the background, this would open up disk capacity and free up Random-access memory. You will be able to download all of your paid or free apps again from the App Store.

  1. Find an app you would like to uninstall from your home screen.
  2. Until it begins to wiggle, click, and hold the app.
  3. To delete it, press ‘X’ in the corner of the app. For any other applications that you want to uninstall, repeat. It is not possible to uninstall system apps.

Conclusion

Now is the opportunity for you to bring an end to file hoarding. Without you noticing it, all of the files on your phone and device take up RAM space. Now you know how to securely declutter these redundant files from your device and how to free up Random-access memory so that it operates more effectively.

Frequently Asked Questions

Q: What is RAM?

A: The Random Access Memory (RAM) of your computer is located on a memory chip and is usually located on the motherboard. This is where short-term data is saved on your computer.

Q: Will doubling RAM improve performance?

A: If your device has less than 4GB RAM memory, we encourage you to add more RAM since it will greatly improve your device’s performance.

Q: How do I check RAM usage on Windows?

A: You can check your PC’s RAM usage by following some simple steps. Right-click on the Windows taskbar and open the Task Manager. Click on Memory, and you’ll be able to see the memory usage.

Q: What happens when phone RAM is full?

A:  It’ll slow the phone down. Full RAM will slow your Android phone. To be exact, switching from one app to another will be like waiting for a snail to cross a path. Plus, it will slow down some apps, and the phone will freeze in some irritating situations.

Q: Is clearing cache harmful?

A: Cache files are temporary files that are created dynamically when your Android phone is used, such as when you access the internet, use applications, sync your mail, etc. You will delete the memory from the cache at any time. This will not damage your phone. It will free up your internal and external storage.

read more
Do It Yourself

How to Type Faster on Keyboard: Amazing tips to type faster

How to Type Faster on Keyboard: Amazing tips to type faster

In this digital age, almost all people try out typing quite often as typing has become a necessity. Gone are the days where you used to work manually without machines and computers. But, in this modern age, it’s all about computers and machines. So, typing is a must to increase your productivity and also to get your things done quicker. But most of us do not know how to type faster on keyboard.

Usually, typing faster can enable you to keep your brain sharp, and the best part is you’ll also get some good & fresh ideas as well because of your brain activity.

Generally speaking, typing is much fun when you get used to it. But, it’s a demon when you are new to typing. If you are a writer means you’ll love typing your ideas on your computer as it’s the best thing to store your creative thoughts.

Are you able to type faster to make your work faster than you usually do? Do you want to be more productive by learning how to type faster?

In that case, you’ll learn about how to type faster on keyboard in this particular post. I’ll cover how to type faster on keyboard by providing some helpful tips and techniques.

Let’s get started with How to Type faster on keyboard tips.

Type faster on keyboard tips

How to Type Faster on keyboard: 10 Amazing Tips and techniques to Type Faster

As you’re striving to know how to type faster on keyboard, these 10 Amazing tips and techniques will help you type faster. Follow these simple hacks and improve your typing speed to increase your productivity in 2020.

How to Type Faster on Keyboard Tip 1- Make your workspace and Typing Area Neat and Tidy

Making your workspace clean and tidy can help you focus on your typing. This simple hack can definitely help you to type faster. Usually, lots of people don’t believe this statement, as they believe fast typing comes when they master the keyboard.

But, the real truth is you will have to start it by making your workspace neat and tidy. Along with that, your workspace should have enough ventilation, and it should be comfortable with making you relax.

At that time, your typing speed will improve. Apart from that, for fast typing, you have to get a computer table or working table to increase your typing. Avoid using a laptop or tablet on your lap as this decreases your typing speed.

How to Type Faster on Keyboard Tip 2- Always Get Rid of Bad Typing Habits:

It’s quite apparent that a person can’t get rid of their bad typing habits at once. But, he/she can do it while they start leaving their bad habits by inculcating Good habits. Most of the people are probably using the same old typing methods since they started using the keywords.

If you are a game who loves to play games, then your fingers will be on WASD Keys, or you’ll most use arrow keys. They will get used to those keys, and they will use only two or three fingers to play them.

Later on, it will be harder for them to use all fingers for typing as they got used to it. Some people type with only two fingers or three fingers, some might hover over ten keys and leave the others. If you’re one of them then, stop that way right now. Just practice to use all the fingers to type; at the start, it’ll be harder for you, but you can break that habit in the process.

How to Type Faster Tip 3- Always fix your posture while typing:-

If you’re striving to type faster, then you should have a correct position. The proper seating posture will help you type more quickly. The perfect pose for typing is “Keep your back straight and keep your legs planted a little apart and flat on the ground in your sitting position.

Make Sure; your wrists are postured in a way that your fingers can cover all the keyboard. Ensure your head is comfortable, you can tilt it a bit so that you can see the screen properly.

You can adjust your chair so that you’ll be able to get a perfect posture to type. In case your chair is uncomfortable for seating, then you should replace it to increase your typing speed.

How to Type Faster on Keyboard Tip 4- Properly hold your posture:

It’s always vital to maintain your position while typing. This can help you type faster, this is, in fact, the best typing tips from expert typers as well. When you ensure your posture is right, you can avoid getting aches on your wrists.

Usually, aches can slow you down and keep you out of your rhythm very soon. So, avoid getting pains on your wrists and keep your back & Shoulders from hunching, make sure to sit up straight. Because of following these steps you’ll be relaxed. This can accomplish your goal to work faster by typing faster.

How to Type Faster Tip 5- Accustom yourself with the keyboard:

As you are striving to learn how to type faster on keyboard? The prime set you have to do is accustom yourself to the keyboard. You have to adapt the keyboard in such a way that you can use it to type faster. The best thing for you is most of the modern-day keyboards are with the same layout.

So, you don’t have to worry about that. The QWERTY layout keyboard is a regular keyboard.

Work on reminding all the keyword positions because this can help you type faster. Most of the people just memorize Alphabets, numbers and leave the punctuation marks. But, those are vital for fast typing as well. You have to understand everything where they are without looking at the keyboard properly.

How to Type Faster tip 6- Remind Keyboard Keys by closing your eyes:

Most people think this as waste or childish point. But, it works perfectly, so you have to try it out. Whenever you close your eyes and remind all the keyboard keys. Try out saying them loud by pressing them; this can help you know the touch.

Type faster on keyboard tips

Simply, touch a letter or number and pronounce that key as you touch them and see if you said it right or not. If you said it right, then you are good to go with typing. In case you didn’t know, it means you have to re memorize the keyboard again.

How to Type Faster tip 7- Start Touch typing slowly:

To enhance your typing speed, you need to develop that skill. At the start, no one can master typing as you should get accustomed to it. By slowly touch-typing the keyboard, you can become a high-speed typist.

This touch typing is one of the quickest ways to master typing. If this type of typing is the first time means you have to spend a bit more time on it to learn. Then slowly, you will pick up the speed. If you can remember keys and touch them without seeing the keyboard, you can definitely increase your typing speed.

At the start, this typing method might seem like a demon to you, but you can improve as time progresses.

How to Type Faster on Keyboard tip 8- Stick with Typing and Don’t look at your hands:

You have to follow this step as its the essence to make you type faster. If you can stick with typing by not seeing your hands means you can master typing. As you can improve your fingers movement and learn how the keys work.

At the start, you might find it harder, but it will increase your speed. Stick to it and see the results when you master the art of typing. You can reach high typing speeds with this step.

How to Type Faster tip 9- Use All 10 Fingers to Type Faster:

Most people never use 10 fingers to type, that’s why their typing speed will be on the lower side. If you want to type faster, you have to use all ten fingers.

Generally, if you take a look at your keyboard, you will be noticing a raised keys in form of  “F key” and J key. This is to help you find the correct placement.

So, it’s always best to rest your index fingers on F and J keys. Because of that, other fingers will automatically fall into the perfect placements. Use your little finger to control the punctuation, navigation and function keys.

In case, if you’re confused in getting my words you can check sites like Typing web and typing club to take lots of typing suggestions with videos and screenshots. The typing programs found on these websites help you type faster.

How to Type Faster tip 10- Practice until you succeed:

There is a say, that practice makes a man perfect. Follow that to master the touch typing technique, in case if you are uncomfortable with that technique you can use other techniques by using your 10 fingers.

Although mastering touch typing technique will prove to be a finicky aspect but once you get in touch with it you will not leave that.

Practice it daily until you get both speed and accuracy as well. With continuous efforts, you can improve your type of speed.

How to Type Faster tip 11- Practice Dictation: 

  • Generally, if you don’t know what to type you I’ll certainly be blank. If you’ll be a blank minded means you I’ll lose your typing practice. So it’s best to practice dictation while typing by listening to others. This improves your speed and accuracy as well.

You can even get a book or other talk show and type the word’s you listen to improve your typing speed.

Monitor your typing progress: 

As you are striving to type faster, you should monitor your typing progress so that you will be motivated to work more.

It is always important that you don’t get your result in a negative way, as at the start you’ll be like that. Slowly you can improve and Master typing skill. You can even check how many words you are typing for a minute and up the count by gradually improving the numbers.

Get training if you need to Know How to Type Faster on Keyboard:

If you want to get trained by a professional institute then you can enroll in any typing course but mostly it won’t be required because there are hell a lot of online typing tools.

Conclusion:

This is all about, how to type faster on keyboard post. With these tips and techniques you can type faster. After reading this article you can go and start practicing typing.

read more
Gadgets

Google Pixel 4 Vs iPhone 11- Which is the better Phone?

Google Pixel 4 Vs iPhone 11- Which is the better Phone?

Most phone companies these days try to copy what the other has done and also add something of their own to differentiate their offering from the rest. That’s what’s happened here too. The Pixel line up was started to give Google a boost into the mobile market. So they decided to do precisely what the competition was doing. Here the competition is Apple. Since then, Google has made its own tweaks and come up with a phone of its own: Pixel. Let us drill down Google Pixel 4 Vs iPhone 11.

Dig the Pixel 4 Design or iPhone 11’s in Google Pixel 4 Vs iPhone 11:

The iPhone 11 had taken the almost bezels less route when it came to its display. The only significant part of its bezel came in the form of a notch sitting at the top of the screen. Still, no one minded it; otherwise, it wouldn’t have been there in the first place.

As for Google Pixel 4, you get again the same almost bezel-less display with a large part of it taking up real estate at the top of the screen. This houses the Solei radar sensor to see your hand gestures.

Coming to the rear of both phones- they both look similar. With the Google Pixel 4, Google has opted-in for a dual camera set up that comes in a square format, much like what Apple has done.

The color options vary with Apple’s iPhone 11 being available in white, black, green, yellow, purple, and red. Google Pixel 4 comes in the boring options of white, black, and the – not – so – boring – orange choice.

Winner for this round goes to Apple iPhone 11.

The screen in the battle between Google Pixel 4 Vs iPhone 11:

iPhone 11’s display is more prominent but with less resolution and Pixel 4 has a smaller screen with a sharper resolution.

Talk of the display, and you come to refresh rates with the Pixel 4 having a 90Hz refresh rate and the iPhone having the standard 60Hz.

Overall the viewing experience feels better in Pixel 4. Now we’re even.

Pixel 4 Vs iPhone 11

Dual Camera Set Up on Both Phones:

Zoom out with iPhone 11’s ultra-wide camera and zoom in with Pixel 4’s telephoto lens. These are in addition to the main camera on both phones.

Both phones allow you to take excellent photographs. The both have some iteration of taking shots of the night sky. Both phones also have accompanied photography software to make your photos look even more incredible.

Again it’s a tie in Google Pixel 4 Vs iPhone 11.

Now to the Hardcore Stuff- Performance in this Battle between Google Pixel 4 Vs iPhone 11:

Ok, it’s a clear hand down to Apple in this round. The iPhone 11 houses Apple’s very own A13 Bionic chip. This chip simply beats the competition with its sheer power. Gaming is excellent, Apps run smoothly, no lag, it’s merely exceptional.

When it comes to the Google Pixel 4; the phone houses one of the best chipsets seen in Android so far- a Snapdragon 855.

In the end, it is Apple’s iPhone 11 that takes the top spot in the competition Google Pixel 4 Vs iPhone 11.

read more
Do It Yourself

Add Video to Google Slides to Entertain Your Audience

Add Videos to Google Slides to Entertain Your Audience

A video always makes for a more powerful presentation. It provides a required break in the normal flow of a presentation and generally makes thigs more entertaining. Hence many powerful presenters opt for a video to make their presentations more dynamic. So how do you hold your audience’s attention? We’re here to tell you how to add video to Google Slides. There’s always the option of pausing the video mid-stride and looking for the video elsewhere. This is not a good option if you catch my drift. Plus it won’t make you look good too. So the easiest way then is to place it in the slides itself. Believe me; it’s easy enough to do so too.

If you’re presentation is unusually long, and you don’t want to lose your audience mid- way then the best option is an aptly placed video. In this article, we’ll be showing you just how you can do that.

There are options when you place your video to your Google Slides. You can have it play automatically as soon as the slide comes up and even stop it at certain intervals if you’d like to add a point or two. So without further ado, sit back and relax as we take you through the steps involved in adding video to your Google Slides.

Add video to Google Slides:

YouTube has become a library, of sorts, for videos. So it’s more likely that you’ll find that you need a video or two from there. This then becomes easy. Most of the legal work already done for you. It becomes a simple, emphasis on the simple, case of adding video to your Google Slides and Presto! You’re done.

You can even tweak it a bit to make it more to your liking. Here’s how you can add videos to your Google Slides using YouTube…

The first step requires you to go to the slide you wish to place the video in and select insert. Once there choose the option of video.

On the other side, go on to YouTube and look for the video you want. Once you’ve selected the one that best matches your presentation, double click the video or press “select” at the bottom of it to get it into your slide.

If you already happen to know which video you want by URL. Just select the option of placing the video by URL. Copy and paste the URL into the given area, and you’re done. In case you don’t know where the URL is- it is present in the top bar of the web page.


Have your own Video? No Worries follow these Simple steps to add video to your Google Slides:

The roundabout route involves uploading the video to YouTube and following the steps mentioned above. If that’s not your thing, which for most isn’t, then keep on reading…

The other step involves uploading the video first and then letting Google Slides know where you’ve uploaded it to. Since Google Drive and Google Slides are connected, thankfully at that, you can first upload your presentation to Google Drive first and then begin. To upload the video onto Google Drive, follow the following steps….

Click the new button in Google Drive. Then click the file upload button. Or you can always go the drag and drop way.  Once this is done, go on back to Google slides and press insert, then followed by video. Choose Google Drive at the top of the options list. Once this is done, you’ll see all the videos present in Google Drive.  Just select the one you want by double-clicking and your video will be in your slides. It may, however, take some time to get there. But in the end, get there it does.

Cases where you’ve received the File from Someone:

In cases where you’ve received a file from someone else instead of choosing the drive option in the insert, choose the shared with me tab. Then it’s pretty much the same from there.

Getting your Video Slide ready:

If you just place the video in the presentation as – is then you’ll have to manually play the video when the slide comes up. And if that’s alright with you, then you’re done. If not then continue reading on further…

However, there are still some points that can make your presentation a little more put together. Right-click on the video that you’ve placed on your slide to get to video options. You’ll then see a bar on the right that will have several options. This first option has a start and ends time if you’re not keen on playing the entire video. This allows you to play a video say from the middle to somewhere to the end if that is most appropriate to your presentation.

The second option is to press autoplay. This will make the presentation play as soon as you get to the slide. This is so that you don’t have to manually press “play” on the video when the slide comes up and break the flow of your presentation.

The other option is to mute the audio so that you can provide the voice over instead.

Once all the options are selected, you may want to play the video again to ensure that everything is working as it should.

Be Smart While add video to your Google Slides:

Now, since you know how to add videos to your presentation, you’ll look smarter while doing it. Not only that, it adds a particular pizzaz to your presentation skills. Your audience will be noticeably intrigued by your work.

You now know how to place any video into your Google Slides presentation, be it form YouTube or your own. Besides this, you also have learned how to tweak your video a bit to make it just right for your presentation. Hope you find these tips to add video to Google Slides useful and here’s to happy presenting!! Cheers!

read more
1 6 7 8 9 10 15
Page 8 of 15