close

Software

Technology NewsAppsDo It YourselfSoftware

14 Best Cursive Fonts in Word

Best Cursive Fonts in Word

People can insert graphics, images, word art, charts, 3D models, screenshots, and other modules here. In addition, it can provide different fonts that we can use in our documents to add value to your text. Ensure that you choose a suitable font for the text so that it can be easier for people to read.  We use these primarily for decorative invitations, stylish text work, informal letters, etc. Upon installation, this software includes a few default best cursive fonts in Word with different designs. While professional cursive fonts in Word are used on more serious matters, there are a few casual but beautiful cursive fonts in Word on the list.

Microsoft Word, acquainted as “Word,” is a famous platform you can easily access. Besides, you can use Word processing software easily. We use this for writing documents. It is the best software available in the technology market for this purpose.

What are Cursive Fonts in Word?

Cursive is a font style where letters touch each other. It means that the characters are joined. The font’s stylishness is one of the specialties of writing. If you use these in your document, the letters would be in flow. After that, you can see the text appearing as if it is handwritten.

A lot of fonts are available. So, when you apply them, these would look amazing in the document. If you are finding a few of the best cursive fonts in Word, go through the entire guide.

How to Use Cursive Fonts in Microsoft Word:

  • Your first job is to write any text you want in the Word document.
  • After that, you must choose the text or highlight it using the mouse.
  • Hit the Home tab.
  • Find any cursive font on the Font Box as per your wish. However, it is possible to browse several fonts to look for the best one.
  • Tap on your preferred font style or hit enter.
  • Finally, you can choose text appearing in cursive font.

How to Download New Cursive Fonts for Microsoft Word:

You can download these from several places online. While a few of these are free, a few of these are paid. You need to follow the following steps to learn how to find a cursive font, download it, and install it on your Windows 10.

  • Your first job is to head toward the font at https://fonts.google.com/.
  • Write a term into the search field at the window top. Next, you have to hit Enter. You should know that “cursive” doesn’t return many results. So, you should use something like “script” or “handwriting” instead.
  • After that, tap on your preferred font.
  • Choose the Download family option at the window’s top-right.
  • You must select a location for the downloaded zip file on the PC.
  • Your job is to tap on the file and select the Extract All option.
  • Hit the Extract button.
  • Finally, you must tap on the file and choose the Install option.

NOTE:

If you download this file from the internet, it could be downloaded as a zip file. Ensure that you need to extract the zip file before installing the font.

Suppose you have an active window of this software or other apps. Hence, your installed fonts will not reflect in any currently active software. Therefore, you should exit and close the program entirely to access new fonts.

Have you used third-party fonts in your projects or presentations? It is essential to take the installation file with the project because you have to install it on the System that will be used to give the presentation. In simple terms, try to keep a backup of these files.

How can you download Fonts using Feature-on-Demand (FOD) in Windows 10?

  • You need to head toward the ‘Settings’ of the app and open it after that on the computer. Then, you need to tap on ‘Apps.’
  • After that, tap on ‘Optional Features’ below ‘Apps & features.
  • Now, tap on ‘+ Add feature’ on the display screen.
  • Then, you should write the font family’s name in the search box. For instance, we use ‘Cherokee fonts’ as an.
  • As soon as you have found this, check the box beside its listing in the search results.
  • Tap on ‘Install’ at the display bottom.
  • Finally, your Windows 10 can download and install this from Microsoft’s servers.

Remember that the wait time relies on the connection speed and the number of background tasks being performed on the System. However, it will take up to sixty seconds.

How to Install the Fonts on Windows 10 PC:

Before knowing the best Cursive Fonts in Word, you should first learn how to install these on the System. Once installed, you can use them outside of Word because these are installed system-wide. It is possible to use installed fonts in all apps like MS PowerPoint, Adobe PhotoShop, etc.

Different websites are available where you can get the fonts. It is possible to download and install them to use inside the software. Besides, you can use them inside other software on your System. In this regard, you should know that these are mostly free to use. But there are a few elegant cursive fonts in Word which you need to buy. You have to pay a certain amount to download & install them. You should follow these steps to download and install them on a Windows 10 laptop.

  • Your first task is to download a font. After that, you must tap twice on the TrueType Font file (extension . TTF) to open this.
  • Next, you will see your file. Finally, hit the Install button to install the respective font on the PC.
  • You can use this in MS Word and other software on the System.
  • Alternatively, if you go to the given folder, you can install the following:

C:\Windows\Fonts

  • Copy the TrueType Font file and paste this inside the above folder.
  • Finally, you have to reboot the computer. Your Windows would install this automatically on the System.

Install Cursive Font On macOS:

  • You should head toward the font which you have downloaded recently and then tap two times on the font.
  • After that, you should tap “Install Font” on the display’s bottom-right corner.
  • It is possible to use that font in the projects moving forward.

Some Default Cursive Fonts in Word:

These are names of a few of the best cursive fonts in Word online to which you have access before finding your own.

  • Segoe Script
  • Lucida Handwriting
  • Edwardian Script
  • Kunstler Script

You can try out many cursive fonts in Word documents by choosing the Home tab at the window top. Next, you must highlight the text you want to make cursive. Next, tap on the Font drop-down list and choose a cursive font option.

These are some of the best cursive fonts in Word:-

  • Brock Script Font
  • Simplesnails
  • Edwardian Script
  • Bradley Hand
  • Brush Script
  • Palace Script
  • Freestyle Script
  • Monotype Corsiva
  • Viner Hand
  • Vivaldi

How to Add Any Cursive Font To Microsoft Word?

If you want to add a custom cursive font to this software, you should download and install this on the PC. Afterward, you must head towards the Home tab and tap on the Font group. Now you should choose More Fonts. As soon as the dialog box appears, your task is to choose the Custom tab. Now, you should browse for the font installed by you. Choose this and tap on OK. At last, you can get the font in the software.

How do you write in the cursive font style In Word?

If you want to write in this style, choose the text you wish to format. After that, navigate to the Home tab. Next, choose the Cursive option from the drop-down menu in the Font group. Finally, you can see the text in this style.

What Are Some Common Cursive Fonts For Signatures In Microsoft Word?

These are a few common ones for signatures in this software, including:-

  • Script MT Bold
  • Brush Script MT
  • Lucida Handwriting.

Head toward the Home tab to choose these and tap on the Font group. After that, scroll down to the Cursive section and choose the desired font.

How To Add Fonts To Word in macOS:

If you use macOS, you should extract these with the help of Winrar for Mac OS if you want.

Different Cursive Font Styles with Applications:

You can now have an improved knowledge of these. So, you should know about a few beautiful font options that could be used on projects. Different styles are designed for simple tasks on personal branding projects.

Cursive Fonts for Logos

  1. Palmer Script & Sans:

This one is a bold script font which generally provides a handmade feel. Therefore, it is ideal for brands & businesses who are willing to emulate a retro spirit. In addition, it becomes flexible for various applications due to the thickness & weight of both upper and lowercase characters.

  1. Audrey:

This handwritten script font is stylish and ideal for logos & quotes. It is feminine but comes with a bit of an edge. As a result, it becomes suitable for unique designs. In addition, this one ranges plenty of ligatures to offer a real handwritten feel.

  1. Heather Oliver:

It comes with solid strokes, which can help you to translate many branding materials. Oliver is hailed by its designers as a “swiss army knife” among typefaces for its versatile usage. It has stylistic alternates for lowercase characters. Therefore, it is possible to tweak every Word as you wish.

  1. Thistails:

If you are looking for a monoline font, Thistails is something you should choose. It combines vintage aesthetics with modern sensibilities to provide a special effect. As a result, Thistails is suitable for youthful brands with an old soul.

  1. Signature Collection:

This is the font you must have seen at the end of an editor’s note or newspaper. It was designed to look so natural. In addition, it provides a complete set of stylistic alternates for lowercase letters and charming watercolor overlays for additional oomph.

  1. Barley

It is something made with an authentic modern calligraphy look. In addition, Barley comes with modern curves. It ensures its legibility in various applications. The unique thing is its handwritten quality making it suitable for digital sign-offs. You can use all lowercase letters to add a few essences of cuteness.

  1. Faustine:

It can add some flourish to digital signatures. Besides, Faustine can emphasize the handwritten effect with its “messy” style.

  1. Haute Couture:

This one features multi-thickness strokes, and it appears like every letter was scribbled using a fountain pen. Due to its excellent quality and calligraphic flair, this one has become a suitable option. It is perfect for fancy events such as weddings, black-tie parties, and metropolitan cocktails.

  1. Wild Love:

Wild Love Collection can amaze you if you prefer using fonts. This set has two ideal fonts. In addition, it includes a set of beautiful symbols that can give Instagram quotes and websites unique looks.

  1. Desirable Calligraphy:

It is the fanciest one on the list. Besides, Desirable Calligraphy’s classic elegance is palpable with grand flourishes. These can make the text pop.

  1. Groovy:

This one can offer a touch of retro to any media type. You have to use Groovy to lend an authentic vintage vibe to ’60s- or ’70s-themed designs. In addition, Groovy is perfect for pop culture collectibles such as posters, special product packaging, shirts, bags, and stickers.

  1. Theodore Bagwell:

This typeface is rough and clean. Besides, Theodore Bagwell comes with a combination of a sans serif and script font so that you can create an exceptional look. Therefore, it is ideal for traditional typography lovers who wish to make various layouts.

  1. Monoline:

It is very simple, so people prefer to use this for web design and other digital media. Even Monoline can be used in newsletters and digital magazines. This one is easily legible. Besides, it has versatile usage.

  1. Wild Irish Rose:

Wild Irish Rose is a very charming brush script font. It becomes handy on plenty of media like book covers, album covers, posters, social media posts, web pages, etc., due to its raw, “just painted” quality. In addition, you can use this as a t-shirt design.

We have given the names of a few more cursive fonts in Word.

French Script Microsoft Font:

It is an excellent option if you are looking for one that can offer a touch of elegance to your documents. The stylish lettering and flowing lines can make the texts unique.

Segoe Script:

If you want to make a document for work, go with this. It can add a dash of class. Therefore, there is no need to wait too much. In addition, your default doc has it. So there is no need to download it.

Vladimir Script:

It is a beautiful font to use in your documents. In addition, Vladimir Script comes with flowing lettering features to add a touch of elegance to your document.

Edwardian Script:

If you are writing a legal document or love letter, Edwardian Script is a good choice. It can add a touch of je ne sais quoi. Therefore, with this one, you can boost your documents.

Freestyle Script Font Family:

It is ideal for making your text look stylish. Besides, the flowing lines and beautiful lettering make it special among others. So, try this out if you find an elegant font to use in your document.

Magneto Bold:

If you are willing to add a few personalities to your work, Magneto Bold is the one you should choose. It is perfect for you when you want to write a love letter or make a fun invitation. Magneto Bold can add an additional touch to your document.

Palace Script MT:

If you want to make a flyer, write a letter, or work on a presentation, choose Palace Script MT. Whether you have planned to make your text stand out, Palace Script MT is the best. As Palace Script MT is a Microsoft-certified font, ensure that it can work seamlessly with other Microsoft Office products.

Lucida Handwriting:

It comes in an elegant design. Besides, this one is ideal for adding a touch of class to your documents. The swirls and flourishes make Lucida Handwriting an excellent choice.

Kunstler Script:

Kunstler Script is a good option if you are searching for fun cursive fonts in Word to use in your documents. It can easily add a personal touch to any document. In addition, this one is very simple to use. When the drop-down menu appears, you can choose Kunstler Script to make a new document.

Brush Script MT:

This one is very common and features a bold look from its heavyweights. In addition, it can display subtle textures to deliver a brush effect. Besides, the letters are conjoined for that look. A few users advise that it is the exact one to use its uppercase settings for beginners.

Script MT:

It is bold and used in logos & packaging. An exciting fact about this is that early twentieth-century German writing styles inspired it.

Vladimir Script Font Family:

It can mimic a hand-painted style font in the 1950s. Besides, it is perfect for those looking for something informal yet presentable. Several users say it will look ideal on personalized printed cards and paper items.

Kunstler Script Font Family:

Hans Bohn designed it. You can find an elegant style in this one. It is perfect to use for formal invites or certificates.

Rage Italic:

It features cursive letters. Besides, it is perfect to use for playful designs.

Third-Party Cursive Fonts:

  • Nexa Rust Script
  • Bickham Script
  • Zapfino
  • Citadel Script

Conclusion:

You already got to know that numerous cursive fonts can add a touch of elegance to your projects. Using these fonts, you can add an essence of sophistication to your website. However, if you have further queries, let us know via comments.

Frequently Asked Question:

  • Does Microsoft Word have a cursive Font?

Yes, it has many options to select from.

  • What font is most like cursive?

If you want to avoid adding other fonts to MS Word, choose Edwardian Script. But if you need other options, try to download a free one. Then, you should install this in the System and will be able to use it in the document.

  • How do you type in cursive on Microsoft Word?

If you want to write in cursive, decide which you are willing to use and choose it from the available cursive handwriting fonts. After that, you should head toward “Home > Select” and begin to type in cursive.

read more
AppsDo It YourselfInternetSoftwareTechnology News

What is an Aspx File?

What is an Aspx File?

Recently, we have been experiencing filename extensions that leave us scratching our heads. For example, files like HEIC, XAPK, and standard FLAC files can turn up; therefore, you might not know what to do with them.  A perfect example of this is the ASPX file, where you might not know what an ASPX file is used for. But it can irritate you as Windows does not know what to do with them by default. So Microsoft made the file format. However, it is possible to open the .aspx files.

But it isn’t necessary to do this if you work in IT on web servers or web development. You should know that .pdf, .jpg, and other file types can sometimes appear as them. Let’s dive into the article to learn what is a .aspx file and how do I open it.

What is an ASPX file?

ASPX, Active Server Pages, is a file format that web servers use. It is created using Microsoft ASP.NET, an open-source development framework. Web developers use it to make dynamic web pages using the .NET and C# programming languages.

It iterates on the ASP, a technology that precedes it. But it never uses Microsoft’s .NET language. Rather than that, you can find the File written in other frameworks. For example, it is known as a .NET Web Form. Besides, it is possible to determine if a web page is written in ASPX while a ‘.aspx’ suffix is applied to the URL.

These files can contain different scripts or other open-source files browsers receive from web servers. In addition, these are web service components that can offer dynamic elements on a page. If you are an end user, you cannot see or interact with these file types during the online experience. But when they do it, you can experience an error with the web service’s configuration. Let’s know more details about what is an aspx file extension.

More Information:

These pages are known as “.NET Web forms.” It is possible to recognize these pages in a web browser using the URL in the address field ending in .aspx.

Microsoft developed and released it in 2002 to succeed Active Server Pages (ASP). Web developers use this web app framework to create dynamic sites and apps.

Common ASPX File Names:

Default.aspx is a default webpage. It is loaded if a client browser requests a web server directory on a Microsoft IIS-based server. In this case, the server, which is Microsoft IIS-based, must use ASP.NET.

For instance, if a client requests HTTP:/​/​www.sampledomain.com/​, the server will load the following URL HTTP:/​/​www.sampledomain.com/​Default.aspx unless you configure it to load another one.

How Do You Convert .ASPX to HTML?

The HTML ones are static. Therefore, if you convert this type to HTML, you might lose all the dynamic elements of the page. If you are willing to convert it, load the page in your browser and tap on it. After that, you should tap on the View Page Source and save that to the local HDD. You may try to load this. It will appear on your page, but nothing will work.

Programs to Open ASPX File on Different Devices:

Programs depend on which type of device you use. Therefore, we have given names of the supported programs for different devices.

Windows:

  • File Viewer Plus
  • Microsoft Visual Studio 2019
  • ES-Computing EditPlus
  • Adobe Dreamweaver 2020
  • Any Web browser

Mac:

  • Adobe Dreamweaver 2020
  • Any Web browser

Linux:

  • Any Web browser

Android:

  • File Viewer for Android

 .ASPX File Format:

ASP.NET web forms depend on the event-driven model to interact with the web app. In this case, the browser submits a web form to the server as an end user. In return, the server returns a full markup page or HTML page. Besides, the ASP.NET component model can provide an object model for these pages. The model describes:

Thre are server side counterparts of all HTML elements or tags, like <form> and <input>.

Server controls are used to develop the most challenging user interface, like the Calendar or the Gridview control. These use the ASP.NET Code Behind model to create pages.

In-Line Code:

It is a sample code that can offer all the functionality for user implementation. This code displays a sample ASP.NET page with inline code:

<%@ Language=C# %>

<HTML>

<script runat=”server” language=”C#”>

void MyButton_OnClick(Object sender, EventArgs e)

{

MyLabel.Text = MyTextbox.Text.ToString();

}

</script>

<body>

<form id=”MyForm” runat=”server”>

<asp:textbox id=”MyTextbox” text=”Hello World” runat=”server”></asp:textbox>

<asp:button id=”MyButton” text=”Echo Input” OnClick=”MyButton_OnClick” runat=”server”></asp:button>

<asp:label id=”MyLabel” runat=”server”></asp:label>

</form>

</body>

</HTML>

Code-Behind:

You can write the code and store it in separate class files for clean separation of HTML from presentation logic. As a result, the presentation layer becomes independent of the executable code. It is the code-behind for presentation purposes.

<%@ Language=”C#” Inherits=”MyStuff.MyClass” %>

<HTML>

<body>

<form id=”MyForm” runat=”server”>

<asp:textbox id=”MyTextBox” text=”Hello World” runat=”server”></asp:textbox>

<asp:button id=”MyButton” text=”Echo Input” Onclick=”MyButton_Click” runat=”server”></asp:button>

<asp:label id=”MyLabel” runat=”server” />

</form>

</body>

</HTML>

The genuine logic’s C# implementation for the presentation layer is as follows:

using System;

using System.Web;

using System.Web.UI;

using System.Web.UI.WebControls;

namespace MyStuff

{

public class MyClass: Page

{

protected System.Web.UI.WebControls.Label MyLabel;

protected System.Web.UI.WebControls.Button MyButton;

protected System.Web.UI.WebControls.TextBox MyTextBox;

public void MyButton_Click(Object sender, EventArgs e)

{

MyLabel.Text = MyTextBox.Text.ToString();

}

}

}

How do you open an ASPX file as a PDF?

If you want to open it as a PDF, you should first open it with the standard app on the computer. Next, navigate to File and then Print. You should, after that, choose “Microsoft XPS Document Writer” as your printer. After that, tap on “OK” or “Print.” Now, you should select a destination for the XPS file and tap on the “Save” option.

How to open an ASPX file:

While downloading any file from the internet to your system, you will see the download in a .aspx format though you were expecting other formats like PDF. In this case, renaming this can work for you. Besides, you may change the type to the one you expect to have, like .pdf.

If the File you want to open is in the correct format, several options are available. Microsoft initially wanted it to be available in its open-source integrated developer environment (IDE) Visual Studio Code. However, there are other programs, both free and paid. So, you may use an alternate.

Open ASPX files with Notepad++:

It is a free source code editor. As it is compatible with many languages, it becomes a perfect replacement for Notepad. This editor can support even CGI format. While the code is in C++ programming language, it depends on the editing component Scintilla. In addition, it can provide a higher execution speed and smaller program size for using Win32 API and STL.

Rename the ASPX File:

If you find your Windows unable to open this, try to rename it. Renaming it to PDF allows you to open and view it. Here are the steps you should follow to rename it.

Before renaming this, set up the PC to see the file extensions. Then, go through these steps to do so.

  • First, your job is to tap on the “Windows” + “R” key on the keyboard to bring up the Run box.
  • After that, write “control folder” in the text field.
  • Hit the “OK” button or tap on the “Enter” key on the keyboard to bring a “File Explorer Options” window.
  • Move to the “View” tab.
  • Next, tap on the “Uncheck” where the box asks, “Hide extensions for known file types.”
  • Then, hit the “Apply” button.
  • Now, hit the “OK” button.
  • Thus, it is possible to view the file extension on the PC.

Let’s know how to rename it to PDF:

  • First, find the .aspx File on the pc and tap on it.
  • After that, select the “Rename” option from the context menu.
  • Next, change the file extension to PDF.
  • Now, the prompt appears to confirm your action, and tap on “Yes.”
  • It helps you to change this to PDF. Then, it is finally possible to see and read the PDF. But renaming it can make your content corrupted. Besides, you might not see the content in PDF format.

Open ASPX File with Adobe Reader:

Using Adobe Reader to open it is a simple way to see it. In this case, ensure that you have successfully installed the software on your laptop or computer. Then, follow these steps to learn how to open it.

  • Tap on the “Start” menu on the pc.
  • After that, you should tap the “View by” option on the window top.
  • Next, you should select “Small icons” and tap on “Default Programs.”
  • Then, you should tap “Associate a file type or protocol with a program” and find the “.aspx” protocol.
  • Now, your job is to tap on “Change program” and select “More apps.”
  • Head toward the “Adobe Reader” program.
  • Finally, you should hit the “OK” button to switch the program.

Thus, once you implement the steps, you can set this with Adobe Reader to see it. This software is also compatible with other formats.

Convert the .aspx into PDF File:

You can use browsers, including Google Chrome, Firefox, etc., to see and open it on your PC because it is an Internet media-type document. If you can use the web browser to see the File, go through these steps.

  • Tap on the one which is in the extension format.
  • After that, tap on Open within the menu bar.
  • Choose Google Chrome below the Open with context menu.
  • Next, you should tap on Google Chrome.
  • Now it becomes easier to open it locally in the browser. Select other browsers such as Microsoft Edge, and Firefox, if you want.
  • Finally, you can view it in any web browser supported by Windows 10. However, if you wish to see it on the computer, it is essential to convert it into pdf format. After that, you can see the contents of it.

What if Google Chrome is not available?

  • If this web browser is unavailable in the menu option, tap on the “Choose another app” option.
  • After that, you should browse it under the “Program” file.
  • Choose the “Google Chrome” folder. Thus, you can select the app to see this type.

How to open the .aspx File if you use windows 7?

If you use Windows 7 and are willing to know how to open it, go through these steps.

  • First, look for it on Windows 7.
  • Then, you should tap twice on it. Hence, an error pops up asking, “Windows can’t open this file.”
  • Afterward, you should choose the “Select a program from a list of installed programs” option.
  • Hit the “OK” button.
  • Then, browse to select “Google Chrome” from the list.

If you are willing to convert it to pdf, these are the steps you should follow.

  • Open it in Chrome. Then, tap on the Ctrl + P key to open the Print page pop-up window.
  • Navigate to the Destination drop-down and choose the “Save as PDF” option.
  • Once you select the Save as PDF option, hit the Save button marked in blue color. Thus, you can convert it into a pdf.
  • You will see this converted into a pdf as soon as you perform these steps.
  • Thus, it is possible to open this on the computer and see its content.

Use online converters:

You can use the online converters’ help to convert these to pdf. The process may take some time, but you can download a PDF. These are a few online converters.

If you want to convert it into a pdf with online converters, try to upload it first. Then, hit the Convert to PDF button. In this case, its size is a dependable factor. Based on that, it will be converted into a PDF. Next, a download button appears. Tap on it. Now, you can see the downloaded PDF that you can open on Windows 10.

Other .ASPX files:

Suppose you see a URL ending with .aspx in a browser bar. It indicates that the page is run as part of an ASP.NET framework. Besides, you can not open it yourself because the browser has to do it automatically. The web server running ASP.NET usually processes the code inside the File. Instead, use Microsoft’s free Visual Studio to open and edit. It is possible to open it up with the help of a normal text editor.

Still Can’t Open It?

Ensure you must not confuse other names with the names of the .aspx file extensions. For instance, ASX files appear to have connections to them. However, they might be Alpha Five Library Temporary Index files supporting the context of the Alpha Anywhere platform. The same occurs for ASCX also.

Conclusion:

You cannot open these on Windows PC. But the given tricks allow you to open and read them. You can open it using Google Chrome and save it as a PDF. This one is the most effective way to open it. You can open this even in the future. It is all you can learn from this article what an aspx file pdf is.

Frequently Asked Question:

  • How do you open ASPX files on Android?

Open it first, as usual, and head toward File. Then, go to “Print” and select print as a PDF.

  • How do you open an ASPX file on a Mac?

Microsoft comes with a Mac version of its Visual Studio software to open it on Mac. You only need to download Visual Studio and install it on the company’s website.

  • How do you create an ASPX file using inline code instead of code behind?

You should create a new web page using inline code in Visual Studio. Ensure that the Place code remains unchecked.

read more
Technology NewsSoftware

Top 10 Video Enhancer: How to Enhance Video Quality

Video Enhancer: How to Enhance Video Quality

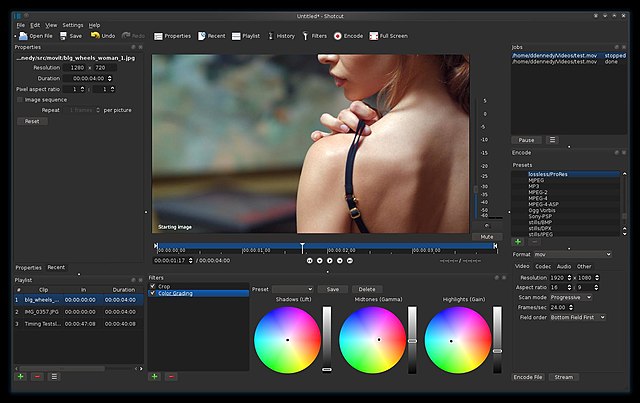
Are you looking for a video enhancer? These tools allow you to improve the resolution of a video. Besides, with the help of these apps, you can change the brightness, saturation, and contrast of clips. In addition, it allows you to crop, rotate, edit, and zoom clips. Multiple apps enable you to edit 360 videos with minimal effort. We have given both open source (free) and commercial (paid) software.

What is a Video Enhancer?

A video enhancer is a tool used to improve the resolution. For example, you can perform cropping, rotation, edit, etc.

Why Should You Use a Video Enhancer?

These have plenty of features that can breathe new life into your footage. You should use them for—

  • Upscaled resolution
  • Better lighting
  • Improved stability
  • De-noising
  • Brightness adjustments
  • Cropping, rotating, and flipping
  • Filters
  • Effects and animations

How to Enhance Video Quality?

These are the essential ways through which you can improve it:

  • First, your task is to use the upscale resolution.
  • Then, you need to manage frame rate, codec, aspect ratio, and bitrate.
  • After that, you should decrease or remove the noise.
  • Now, adjust shaky videos.
  • Next, you need to optimize contrast, brightness, and saturation.
  • Then, your task is to rotate, crop, and flip clips.
  • After that, your job is to apply those transitions, filters, and visual effects.
  • Finally, you can add your favorite texts, sound, music, subtitles, and watermarks.

Top video enhancers:

1) Adobe Premiere Pro CC:

This video quality enhancer allows you to improve the quality easily. Besides, it enables you to export video formats like AVI (Audio-Video Interleaved), MXF (Material Exchange Format), etc.

Features:

  • While it can reformat videos automatically, it also adjusts curve adjustments.
  • In addition, it helps to extend the editing platform.
  • You can mix audio with video.
  • This video offers tools using which you can make and share stories.
  • It supports Windows and Mac.

2) Topaz Video Enhance AI:

You can increase resolution using the tool. Besides, it enables you to upscale these. It is compatible with DVD, DSLR, Game, and HD stock footage.

Features:

  • You can remake high-resolution video from low-resolution footage.
  • In addition, it enables you to increase quality up to 8K.
  • Besides, this software allows you to analyze multiple videos.
  • You can use it for commercials, movie content, YouTube videos, etc.

3) AVCLabs Video Enhancer AI:

It is an AI-powered upscaling software that improves quality via a neural network. Besides, it can upscale videos from SD to HD (720p or 1080p), to 4K, and up to 8K in a single tap. It is an excellent super-resolution upscaling and multi-frame enhancement tool.

Features:

  • AI power can enhance video quality.
  • Moreover, it offers a 5-day money-back guarantee.
  • In addition, it can process videos 100% automatically without fine-tuning.
  • Besides, it can support automatic face refinement to enhance faces’ details.
  • Its Super Resolution allows you to recover a high-resolution video from a low-resolution material. Besides, the tool can make additional pixel data to fill in the missing gaps. It uses the multi-frame convolutional neural network that helps to boost the video quality. In addition, it allows you to remove motion artifacts, stabilize video shake, remove overlay noise, etc. Classic programming can’t achieve these natural results.

4) PowerDirector:

This software allows for improving video quality. Besides, it enables you to include customized shapes and objects. Moreover, you can use the app supporting motion graphics and animated titles for Android.

Features:

  • This free video enhancement software enables you to import 8K videos.
  • Besides, it allows you to create a video in a 1:1 output ratio.
  • In addition, the tool can offer plenty of ready-made templates.
  • Moreover, this software can provide slow motion and fast motion effects.
  • It allows you to correct color distortion in a clip.
  • You can stabilize shaky footage.
  • The tool can import and edit video shots on camera.
  • It supports Windows and Mac.
  • In addition, the software can give a 30-Day Money Back Guarantee.

5) Ashampoo Video Optimizer:

This robust movie editor tool can offer your shots the best. In addition, you can stabilize shaky videos and optimize colors & contrasts. Besides, you can sharpen footage by tapping on the button once.

Features:

  • It enables you to improve contrast and saturation. Besides, it can make photos more vivid.
  • The tool can offer a tilt-shift filter to make a selective blur. Thus, it can provide your captures with a unique look.
  • It can remove fish-eye effects from videos and photos.
  • You can improve the sharpness of your images to make them crisper.
  • Sometimes, poor lighting and high ISO settings cause noise. This software allows you to remove it.
  • It only supports Windows and offers Basic Free Version.

6) Pinnacle Studio:

Pinnacles Studio is a video quality improvement tool that has enhanced color grading features to improve video quality. It contains more than 2000 effects. In addition, this tool helps you to stabilize shaky videos.

Features:

  • It lets you edit video in 4K and HD format and offers 360 video editing.
  • The tool allows you to crop, rotate, edit, and zoom videos.
  • It lets you split-screen video and edit videos captured from your camera.
  • The tool only supports Windows.
  • In addition, this software can offer a 30-Days Free Trial.

7) VEGAS Pro:

You can import video from cameras, tablets, and mobile devices. In addition, it can provide a nested timeline to speed up your workflow. It is a perfect tool to enhance video quality free.

Features:

  • It can offer plenty of effects.
  • In addition, it can remove whole sections of a video clip without any problem.
  • Besides, the tool supports HDR (High Dynamic Range).
  • It allows you to edit a video of 8K. Additionally, it can save your work automatically.
  • It can give a drag-and-drop interface.
  • This tool has an advanced version offering a lens correction plugin.
  • In addition, it can create a slow-motion video.
  • It supports only Windows. Besides, it can offer a 30-Days Free Trial.

8) Pikavue (Online):

With the help of the tool, you can boost the resolution and quality of the upscale video. In addition, it lets you increase the quality with no hardware limitation. You can convert any low-definition video to full HD.

Features:

  • This application supports 4x the size and up to 4K UHD.
  • In addition, you can compress them easily.
  • It allows you to develop upscale AI.
  • Moreover, it enables you to upgrade the quality online easily.
  • It supports a Web-Based platform and can offer Basic Free Version for trial.

9) Final Cut Pro X:

It can dramatically accelerate graphics tasks such as rendering, real-time effects, and exporting. In addition, you can use gift cards for Apple’s digital content and subscriptions.

Features:

  • It can sync up to sixty-four angles automatically with the help of different formats.
  • The software comes with an intuitive, comprehensive set of tools.
  • It can accelerate post-production work.
  • The software allows you to add 2D and 3D titles to the 360° video. Besides, it asks you to apply blurs, glows, and 360° effects.
  • This tool is optimized for the new Mac Pro.
  • It can support Mac only.
  • The tool offers a 90-Days Free Trial.

10) Lightworks:

With the help of this platform, it is possible to edit any digital video in multiple formats like 2K resolution, 4K resolution, and HD formats. Besides, it lets you export these for YouTube, Vimeo, etc.

How it works:

  • Your first job is to tap on the “Create a New Project” link.
  • Next, you should choose the video clip to import. Then, you need to use Ctrl/shift to choose many clips.
  • Now, your task is to drag this to the Timeline. Hence, you can zoom the content using the plus button in the upper left corner of the display.
  • A yellow bracket means parts adjacent to cuts are now separated from clips. Coop frames are available on both sides of a cut in Trimview mode. You need to tap on Preview below Viewer to see both in sequence.
  • Tap on it in the Timeline and choose Speed.
  • After that, put the speed percentage as you prefer and tap on Do It to save.
  • Now, tap on the edited clip, sequence, or Timeline. Then, choose Export from the drop-down menu.

Features:

  • It allows you to edit video timelines and trim.
  • In addition, it lets you create 2D and 3D titles.
  • You can share a clip with other people and assign read or write access.
  • Besides, the tool can help you to customize the shortcuts.
  • You can use English, German, Italian, and more languages.
  • It offers an easy way to trim your video.
  • It supports platforms including Linux, Windows, Mac, and OS.
  • Basic Free Version is available.

11) Clip Champ:

It allows you to edit and boost the quality of any clips. Besides, the app can provide customizable video templates. In addition, you can mix and match stock footage and audio.

How it works:

  • It enables you to log in or make a free Clipchamp account.
  • After that, you can see the editor opening while hitting the purple Create a video button. Next, hit the Untitled video bar to Rename in the editor.
  • Then, you should drag the audio files and drop them into the white pull-out tab.
  • As soon as you upload your music clips, you will find them appearing under the Your media tab.
  • After that, drag the audio file and drop it onto the Timeline after it is added to the media tab.
  • Tap on the plus symbol on the left sidebar. You can see a pull-out tab appearing and uploading the music videos.
  • Then, drag the video footage and drop it onto the Timeline.
  • Choose the Text tab on the left sidebar and put a motion title.
  • Finally, your job is to export the music after editing.

Features:

  • It lets you compress, covert, collect, record, and make videos.
  • In addition, it enables you to cut, crop, and rotate.
  • You can make these using media assets from the stock library.
  • It can decrease file size, convert clips into MP4, etc.
  • The tool supports Windows and Mac.
  • Basic Free Version is available.
  1. Filmora:

It is an excellent option if you are searching for a reasonable desktop tool to increase quality. However, you must invest $60/year or purchase a lifetime license for $90.

Although there is a free version to use, it leaves a watermark on the content. Besides, you can never access the app’s vast library of effects through the store.

It can improve with stabilization, brightness, contrast, tint, and saturation controls. Besides, many overlays, motion graphics, and title templates exist.

Tips For Shooting A High-Quality Video:

These are the tips you need to follow.

Light Up Your Work Area: You must use well-lit environments. Hence, it is better to get near a window or open up all blinds while shooting indoors. However, whether you shoot outdoors, you must look for a spot in direct sunlight.

Invest in a Good Camera: Which camera you use is a significant factor in differentiating the quality. Of course, it is better to use a DSLR camera. However, you can have perfect results using a top-quality point-and-shoot camera. If possible, you should shoot them in high definition. It ensures that your music clips look perfect while uploading to the web.

Improve Audio Quality: Audio is another vital aspect to consider. First, ensure that you use a top-quality microphone to record your audio. After that, you should look for a quiet place to shoot music clips. These tips can create a top-quality video that appears excellent.

Conclusion:

You know how it is possible to improve the quality. Therefore, it is time to practice. You can create better videos by putting in a little effort.

Frequently Asked Questions:

  • Can you convert low-quality video to high quality?

You can convert the low-quality clip to a high quality with their help. Besides, it is possible to use readily available sites and software for converting clips into HD.

  • How does it work?

It can convert low-resolution video to HD. Then, you should check different parameters, including sharpness, bitrate and footage stability, contrast, brightness, etc., to increase the quality.

  • What is the best free video enhancer?

The names include:

  • Kawping.
  • Clipchamp.
  • Flexiclip.
  • Avidemux.
read more
SoftwareInternetTechnology News

How to Delete Win Setup Files in Windows

How to Delete Win Setup Files in Windows

While upgrading the Operating System to a new version, you can find a Windows.old folder saving Win setup files in their system drive. Unfortunately, these old files consume a lot of space on their disk, where a few can run out of disk space. As a result, it becomes vital to know how to delete win setup files in windows.

The previous files will remain on the disk whenever you update your computer to a new version from the earlier one. These files help to roll back the PC to an earlier installation.

What Are Windows Setup Files?

The windows setup files are available on the PC during the up-gradation of Windows or performing a clean installation. Unfortunately, most people do not know about them as they don’t clear after the installation. However, you can find them on your hard drive.

Do You Need Windows Setup Files?

As more than 1.3 billion people are running the current edition of Windows, it has become a common question for all. The truth is that these are not useful for your computer except for consuming space, and there are not helpful even if you install them again.

Where are Win Setup Files?

While entering into the main hard drive, especially the C drive, you can find the “Windows.old” folder in your file explorer. It contains the temporary installation files and all the files from your earlier installation of Windows. If you are willing not to keep anything there, you can delete it. Whether you are looking for other installation files, these are in hidden folders like “$WINDOWS.~BT.”

Is it safe to Delete Windows Setup Files?

Win setup files are system log files. As these are a vital part of your System, you can not delete them.

Should you delete Windows Setup Files?

The Windows.old folder, where the system files and information of previous Windows installations are available, remains on the disk for ten days after installation. When the time comes, your System will clean up automatically.

If you have plenty of space on your disk, you don’t have to delete them. Besides, you can erase these manually while facing a low disk space issue.

How to Go Back to the Previous System?

First, your job is to head towards Settings and open it. After that, select Update & Security and Recovery options, respectively. Finally, tap on the Get Started option below the Go back to the previous Windows 10.

How to Delete Win Setup Files in Windows 10:

We have given here a few ways to erase the files.

Using Disk Cleanup:

  • Your first task is to tap on Win + S to open the Windows search bar.
  • Next, write cleanup into the textbox.
  • After that, you should tap on Disk Cleanup from the search result. Now, select Run as administrator.
  • Next, choose the system drive in the Disk Cleanup: Drive Selection window. Generally, you have to select C: by default.
  • Hit the OK button and wait after that for the calculating process.
  • Tap on the Cleanup system files button available at the bottom left.
  • You can check the earlier Windows installation(s) from the list and hit OK.
  • Hit the Delete Files button while the System asks you: Are you sure you want to eliminate these files permanently.

How to Delete Win setup files in Windows Using the Windows Settings:

  • Tap on Win + I to open the Settings window.
  • Now, you need to choose System in this interface.
  • Next, your task is to move to the Storage option in the left sidebar.
  • Select This PC (C:) option available below Local storage.
  • After that, your job is to select Temporary files under Storage usage.
  • You should check the earlier version of Windows under Remove temporary files.
  • Hit the Remove files button and wait till it finishes.

How to delete Win setup files in Windows Using Command Prompt:

  • Please navigate to the Windows search and open it. Then, write cmd.
  • After that, you should tap on Command Prompt and select Run as administrator.
  • Type RD /S /Q %SystemDrive%\windows.old and hit Enter.
  • It would help if you now waited till the command completes. If you are willing, you can execute the command step by step and hit Enter after each:

cd C:\

attrib -r -a -s -h C:\Windows.old /S /D

takeown /f Windows.old /a /r

rd /s /q Windows.old

Command Prompt

If necessary, take the help of the Command Prompt tool to recover lost files. Whether you want to remove Windows .old Folder with the help of Command Prompt at Boot, the method is as follows:-

Steps:

Step 1: Head towards Command Prompt and open it at Boot with the help of Advanced Startup Options in Windows 10.

Step 2: You should now verify the Windows 10 Drive Letter at Boot.

The Windows 10 drive letter will not always C: at Boot as it can change sometimes. Therefore, ensure that you verify the drive letter before applying the command.

  • When you are in the command prompt section, you should write diskpart and hit Enter.
  • Write list volume after that and hit Enter.
  • Find the drive letter from the listed volumes and verify your Windows 10 drive.
  • At last, write exit and hit the Enter key.

Step 3: Your job now is to execute the delete the Windows .old folder command as follows:

RD /S /Q “D:\Windows .old”

The original drive letter of the earlier windows version is D as it sizes 47GB. There is another volume, but it can not store the system folders for its small size.

Step 4: Shut down the command prompt. Next, tap on Continue to reboot the PC to Windows 10.

You can see the Windows .old folder deleted immediately.

Using CCleaner:

Take the help of third-party tools like CC Cleaner if you cannot fix the issue. For example, with the help of the CCleaner tool, you can clean your device within a few minutes, like clear browsing history and cache memory, and free up your disk space. In addition, you can run an antivirus scan before using it.

These are the steps you should go through to fix the issue.

  • Hit Windows + I keys at a time to open Settings.
  • After that, you should tap on Update & Security.
  • Next, tap on Windows Security in the left pane.
  • Choose the Virus & threat protection option available under the Protection areas section.
  • Now, you can see all threats available in the list. Next, tap on Start Actions under Current threats if you are willing to take action against the threats.

Whether you find no threats in your System, your System will display the No actions needed alert. As soon as the scanning process ends, the Windows Defender will remove malware programs and viruses. After completing the virus scan, you run CCleaner to clean up disk space by clearing them from the windows 10 PC.

Further Steps:

  • Go to the CCleaner download page and open it in the web browser.
  • Your task is to scroll down to the FREE option. Then, tap on “Download” after that.
  • When the download is complete, your job is to open the setup file. Then, follow the instructions shown on display to install CCleaner.
  • You should now open the program and tap on Run CCleaner.
  • Tap on Custom Clean from the left pane and move to the Windows tab. You need to know that the tool can eliminate all system files from windows by default, and for Applications, it will deface only the programs installed manually.
  • You have to check the files and folders section below System. Clear files if you are willing to do any.
  • Tap on Run Cleaner.
  • Finally, your task is to tap on Continue for confirmation. Now, wait till the cleaning method is not finished.

How to Restore Windows PC:

Sometimes, you may not prefer the newly updated version of windows, and hence, you have to roll back to the previous version.

  • Head towards Settings and Update & Security.
  • Choose the Recovery option from the left pane. Next, tap on the Get started option in the right pane.
  • You can see some options available in the Reset this PC Window. Select any of these as you want.

Keep my files option can keep the files but remove apps and settings.

The remove everything option can remove all folders, apps, and settings.

  • At last, go through the on-screen instructions to finish the reset process.

Conclusion:

How to delete Win setup files in Windows? You have got the question answered now in this article. We have given four ways as solutions. Try each solution to fix and let us know which one is the simplest. You may have run out of storage on your System. If something happens to you, use the essential tools to free up your hard drive with ease.

Frequently Asked Questions:

  • Why is setup exe running?

While opening the Task Manager, you can see the “setup.exe” process running. It indicates that a few installation software packages are somehow running in your System. Run MSCONFIG. EXE from a command prompt to check if you can begin it during Boot. With the program’s help, it is possible to disable it from starting.

  • Can you delete setup files after installing games?

It is possible to deface the setup file after installing the software.

  • Do you need to keep setup files after installation?

Delete the old installation programs if you have already added programs to the PC. These sit dormant after running the installer folders unless you are willing to reinstall the program you downloaded.

read more
AppsDo It YourselfInternetSoftware

Chrome OS Flex: Upgrade Your Computer

Chrome OS Flex: Upgrade Your Computer

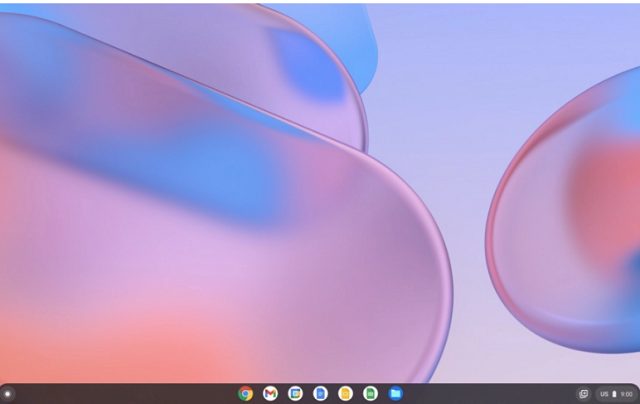
Chrome OS Flex is called the second generation of CloudReady. If you don’t know about OS Flex, check Neverware, acquired by Google two years ago. Neverware is a New York-based company that developed CloudReady, and it enabled the old PC versions for running the Chrome OS and extending the lifetime.

CloudReady was made upon an open-source Chromium OS base, and this one is compatible with Linux. The project is taken over by Google. But Google released the operating system or CloudReady 2.0 based on Chrome OS.

The operating system is compatible with Google Assistant and other Google services. In recent times, the OS allows you to access for free to Education and Enterprise users. If you are a general user, you can install the operating system on old Windows PCs and MacBooks. The OS Flex build offers a great experience to the users, but it is based on the Chrome OS 100.

What is Chrome OS Flex?

OS Flex is a web-based OS announced by Google very recently. It offers quick access to web apps and virtualization. This new upgrade comes with the same code base and releases cadence. However, it offers a few basic benefits over its predecessor.

Requisites to install os flex web-based operating system:

  • You should first have a USB pen drive with 8GB or more storage.
  • The PC must come with an Intel or AMDx86-64 processor.
  • 4GB is the minimum RAM that is necessary on the device.
  • The device’s internal storage needs to be 16GB or more.
  • Make sure that you have checked the system compatibility before installing Google web-based operating system.

Flash the web-based OS on a USB drive:

  • You should first install your Chromebook Recovery Utility Chrome extension.
  • It allows you to flash the web-based OS build on your USB drive.
  • Next, you are required to open your Chromebook recovery utility. Then, you should connect the USB drive and tap on the option “Get Started”.
  • Choose a model you want from a list.
  • You can see a drop-down menu appearing as soon as you choose a manufacturer.
  • After that, you should select the “Google Chrome OS Flex” option. As soon as a drop-down menu appears, you should choose ‘OS Flex’ from it. Next, you have to tap on the Continue option.
  • Choose the USB thumb drive and thereafter hit the Continue option.
  • After tapping on ‘Create now’, you can see a Chromebook recovery Utility available.

Chrome OS Flex: Ways to install on Windows, Laptop, or MacBook: 

  • When you have completed the flashing process, you should reboot the computer. Then, you should tap on the boot key. Hit the boot key continuously until you see the boot selection page.
  • Use the arrow keys to choose the USB drive on the boot selection page. Next, you are required to hit the Enter option.
  • You can see now ‘Welcome to Cloudready 2.0 screen’ appearing. After that, hit the ‘Get Started’ option. Go through the instructions on display and then login into the Google account.
  • Your job is to explore the operating system and install this on the hard drive.
  • After that, your task is to open the Quick Settings panel and tap on the Sign Out option.
  • You should tap on the ‘Install CloudReady’ option available on the bottom-left corner.
  • After that, you are required to tap on Install CloudReady 2.0 option and tap on it again. Then, tap on the ‘Install’ option.
  • Finally, you can see the operating system available on the device.

Benefits of Chrome OS Flex installation:

You can install the software on the computer and Macs to protect these. After installing this, your system will work fast and automatically update itself in the background. You can manage these from the cloud.

Quick modern work experience:

Installing the OS helps to boot quickly, update the background, and reduce your device downtime. You can quickly access the VDI and web apps using an intuitive, clutter-free, and reliable experience.

Quick deployment and simple management:

Use the USB or network deployment to deploy it across the fleet with policies and a user’s settings. If necessary, you can use the Google Admin console to adjust updates and configure device policies remotely.

Proactive security:

It blocks the sandboxing technology and executables for which you are not required to use antivirus software. The IT controls do not allow data loss on lost or stolen devices.

Make the most of existing hardware:

You need to refresh the old devices using a modern OS. Then, you should boost the lifespan to decrease e-waste.

How does it operating system work?

If you are willing to experience the OS, you should use a USB drive on the PC or Mac. Setting up the web-based OS merely takes some minutes to be finished.

Steps:

  •  You need to generate a bootable Chrome OS Flex USB drive for installation.
  •  As soon as the method of creation is completed, then you should install the operating system on Windows or Mac to exchange the operating system.
  • Finally, you need to deploy the operating system to more devices through a USB drive or network deployment.

When to consider in Chrome OS Flex web-based operating system:

If you want to know about Chrome OS or accelerate cloud-first OS deployment, then the OS can make this simpler than ever.

You can use recent computing with cloud-based management. Just install the operating system and experience its benefits for Macs or PCs.

Use the modern operating system to decrease e-waste and increase the lifespan by transforming the existing devices.

You may deploy a cloud-first OS on the purpose-built hardware for kiosks or digital signage.

Adjust & protect the Chrome OS Flex fleet with Chrome Enterprise Upgrade:

With the help of Chrome Enterprise Upgrade, you can unlock the default business capabilities of the OS. You should use the Chrome Enterprise Upgrade for managing these alongside Chromebooks.

Advanced security:

It allows you to disable devices remotely and turn on the sign-in restrictions. Thus, you can keep the information protected in the right hands.

Control updates:

Use this to roll the updates out slowly or automatically with an additional option for the long-term support channel.

Granular device controls:

It helps to turn on the single sign-on and identity-free login. Besides, it is useful in configuring printers and WiFi networks.

Reporting and insights:

It can pull 7-day active metrics, OS versions, and crash reports.

Conclusion:

Google has created Chrome OS Flex that is simple to use and download. Users can have this for free on their computers or laptops, and they merely should have a USB drive and a compatible system to run this platform.


read more
AppsDo It YourselfGadgetsInternetInternet SecuritySoftwareTechnology News

How to Fix err_address_unreachable Error in Your Browser

How to Fix err_address_unreachable Error in Your Browser

Most of the people across the world prefer to use Google Chrome as a browser. However, many users have already encountered the message ERR_ADDRESS_UNREACHABLE on Chrome. If you have already faced the problem, the reasons can be router issues, proxy settings, wrong website access environment, server problems, etc. Due to these issues, you may be unable to access a few sites on your PC.

What Does The err_address_unreachable Error Mean?

This err_address_unreachable error message is common on the Chrome browser while using a Windows PC. It usually happens for the Domain Name System (DNS) when it carries an error. This is the reason due to which you are unable to load web pages using the host.

What causes the error “ERR_ADDRESS_UNREACHABLE” in the Chrome browser?

We have given here the reasons for which you can face the issue while trying to access any site on the browser.

Router Issues:

The router that you are using can create problems in submitting requests to the designated ports.

Proxy Settings:

Whether you use a proxy network to access websites, it might not handle your requests properly. In this case, you have to disable the proxy server or try to enable it as per the situation.

Wrong Website:

This message can appear while you are trying to access a private address in a public network.

Server issues: Whether you are a website owner, you should know whether your users can access your site or not. The error can appear due to some other reason related to your site.

DNS Cache Problem:

The chrome browser stores caches of different sites. Hence, the DNS cache can be a reason for the err_address_unreachable issue.

Antivirus Issue:

If you use antivirus to check websites, you can find the site spam or harmful. The installed antivirus may block the chrome browser and not allow it to reach the website.

Slow Internet Connectivity:

While you are using any network, the internet connection can be low, due to which you may not load a website. Hence, the browser displays the err_connection_timed_out message. Sometimes, it can display the message Err_network_changed where the address is unreachable.

When you are trying the fixes, ensure that you have a proper internet connection. However, whether you are willing to access a private address, you should be in the network.

err_address_unreachable’ Error on Chrome:

When you see the error, you cannot access the websites you prefer for some reason on the Google Chrome browser. The ‘This site can’t be reached’ message comes with the ‘err_address_unreachable’ error code. The message says that you are unable to get access to the webpage. So, it is essential to run Network Diagnostic to identify the real reason for the error. Ensure that you are refreshing the webpage on the chrome browser, then check if it works.

Sometimes, you can face the problem due to temporary glitches in the networking equipment and Windows. Hence, you are required to try to reboot both your router and PC. Then, you should check whether restarting the device helps to get rid of the issue or not. Generally, router and router settings-related issues are the reasons for the error. If you’re willing to solve the error, restarting or resetting the router can help you. If the proxy server settings are turned on on the Windows computer, you can also see the error. However, problems with the website server itself are also one of the causes of the issue.

Similar Types of NET::ERR_ADDRESS_UNREACHABLE Error problem:

  • Err_address_unreachable ubuntu
  • Err_address_unreachable opera
  • Net::err_address_unreachable
  • Err_address_unreachable mac 2018
  • This site can’t be reached
  • Err_address_unreachable mac 2020
  • Err_address_unreachable wordpress
  • How to fix err_address_unreachable chromebook
  • Err_address_unreachable reddit
  • Jio fiber err_address_unreachable

How to Fix err_address_unreachable the Error on Your Browser:

First, ensure that no problem will be there at the server-side. If there is no problem with the server, then the issue is at your side. Before proceeding with the fixing methods, you have to ensure that you have proper network connectivity. When you see the network connection is fine, then check these solutions given below.

Restart Your Router:

In most cases, when you restart the router, you can solve the issue immediately. Multiple cases are there where the router goes into an error state. If you face the situation, restart the router to get rid of the error message.

First, your job is to close the power supply of the router. After that, your task is to wait for around 2-5 minutes.

When the time has gone, turn it back on. Wait for a while, and then try to attach the PC again.

After that, try to access the website and then check if you are still facing the error.

Are you unable to fix the problem? Are you facing it till now? Then, reset the router. In this case, one thing you have to ensure is that you must know the details of the ISP of the router. If you don’t know, then you should know it first before resetting the router.

Hence, your job is to first find the small hole behind the router device with the reset tag.

Use a little pin after that, and then try to tap the hole continuously for 4-5 seconds.

Now, you can connect the router after a reset. Use an Ethernet wire if necessary and then head towards the router address. You can find the router’s address on the backside of it in most cases.

Next, you are required to put the details that you get from your ISP to access the network. Finally, check if the issue remains.

Disable Proxy Server:

A proxy server is the same as a VPN, and therefore you can use it with ease while connecting to a public network. When you use a proxy server outside of the organization or office, it can cause connection problems. In this case, you have to turn off the Proxy settings.

If you want to disable the proxy server, your job is to tap the Windows key + R button available on the keyboard to open the RUN dialog box.

When you are in the RUN dialog box, you must write inetcpl.cpl. Then, you should tap the Enter key or OK for opening the Internet Properties window.

Tap the Connections tab when the Properties window is opened.

Then, navigate to the LAN settings tab below the Local Area Network (LAN) settings.

Ensure that you have unchecked the “Use a proxy server for your LAN” option.

Then, you are required to mark the “Automatically detect settings” option.

After that, your task is to tap the OK to make changes. Then, get out of the LAN settings.

Finally, your task is to tap the OK button to get out of the Internet Properties window.

Clear Google Chrome DNS Cache:

Domain Name Server is the full form of DNS. The function of the server is to store the IP addresses of those domains you have visited. This browser helps to increase the speed of your internet browsing. To do this, you have to keep all the DNS data of the sites. You can face the issue due to this error. The reason is that Chrome may use the cache data for accessing the page that has moved to a different IP address.

It is better to delete the DNS cache memory to fix the issue. If you are willing to remove the DNS cache of the browser, then you need to copy the address and paste it into the address/URL bar. Next, your task is to tap the Enter button after pasting this address chrome://net-internals/#dns.

A page appears in front of the display after that. You need to tap the Clear host cache button.

Now, you have to remove the Host data DNS from the PC.

At last, your job is to relaunch the browser. Then, move to the troubled website again. Deleting the cache helps you to reset the device.

Disable your Antivirus App:

If you use any Antivirus software or third-party antivirus programs, it can create issues like ERR_ADDRESS_UNREACHABLE. Whether you want to solve the problem, you have to disable the antivirus program temporarily. Then, you can check if the issue remains.

If you find the antivirus software not causing the issue, you must enable the antivirus software again to keep the PC protected.

For Windows Defender:

Tap the Start button or Windows logo key first to get available at the lower left.

Then, you can see the settings icon. Tap on that for opening the section of Windows Settings.

When you are in the Windows settings section, you need to tap the Update and Security option.

Next, your task is to tap the Windows security available at the left pane.

Navigate to the protection areas section and tap on the Virus and Threat protection. After that, you will see a window appearing on display.

When the new window appears, you must tap the Manage settings option from Virus and Threat Protection settings.

Then, your job is to toggle the Real-time protection off.

Finally, reboot the PC.

For AVG:

First, tap two times on the AVG icon on the system tray.

Hit the option Temporarily disable AVG protection.

Then, choose the timing for how long you want it to be disabled. Select if you are willing to turn off its Firewall too. Tap the OK option if you are ready to disable the antivirus program.

For McAfee:

First, your task is to tap on the McAfee icon two times. The icon is available on the system tray.

Tap the Exit option after that.

Next, you can see a dialog box appearing saying that McAfee protection will be turned off. Hence, you have to tap the Yes option for turning off the antivirus program.

For Avast:

Hence, you need to tap on the Avast icon twice, which is available on the computer system tray.

After that, your job is to tap the Avast shields control option.

Now, you have to find the options for turning off the program. The options are as follows— for 10 minutes, an hour until the computer is restarted, or permanently. The option permanently indicates that it remains disabled until you turn this on again. After that, you have to select an option suitable for you. Use the option for turning off the program.

Launch the browser again and then check whether the issue remains or not

Reset TCP/IP:

We know TCP/IP as an internet protocol component useful for connecting with a network. When this gets corrupted, you can face a problem due to which you may not be capable of loading a webpage. Hence, resetting the TCP/IP of the PC can help you to solve the problem. If you cannot fix the error, you may want to reset TCP/IP with Command Prompt.

You should always be careful as your device may be affected if any wrong operation occurs while using Command Prompt. An improper operation can lead to data loss.

Step 1: First, your task is to navigate the Run window and open it. After that, you need to write cmd and then tap the Shift + Ctrl + Enter buttons for running Command Prompt as administrator.

Step 2: Hence, your job is to enter the following commands. Tap on the Enter after each.

  • ipconfig /release
  • ipconfig /all
  • netsh Winsock reset
  • netsh int ip set dns
  • ipconfig /flushdns
  • ipconfig /renew

Now, get out of the Command Prompt and then helps to reboot your PC. After restarting the computer, you have to launch the browser.

Clear Browsing Data:

Sometimes, the data you are using can be corrupted. In this case, what you should do is clear the browsing data.

We have given here the method for clearing the browsing data from the Chrome browser.

Hence, first, your task is to launch the browser.

After that, you are required to tap the vertical three dots. This menu is available at the top right corner of the browser display.

Next, move to the options list and then select the Settings option.

After that, head towards the Privacy and security section while you are in the settings.

When you enter the section, your job is to move to the Clear browsing data.

Now, go to the Advanced tab.

You should make changes to the Time range to All time. After that, you should check these items.

Browsing history,

cookies, and other site data,

site settings, and

hosted app data.

Tap on the Clear data button at the bottom of the display. Now, you should wait for a while till the data is cleared.

If you don’t clear data from the chrome browser, you should know that the more you clear data, the quicker the process will complete.

Check Address:

You can encounter the error if you try to access a private address while connecting to a public network. There are network addresses like ‘192.168.1.8’ etc. that you can access only in private networks.

You need to ensure that the address you are willing to access is not bound because of networks. If it happens, then you can confirm that you have connected to the correct network. Next, you should try to reaccess the network.

Try these solutions we have given below:

You can access the site in another network using a different ISP.

Besides, if necessary, then use another browser to access the site. If you find the other browser working correctly,

then the issue is with your browser. Hence, you are required to reset the browser or try to reinstall that.

You can check the address in the incognito tab. In this way, you can make sure that if the browser add-ons are the ones who are responsible for the issue.

If you are willing, you can try to access the site on another device but on the same network. Repeat the same process while you are connected to a different network. Thus, you can diagnose the issue to check if the culprit is your device or the network.

Whether each solution fails, you need to contact your ISP.

Change to Google DNS server on DNS Settings:

In most cases, whenever you find DNS (Domain Name System) related problems, you can fix them by changing DNS servers with the help of a Google Public DNS server. Hence, your task is to change the settings on Internet Protocol Version 4 (TCP/IPv4) for your preferable DNS server and Alternate DNS server. Now, check whether you are capable of solving the problem or not.

To get rid of the issue, first tap the Windows key + I buttons together that are available on the keyboard. By pressing the buttons, you can open the Windows settings section easily.

After going inside Windows Settings, your job is to tap the option Network & Internet.

Tap the option Change Adapter that is available below Advanced network settings of network status. Hence, you can see a new window appearing.

Then, your task is to tap on the network that is available in the Network Connections window. After that, you should tap the Properties option from the drop-down menu.

You can see the Networking tab option available below the Wi-Fi Properties. Hence, you have to tap on the option.

Now, you are required to scroll the page down and then tap two times on the Internet Protocol Version 4 (TCP/IPv4) for opening the section.

Tap the “Use the following DNS server addresses” option now.

Input 8.8.8.8 as a Preferred DNS server.

Input 8.8.4.4 as Alternate DNS server

Hit the OK option for making changes.

Next, your job is to relaunch the browser and check whether the message alert is still available in the Chrome Browser or not.

Reset Network Settings:

If you encounter problems with the network settings, you may experience this error message where the address can’t be reached. Besides,  if you are willing to get rid of the issue, try resetting the network settings by going to the command prompt.

If you want to do this, your first job should be to write ‘Command Prompt at the search bar on the lower left.

Next, you are required to tap the option command prompt result. After tapping, a drop-down menu will appear. From there, you have to choose the Run as Administrator option and tap on that.

When you are at the Command prompt window, you should try to write these commands. Then, you should tap the Enter option after each command.

You have to write the command ipconfig/release and then hit the Enter option.

Now, write ipconfig/all and tap Enter.

Write ipconfig/flushdns and hit the Enter key again.

Next, you need to type the command ipconfig/renew and then tap the Enter key.

Write this command now netsh int ip set dns, and after writing the command, you should hit the Enter key.

You have to write the command netsh Winsock reset and now hit the Enter key.

Write the ipconfig/renew command and then tap the Enter key again.

Finally, your job is to restart the PC.

As soon as the PC finishes the rebooting process, you should check whether the ERR_ADDRESS_UNREACHABLE error message is available or not.

Forget Wi-Fi Network and Reconnect:

Hence, you can try to delete the current Wi-Fi network and then connect it again. If you are willing to get rid of the error, you should follow the steps.

First, a drop-down menu appears to see the Network Preferences option at the bottom part of the menu.

Tap on the Wi-Fi option, which is available on the left side, and then tap on the Advanced option available at the bottom right of the pop-up window.

Now, you are required to choose the Wi-Fi network that you prefer to “forget” and then tap the minus sign. After that, your job is to hit the OK option.

Finally, you should type the username and password to reconnect the Wi-Fi network.

Turn on and Turn Off the Airplane Mode:

If you are willing to restart the device’s Wi-Fi and mobile-data components, you need to enable and disable the airplane mode. Try to restart the components as it can solve the error.

Remove Chrome Extensions:

Your PC can display the err_address_unreachable error for the chrome extensions you use. It is another strong reason for experiencing the error message. Using the Incognito mode of Chrome can help you in this case. When you use this mode, your browsing history or extensions are not stored because of the private browsing settings.

You should try to open the page in incognito to check the extensions if these cause the issue. If you can open the webpage with ease in the incognito tab, then ensure that this one is an extension error.

In this case, you must head towards the chrome://extensions to uncheck every extension manually. Then, you have to run the webpage to check which one is the culprit.

Update Google Chrome:

We primarily use Google Chrome as our regular browser to update automatically. However, if necessary, you can update it manually.

First, your task is to tap the three vertically aligned dots that you can see on the browser’s upper-right corner.

After that, your job is to tap the Settings and then Tap the About Chrome option. Make sure that you are updated. Otherwise, it asks you to update.

You should know that other browsers come with similar layouts and update procedures.

Use a Different Web Browser:

While you are using Google Chrome, you can experience plenty of err_address_unreachable error messages.

The reason is that the chrome browser may use its IPv6 DNS settings, due to which you can face the DNS resolving issue. Therefore, you are unable to get access to the websites. A few people experienced in the dns probe identified no internet problem due to this.

It would be best to try to access a similar webpage using a different web browser. For example, you can use Mozilla Firefox or Microsoft Edge. You may be capable of using the page on another browser but face the issue on Google Chrome merely. If it is the reason, then try this method.

Website is Down, Moved or not Exist:

Have you found your ISP not the culprit? Has it not blocked the webpage that you are using? Then, one thing that you can ensure is that your webpage server may be down. You can wait for a day until it comes alive again. Whether the web page won’t come, it either moves to another new address or doesn’t exist.

Use ‘PC Repair Tool’:

If the windows PC is causing the error, then the best way you can follow is to take the help of a ‘PC Repair Tool’ for solving the error. The additional benefits you can get from the software are that it can solve BSOD errors, EXE errors, DLL errors, programs/applicators issues, malware or viruses problems, and other system issues.

What will you do if no method will work for err_address_unreachable Chrome Windows 10?

If you have been experiencing the issue till now, then ensure that you are not the one who is causing the problem. Your device also works well.

How to Fix err_address_unreachable Error on Mobile?

Not only on a computer, but you can also face the issue on your mobile while surfing the web on a chrome browser. Hence, you are required to check the internet connectivity first. If it is fine, then you are required to restart the device.

You should check whether the mobile data or the Wi-Fi is working accurately or not. If the network is working fine, then the issue is on the server side. However, if your server is not responding to your device and responding to another one, follow the steps.

First, your task should be to enable the flight mode. Then, you have to wait for sixty seconds and then disable it.

Next, you should disconnect the Wi-Fi and then connect this again if you see the error.

Now, try to reboot the android mobile.

You can try to remove the browsing data and cache of the chrome browser

If you want, you can uninstall the browser and then try to install this.

Conclusion:

ERR_ADDRESS_UNREACHABLE is a type of error that is available in chrome browsers mostly. When it appears, it indicates that the browser you are using cannot get an answer from the site. It is actually on the IP address linked to your preferred domain name.

However, you should know that you can face the error on the other end of the connection. It indicates that your website may be down or moved. You can also see the error message while your network service provider or network administrator blocks the website.

Frequently Asked Questions:

  • Why are you unable to find the address of all websites?

There are a few websites that are unreachable due to server-related problems. For example, the server may be down or under maintenance. If you want to access an unreachable webpage, wait until the server becomes active. However, when you find the server responding to another device, then the issue is at your end.

  • How can you solve err_address_unreachable on mac?

Hence, you are required to diagnose your Chrome browser and mac book. You can reboot the system and modem, check the network connection, clear the Chrome cache, browsing history, etc.

  • What is Err_timed_out?

While trying to open any website on Google Chrome, it may take too much time to load. But if it fails to load the page, you can see the Err_timed_out error appearing.


read more
AppsInternetSoftwareTechnology News

Xbox Error Code: How to Troubleshoot Xbox Error Codes

Xbox Error Code: How to Troubleshoot Xbox Error Codes

Have you ever experienced an unwanted “pause” by your Xbox while you are enjoying your favorite game? Or Have you heard or seen some numbers (0x80010108) / or the so-called “Xbox Error Code” on Xbox while playing your games?

If yes, you will be annoyed to see these kinds of pauses while striving to enjoy your game. But it happens; if you haven’t faced these with your Xbox yet, then you will undoubtedly face these in the long run.

These error codes are quite common, so there is nothing to worry about. You can solve most of the Errors by troubleshooting Xbox or doing what I’m sharing in this article.

In this article, I’m going to explain all the latest Xbox error codes with code names so that you can efficiently resolve them and move ahead by enjoying your gaming experience.

Xbox Error Code: How to Fix and Troubleshoot Xbox Error Codes

Here is the complete guide to fix and troubleshoot XBox error code.

0x8b0500b6

0x87E105DC

0x87E105DC

0x87E107DF

0x8923101c

0x89231022

0x89231806

0x8b050066

0x903F9006

0x903f9008

and more?

As per Microsoft,” the real solution to these error codes is to restart your console.

  1. Press and hold the Xbox power button on the controller.
  2. Choose to turn off the console or restart the console.

If this doesn’t resolve your problem, then try connecting to a different network. It means, use Wi-Fi or Ethernet cable or so on.

0x8b0500b6 Error Code:

This error code is quite a common error code, and it mainly occurs due to the update on the Xbox console.

All these error codes can be resolved with the below steps. Let’s start with Xbox startup errors.

Troubleshoot Xbox Startup Errors:

Generally, if you see “Something went wrong Screen” with an Error Code “E” whenever you start your console, then you can go ahead with the below steps to resolve this error.

How to TroubleShoot Xbox Error Codes:

E100, E207, E204, E200 (You can try these steps for almost all the error codes)

To resolve the above error codes, please follow the below steps. If you are getting different error codes, then scroll down to other Xbox error Codes.

Step 1: Restart your Xbox Console

Firstly, use the “D-pad” and A button which is there on your controller – to select “Restart Xbox” whenever you see “Something went wrong screen or above error codes.

If this helps you resolve the issue, you should return to your home screen after Xbox restates, and it should work correctly.

In case if the above step doesn’t work, then let’s try out another step.

Step 2:  Reset your Xbox

  • If restarting doesn’t work, then you have to reset your console. You can do it from Xbox Startup Troubleshooter.
  • Use the “Dpad” + A button on your Xbox Controller and select “Troubleshoot.”
  • It opens the Xbox troubleshooter and goes with resetting.

Manual Reset:

  • To reset it manually, you have to power off your console and remove the power cord.
  • Insert the power code back in after 30-45 seconds.
  • Now, hold both the “Eject and pair button on the console” and press the “Xbox button on the console.
  • Continue holding the pair and eject buttons for 15-20 seconds.
  • You will get two “power-up” tones in a couple of seconds. Now, you can release both buttons after the second power-up tone.
  • It will take you directly to the “Xbox Startup troubleshooter.”
  1. To reset – select “Reset this Xbox.”
  2. Then select “Keep games and Apps” when prompted. This option will only reset the OS and delete corrupted data without deleting your apps and games.

If this resolves, your screen and everything works fine, and you can then it’s good you can enjoy playing or move to the next step.

Step 3: Download Offline System update file (OSU1)

If the above steps don’t work, then you have to perform a system update. For offline system update, you need

  • Windows PC – with Internet connection + USB Port.
  • NTFS formatted 6 GB Space USB drive.

 Note: Most USB flash drives come with FAT32, so you have to reformat that to NTFS. It will format all data during this process, so use an empty drive.

Process:

  • Firstly, plug your USB drive into the USB port of your Windows PC.
  • Open “Offline System Update file OSU1) – This you will find in “Xbox Site.”
  • Click on “Save” — It will save the console update in the .zip file
  • Now, unzip the file and extract it all.
  • Copy the “$Systemupdate” file from extracted zip file to your USB drive.
  • Unplug the USB drive from your computer system, and proceed to update the console.

Step 4: Update Xbox

 Now, let’s update your Xbox using “ Xbox startup troubleshooter.

  1. Power off Xbox — Unplug the power cord for 30 seconds – Press and hold “Pair & Eject.”
  2. After 15-20 seconds release it after two power-up tones.
  3. It will straightaway take you to the Xbox startup troubleshooter.

Xbox Process:

  • Plug the USB flash drive with offline system update in the “Xbox USB Port.”
  • Now, the “offline System update option will become active in troubleshooting.”
  • Use Dpad + A button and select “Offline System update” to start the process. This process takes some time, and it restarts many times.
  • When the update is completed, you will see the home screen and Xbox functioning fine without errors.

Step 5: Restore your Console to factory defaults:

If the above methods don’t work, then you can try “resetting your console to factory default settings.” This might work and resolve your error codes. However, resetting the console will lose all your saved games, settings if they are not synchronized with Xbox Live. So, this should be the last option for your issue.

  1. Open Xbox Startup troubleshooter ( Steps mentioned in above step 1 & 4)
  2. Now, select “Reset this Xbox.”
  3. After selecting that, you will get a prompt “Remove everything.”
  4. Now, select that and this will delete all the data, games, and apps.

Your Xbox should function perfectly now; if the problem persists, you should go-ahead to the service shop.

This is all about the Xbox error Codes; although there are more error codes in the Xbox for all those error codes above points will be helpful. These are official ways to solve the error codes as per Microsoft as well.


read more
AppsDo It YourselfGadgetsInternetInternet SecuritySoftwareTechnology News

How to Delete Win Log Files in windows 10

How to Delete Win Log Files in windows 10

If you are a Windows user, you will find a lot of unnecessary documents and folders available in Windows. There are plenty of hidden caches, old junks that take up space. You can delete them from your Operating System, but it may be challenging. This blog post is all about ‘How to Delete Win Log Files in windows 10’ for the File Edge Readers.

If you are willing to free up disk space, then you can remove Win log files in Windows 10. Here, we have given a lot of ways through which you can remove the log files.

What do you mean by Win Log Files in Windows 10?

Windows always store a record of the operation you are doing on it. It saves the records in the directory to its log files. We know the log files as Win log files also. Generally, the files can be found by navigating to the path – C:\Windows\System32\winevt or C:\Windows\System32\config. However, it relies on the windows version.

The files can consume huge disk space of your hard drive and may have large sizes. If you are willing to free up the disk space, it is essential to remove them from your computer or laptop.

Location in Windows 10:

Users can find these log files easily in Windows 10. But as a user, you should know the location of the event viewer default path and the event logs. If you know the location, it becomes very beneficial when you are going to resolve the problem or clear the Windows log files.

You should know that two folders are there, and it relies on the Windows version you are using.

You can go to the folder of:-

%windir%\System32\Winevt\Logs\

In case it doesn’t work, you should then navigate to the folder location given there:-

%windir%\System33\config\

You need to ensure that the %windir% you are using is the directory of your PC’s Operating System.

What Does The Event Log Store? 

Users can access the event log with the help of Windows Event Viewer. It was invented in 1993. Those who are administrators are capable of using this to view actions in five categories that are as follows: application, security, setup, System, and forwarded events.

If you cannot perform the steps completely, the error codes with recently installed updates will display. If you are an Admin, you can access installed apps, Office notifications like “Want to save your changes to x.docx?”.

This windows event log doesn’t keep too many personal details like the text from web pages or documents, mouse clicks’ records, desktop screenshots, etc. However‌, these should not fall into the wrong hands as they can use these to attack.

You should remove these log files for maintenance purposes. Thus, you can free up hard drive space. In case you find the event log cleared, it may be someone else who is hiding something. This article will let you know how to remove a Windows log file using both the Event Viewer program and an Event Viewer command in PowerShell.

How to Delete Win Log Files in windows 10:

The event log of windows is capable of offering an entire record of a user’s activity. If someone accesses the event log file, they will know about your private information. That’s why if you are willing to keep your privacy protected, you are required to remove the event log daily on your computer or laptop. Users should do this thing regularly to clear the Windows event log. Let me explain How to Delete Win Log Files in windows 10.

  1. Delete Event log:

Multiple ways are there to remove event log files with the help of the Windows native interface and a third-party tool.

  •  Removing the Event logs:

The event log may store an in-depth record of your activity on the windows. As a result, if anyone attains the log file, they may know about your activity. It is possible to remove the event log from your OS’s interface directly. Users can use the Command Prompt to remove the event log. This method of removing the event logs through the Windows native interface.

  • First of all, your task is to access the Event Viewer window. If you are willing to do, then you should open the Run prompt. After that, you should give the “eventvwr.msc” command to launch.
  • You should tap on the Windows and X buttons on the keyboard together. It will help you to get a quick access menu. Choose the option “Event Viewer,” and then you should open the Window.
  • After that, you can launch the Event Viewer interface. You are capable of accessing the event logs and editing these as per your requirements.
  • Next, you can access most logs available under the “Windows Log” section. It is available on the left panel. If you’re willing to free up any log, choose the option and then tap on that. Now, you should select the “Clear Log” option.
  • If you are willing to remove application logs, you should choose the “Application” option and tap on that. You can see there all the options. Tap on the “Clear Log” option.
  • If you are willing, you are capable of removing the Windows event log selectively. Choose the event log type by going to the left panel to clear it. After that, you can access the log you prefer to remove from the right panel. Then, you should select the “Clear Log” option from the list.
  • As soon as you choose “System” from the left panel, you must make a selection on the right side. Then, you should select the “Clear Log” action to eliminate the event log.
  • When you finish completing the selection, a pop-up message appears in front of you. It allows you to remove the logs or clear them after saving them.
  • Finally, you should make the final selection and wait for some moments. It is because Windows will remove the event log from it.

Depending on the windows version, the correct technique and interface vary. You are capable of storing the documents again after performing a recovery operation. If a user wants to permanently remove the event log files except for any recovery scope, use a third-party data eraser tool.

  • Remove Windows Event Log Entirely:

When you go through the instructions, you are capable of removing the Windows event log. If you cannot remove the files permanently, you will require a reliable data eraser tool. You can use the Data Eraser tool to delete your information completely within seconds. This tool comes with a simple-to-use interface. You can remove internet activities, system traces, and apps, event logs, etc. We have given here a few features of the tool.

  • Stellar BitRase is very useful if you are willing to delete the various types of system traces.
  • Using the tool, you are capable of freeing up unused and empty space.
  • This tool supports almost all windows versions.
  • Users can use the tool for removing internet activities, data files, app data, etc.
  • As soon as you complete the method successfully, it will offer a deletion certificate.
  • The tool features various types of algorithms that you are capable of selecting from its settings.
  • It doesn’t give any recovery scope and helps to remove your data permanently.
  • Stellar BitRase comes with a scheduler that allows you to remove your data automatically.
Steps:

1: First, your task is to download this tool on the Windows PC. After that, you are required to launch the tool.

2: Tap on the option “System Traces,” After that, you should access the significant features from the right panel.

3: You should then scroll the page down to look for the option of “Windows Event Log.”

4: Your task is to choose the option. Then, hit the “Erase Now” button for deleting the Windows event log. Thus, you are capable of erasing your event log files quickly from the Operating System.

With the help of BitRaser, you are capable of deleting the event log except for creating an issue. You merely have to tap on the option once, and the Windows event log will be removed permanently.

You are not required to wait anymore as the tool is here to help you. It helps to protect your privacy. You are capable of removing almost all system traces and Windows event logs from their interactive interface. The tool becomes useful for multiple occasions to keep your privacy protected.

  1. Using the GUI:

Users can move to the Settings of the Event Viewer GUI easily. Use GUI whether you are not willing to work with command-line tools. You need to go through the steps for launching the event viewer. It will help you to remove the event log.

  • First, your task is to navigate to a Run dialog and open it.
  • After that, you should select the option eventvwr.msc. Next, you should tap on these Ctrl + Shift + Enter buttons at the same time. You should have admin rights while launching the Event Viewer tool.
  • Then, your job is to tap on the small arrow option to expand the folders by going to the leftmost pane. You will get the option available next to the folder.
  • When you navigate to the list of entries, you should choose the entry option from the middle pane. Then, your task is to tap on the Clear Log, which you can see from the Action section in the rightmost pane.
  • The shift button can be used to choose various types of entries in the middle pane.
  • You are required to repeat all the steps for all entries. The method may look quite long, but it is very easy to navigate through.

Delete Saved Console.log:

Every console file comes with a function of recording recent activities. We don’t give importance to these because of their small size. As a result, the error remains. You should occasionally check the log files to offer the solutions.

  • First, navigate to the Event Viewer and launch it.
  • Then, your job is to go to the File option available in the menu and then move to the Options. It shows you the disk space available in the file and the area consumed by the saved files.
  • After that, you are required to tap on the Disk Cleanup option and then navigate to the Delete Files.
  • Finally, you should tap on the Exit option and then tap the OK button.
  1. Use PowerShell:

If you are willing to use a very strong command-line tool, then use it for removing the log files. You should just go through the steps that are:

  • First, your task is to navigate to the PowerShell and open it after that as an admin.
  • To do this, move to the Start menu first. If you still have not exchanged PowerShell with CMD, you must navigate to the WinX menu.
  • After that, your task is to write the command given and then hit the Enter button:

wevtutil el | Foreach-Object {wevtutil cl “$_”}

powershell_clear_all_event_logs

  • Once you write the command, it will remove almost all the event logs available in your Windows 10.
  1. Use Windows Disk Cleanup:

  • Hence, you should first tap on the option This PC. After that, you should choose the option Properties.
  • Navigate to the General tab after that and then tap on the Disk Cleanup option. As soon as you tap on the option, it will begin to calculate the volume of temporary files needed to be deleted.
  • Then, you should choose all the items, such as System archived Windows error reporting.
  • Finally, you are required to tap on the OK key.

How to Do Disk Cleanup:

Windows Update Cleanup: You should delete this as it removes the old copies of Windows Update files. Users can remove them easily, but it is essential to troubleshoot if they run into update-related issues.

Windows Upgrade Log Files: Windows keeps the data files for troubleshooting problems around installations. Whether you don’t encounter any Windows up-gradation issues, you should remove them.

Language Resource Files: Whether you have downloaded another language or keyboard layout, you can delete it.

Recycle Bin: The process of deletion is similar to the Recycle Bin. Ensure that there doesn’t exist anything inside it.

Temporary Files: Users don’t use temporary files for long periods. Therefore, deleting these won’t cause any effect.

These are the things you are capable of removing from Windows 10.

  1. The Hibernation File:

Location: C:\hiberfil.sys

This mode is similar to the sleep mode. In this case, the System stores all the openwork and saves it to the storage drive. After that, you should close the operating System. It is possible to erase the battery from the PC and keep the PC on hibernation mode. After that, you are required to begin the backup and then start from where you left off. The hibernation file consumes plenty of gigabytes, but it relies on the hard drive size.

Users can take help of the command prompt in case they don’t prefer to use hibernation and disable it. Ensure that you are not removing the hiberfil.sys only as your windows are capable of making it again.

You should then tap on the Start key or hit the Win + X buttons. After that, you are required to navigate to the resulting menu and open Windows PowerShell (Admin) window or a Command Prompt (Admin). Hence, you should write the command for turning off the hibernation:

powercfg.exe /hibernate off

It is all the things you need to do to turn off hibernation. Your windows will remove the hiberfil.sys. You should know that turning off the hibernate mode will stop the PC and won’t allow using fast startup.

  1. Windows Temp Folder:

Location: C:\Windows\Temp

These temporary files are required only when in initial use. The folders and files keep the details of the windows used at one time.

Navigate to the folder despite removing it with the help of Disk Cleanup. Then, you should erase the contents necessary. To do this, you must tap Ctrl + A buttons to choose all the options inside it. After that, you should tap on the Delete option. You can encounter some errors in your windows. Hence, you are merely required to remove everything else.

  1. The Recycle Bin:

Location: shell:RecycleBinFolder

It is a folder available below the C:\ drive. Users don’t have to access the drive. While users remove any files, Windows send them to this folder. It is storage where all the removed files are kept. When you erase them from that place, then these will be deleted permanently. If you want, you can restore the deleted files again.

The folder is available as a shortcut on the desktop of your laptop or computer. Therefore, it is simple to access. However, if you won’t find this, you should write shell:RecycleBinFolder into the navigation bar of File Explorer. After entering into the recycle bin, you can find all the things deleted instantly.

When you are going to erase them, you should tap on the individual items. Here, you should tap on the Delete option to remove them permanently. You can select the Restore option to get the file back to its real place. There are buttons available on the top of Ribbon’s Recycle Bin Tools tab. These help to clear the folder at a time and store the files again.

Tap on the Recycle Bin properties for tweaking through which the folder works. Hence, you are capable of changing the maximum bin size. If you want, you have to select the option Don’t move files to the Recycle Bin.

If you tap on the option, your Windows will skip the bin and erase items permanently. However, it is not recommended to use it to restore any file deleted mistakenly from the recycle bin. You can use the Display delete confirmation dialog, but you require an additional file to use this.

  1. Downloaded Program Files:

Location: C:\Windows\Downloaded Program Files

You may find the name of the folder a little bit confusing. The function of the folder is to hold files that Internet Explorer’s ActiveX controls and Java applets use. However, people who are using a similar feature are not required to download the file twice.

But it has become useless nowadays. You should know that ActiveX has become old & outdated technology. It is full of security holes and compatible with Internet Explorer only. It can be seen only on ancient corporate websites recently.

Generally, people are not using IE anymore. The folder containing Downloaded Program Files may be empty. You can remove the contents easily, so don’t hesitate.

  1. Rempl Folder:

Location: C:\Program Files\rempl

The folder doesn’t come in a big size. Therefore, while you see this on the Operating System, you may be surprised. It contains multiple small files. There are some Task Manager methods also connected to it.

It has a connection to Windows 10 update delivery. This folder contains “reliability improvements” that help to perform Windows 10 updates easily.

  1. Use Command Prompt:

With the help of the Windows command-line utility tool, users are capable of doing any task. We can take the help of the command prompt for removing the event viewer in Windows 10. Users can use this for removing individual log files. If necessary, you can remove the entire event log.

We have given here a few steps following which you are capable of removing all Windows log files.

  • First, your task is to navigate to the elevated command prompt and open it then. To do this, you need to navigate to the Windows search context menu. If you want, you can go to the Run dialog. Use hence Ctrl + Shift + Enter buttons to open the command prompt with the admin.
  • With the help of the change directory command, you should navigate to the event viewer default path.

cd %windir%\system32\config

  • Write this command for removing all the win log files. Then, you should hit the Enter button.

del *.log /a /s /q /f

delete_win_log_files_using_cmd

  • As soon as you do this, the .log extension files will no more available on your PC.
  1. Erase Single Log Files Taking Help of Command Line:

You can even erase the log files of individual files. Go through the commands that needed to be entered.

Step 1: Hence, your task is to move to another command prompt with admin and open it then.

Step 2: You should now list all the log files. To do this, first, you should type the command given below. After typing, you should tap on the Enter button.

.wevtutil el

Step 3: You can see there is a list available on display. People who are willing to remove the required log file need to write the following command. After that, you should hit the Enter button.

wevtutil cl <name of the log>

As soon as you do this, it will help you to remove the required log from the Event Viewer file.

  1. Create A Command File for Removing Log Files Automatically:

If you are trying the latest experimental features, it may happen that you have made plenty of win log files on the PC.in this case, you should know the process of erasing the log files in Windows 10 automatically.

Make a .cmd file to make the process automated. You should go through the steps for making this command file.

  • First, you should go to a text editor such as Notepad or MS visual code. Open it after that.
  • Then, your job is to write the code and perform copy & paste in the editor.

@echo off

FOR /F “tokens=1,2*” %%V IN (‘bcdedit’) DO SET adminTest=%%V

IF (%adminTest%)==(Access) goto noAdmin

for /F “tokens=*” %%G in (‘wevtutil.exe el’) DO (call :do_clear “%%G”)

echo.

echo Event Logs have been cleared! ^<press any key^>

goto theEnd

:do_clear

echo clearing %1

wevtutil.exe cl %1

goto :eof

:noAdmin

echo You must run this script as an Administrator!

echo ^<press any key^>

:theEnd

pause>NUL

  • Use the extension command prompt file to save the command name in any place you want.

clear_log_files_cmd_file

  • After that, your task is to run the command file as administrator. To do this, you need to select the right option from the right-click context menu.
  • Here, a command prompt window will open in front of you. Then, all the log files are removed automatically.

You should run the file as admin for removing event log files.

  1. Use CCleaner to Clear Log Files:

People who are using the drive-maintenance program CCleaner can scan the files. You are capable of removing the files except by downloading a dedicated log cleaner program. Hence, you need to open the tool as you normally do. As soon as you open the “Cleaner” menu, your job is to hit the “Windows” tab. Then, you should scroll down the page. After that, you must tap on the check box marked as the “Windows Log Files” option. Next, you should choose the option “Run Cleaner.” When the tool recognizes the system for those files you can remove, tap on the key again. It will help you to erase the Windows log files along with other chosen files. You are required to ensure the deletion of the log files, but it relies on the configuration process of the CCleaner installation.

  1. Use Third-Party App for Erasing Log Files Windows 10:

Plenty of third-party cleaner apps are there, which you can use to remove temporary files and other junk files. In this case, you are capable of using an app to erase the event log files.

Along with the most famous tool CCleaner, you can use BitRaser For File. CCleaner helps to clear up all junk files on the PC for free. BitRaser For File is a powerful file deletion software that you can use here.

How Can You View Windows Log Files?

The method of viewing the Windows log files is as follows:

First, your job is to tap on the Start button on the Taskbar of your PC.

After that, your job is to tap on the All Programs option.

Next, you should tap the Accessories menu item.

Now, you should hit the option WordPad application.

After doing this, you will see a new Wordpad window.

Hence, you should tap on the File menu option.

Then, you have to hit the option Open menu item.

Finally, your job is to move to the log file that you prefer. Then, you are required to hit the Open button.

Final Words:

In this article, you must have learned How to Delete Win Log Files in windows 10. Whether you are willing to remove log files, the methods given here are perfect. We hope you will find these easy to apply. Select any one of these first and perform after that accordingly.

Frequently Asked Questions:

  • Can you remove CBS log files?

You should first remove all existing log files in \Windows\Temp directory. After that, your task is to prevent The Windows Module Installer services. Then, you should remove the \Windows\Logs\CBS\CBS.log file. Hence, you are required to begin the Windows Module Installer service. It helps you to recreate the CBS.log.

  • Is it safe for removing the Windows upgrade log files?

If you want, you are capable of erasing the Windows Upgrade Log Files. But for this, your job is to solve the error if you cannot complete the up-gradation process successfully. When you choose the disk cleanup software, you should tap on the OK button to erase the documents. As soon as you tap on the Cleanup System Files, it will help you to erase more junk files.


  • Can you remove event log files?

Now, you are capable of removing event log files easily from your Operating System. Just take the help of online tools to remove the files and the event log without making any issues. Thus, you can remove the event log files permanently just with one tap. You only have to erase the Windows event log along with the system traces from the interface, while using online tools.

read more
AppsDo It YourselfSoftwareTechnology News

Java Vs C++: Similarities and Differences

Java Vs C++: Similarities and Differences

Let us discuss Java Vs C++: Similarities and Differences in this blog post

What is Java?

Java is defined as a high-level programming language, the purpose of which is general and is designed in such a way as to curtail dependencies while remaining class-based.

Any application to be developed needs a computing platform to which it caters. Therefore the need for this language to be speedy and reliable and security features in place is imperative.

Every computing device does require its program to develop applications in it. To cite a few, it could be laptops, mobile phones, data centers, computers, supercomputers, etc. The IT industry uses this language, and it is considered an indispensable one for developing software.

It was developed at Sun Microsystems (now a part of Oracle) by James Gosling in the early 1990s.

What is C++?

Similar to Java, C++ is yet another computer language that is object-oriented but in reality an extension of the ” C’ language only. It is considered a high-level language as it has the standard features of its predecessor, ‘ C.’

This familiarity with C allows for low-level manipulation and a step closer to the primary machine language.

Bjorne Stroustrup developed the language to continue the rising trend of C languages. It does, however, usher in further control over system sources and memory.

Java Vs C++ Key Differences:

Here are a few key features in which both feature and the differences between them.

Platform

Java Platform:

The platform of this language has a suffix. It is platform-independent. In other words, all operating systems are ‘ user friendly’ with their compiled codes. The usage of the compiler has to be emphasized at this stage.

Humans write programs, and one can read those. It is known as ‘ Source Code. ‘ The compiler becomes a translator for these source codes and converts them into executable codes for machines. That language is known as Machine Language.

When there are many instructions in machine language, it has to arrange in sequence. The CPU can work on these instructions and execute them in two ways. It can carry out the work directly.

The other way is for the CPU to make an intermediate representation. Such a representation can only be understood by a virtual machine and then interpreted.

The interpretation is in Java, and it is called Java Byte Code.

Java Program Execution: The Step by Step Procedure.

  • It compiles all programs whenever written.
  • Such compilation would not be in machine Native Code. It is called the • Class file (or) bytecodes.
  • Without using an interpreter, execution on the machine is impossible, so the bytecodes are always ‘ non-executable ‘ codes.
  • JVM acts as the interpreter, and the JVM can only execute all executions of Bytecodes.
  • The desired output can only be achieved by running the final program.

C++ Platform:

  • They are not platform-independent.
  • The compiler can only generate a file in the • exe extension, which is OS-dependent.
  • It can only run on that OS from where it has been generated and not any other OS. Therefore the compatibility with other OS is redundant.

Java maintains independence across platforms, whereas JVM is 100% dependent on media. – Explained why!

Points to be noted:

  • Pointers can be used in C and achieve a call by reference
  • In C++, the choice of pointers and references (either one) for pass by.
  • As far as Java is concerned, the primitive types are always the values, and the non-primitive can only reference.

Call by Value & Call by Reference:

Call by Value:

The method or practice of attaching values to variables is known as Call by Value instead of calling it a function.

On the same note, we substitute addresses in place of values to the same function. It is known as ‘ Call by Reference.’

So, what is the difference between both?

The commonality is the function between both. Therefore, the procedure is invoked using these two methods only.

The difference between the two ways is ascertained by the value types which are passed on to them. These are called Parameters.

A function can either be given a parameter or receive them. When it is passed onto them, it is called ‘ Actual Parameters. ‘ On the other hand, when accepted, it is called ‘ Formal Parameters.

Call by Value:

To understand this better

  • The Actual Parameters are transferred to the function.
  • Now, the function has two parameters that can be stored in two memory locations independently. Due to this, if any changes occur internally inside the functions, the actual parameters would not be reflected.

Call by Reference:

They share the exact locations under this. We refer to the actual parameters and the formal parameters in which only the Actual Parameters reflect the changes inside the function.

Features:

JAVA C++
1. Many features are available and are capable of adding many more It does not have this capability and has no features that would be equivalent to many in Java.
2.
  • Packages
  • Interfaces
  • Multithreading is are certain features here.
There are no features that can complement these here. The library functions under a standard header file are the only plausible solution.
3. The main objective of multithreading is that

• It permits simultaneous execution

•Conditions are that the pieces should be from the same program

In here, one would do it only manually. No program exists for such multithreading.
4 The string is one of the built-in types in it. In some respects, this string resembles the string class type provided by C++. It is important to note that in C++, the string is available only if its class declaration is included. There is no built-in type for this.
5.


It consists of API classes that are it is own. In case the standard library of C++ exists, it would be removed.


Has only the standard library.


The C++ programming language and Java have many similarities and differences. Following are a few of the significant differences between them:

Comparison Index

C++ Java


Platform-
independent
It is entirely platform-dependent. Compiling its code on each platform is necessary. It is completely platform-independent.
Mainly used for
System programming is the primary function of this language. Application programming is its primary usage. It is to be used here, conditions are, it should be

  • Windows-based,
  • Web-based,
  • Enterprise,
  • And mobile applications.
Design Goal
It was designed for systems and application programming. It was an extension of the C programming language. Originally designed as a printing system interpreter, it later expanded to support network computing. An easy-to-use interface facilitates the use of the program by a wider audience.
Goto
It supports the goto statement, but it should be avoided as much as possible to prevent adverse effects. It does not support Goto statements as it is initially not available.
Multiple inheritances
Unlike interfaces, multiple inheritances are possible in this language. It supports many types of inheritance, including multiple and single inheritance. Even though there are issues, When numerous estates are encountered in it, the virtual keyword is used to solve the problems.  The  classes do not support multiple inheritances.
Operator Overloading
It is possible to override methods and operators in it. The excessive workload for operators The only way to overload methods in it is by using strategies. The system does not allow operator overloading.
Pointers
It is possible to use pointers in this language. You can write Pointer programs in it. Pointers are the foundation of it. We have seen in previous tutorials that C++ has strong support for pointers. Pointers are limited in this language. Java‘s internal pointer system supports pointers. It is, however, impossible to write a pointer program in it.
Compiler and Interpreter
It uses a compiler only. And, is compiled and run using the compiler, which converts source code into machine code, which is platform-dependent. It uses both compiler and interpreter. And the source code is converted into bytecode at compilation time. In addition, the interpreter executes this bytecode at runtime and produces output. This language is interpreted; that is why it is platform-independent.
Call by Value and Call by reference
It supports both

  • Call by value and
  • Call by reference.
 It supports

  • Call by value only.
Thread Support
It does not

  • Have any built-in support for threads but do rely on
  • On third-party libraries for thread support.
It has built-in thread support.
Documentation comment
It doesn’t support documentation comments. It supports documentation comment  such as /** … */ to create documentation for java source code.
Virtual Keyword
It supports virtual keywords so that we can decide whether or not to override a function. It doesn’t have the virtual keyword. By default, We can override all non-static methods. In other words, non-static methods are virtual by default.
unsigned right shift >>>
It doesn’t support >>> operator. It supports an unsigned right shift >>> operator that fills zero at the top for the negative numbers. For positive numbers, it works the same like >> operator.
Inheritance Tree
It always creates a new inheritance tree. It uses a single inheritance tree because all classes are the child of the Object class in Java. The Object class is the root of the inheritance tree in it.
Hardware
On a relative basis, it is much close to Hardware. Java and Hardware have minimal interaction.
Object-oriented
It is an object-oriented language. But in C language, a single root hierarchy cannot exist. It is also an object-oriented language. However, everything (except fundamental types) is an object in this language. It is a single root hierarchy as everything gets derived from it. Lang.Object.
Structure and Union
It supports

  • Structures and
  • Unions.
It does not

  • Support structures
  • And unions.
String
The string is one of the built-in types in Java. In some respects, this string resembles the string class type provided by C++. It is important to note that in C++, the string is available only if its class declaration is included. There is no built-in type for this.


Library
Java consists of API classes that are its own. In case the standard library of C++ exists, it would be removed.


Has only the standard library.


Memory
 

In this, compound-type objects are allocated in a typical manner in the form of a local stack bound.

The idioms are not the same used as far as resource management is concerned.

Memory is allocated by using object instantiation. In this, by initially allocating an array of bytes, arbitrary memory can be assigned.


Which one is better?

It is certainly not the easiest of answers.  In fact, there is no straightforward answer at all to point out one above the other.

The advantages and disadvantages are there with both.

System programming is excellent with C++, but that does not make Java redundant or less worthy. Java continues to prove its worth in many apps like the internet, Desktop, etc.

C++ on its own is versatile and can help even in gaming to leave alone system programming. On the other hand, Java cannot be trusted to develop low-level applications, gaming included.

The decision which is better weighs on the application which is to be developed. For this purpose, do the following.

  • Jot down the Pros and Cons of both
  • Check the compatibility and uniqueness with the application in development and decide which one suits better. Choose that one.

Which one is harder between them?

Java is simpler. It’s preferable because:

  • Syntax is easier to read comparatively
  • It is an object-oriented programming language and helpful to learn
  • Automatic garbage collection is available in it.
  • The quantum of undefined behavior is far lesser with Java which makes debugging easier.
  • It has a library that is of better standard and more extensive.
  • It does not necessitate dealing with pointers.
  • As Booleans are strictly required, the cause of concern for bendiness is removed
  • It surpasses any language in job postings
  • Billions of manufactures trust this language and run it on their devices.
  • In addition, it is racing up the popularity charts with C++ in a declining mode.
  • It has better packaging.

Besides, it does have its merits, and there are many. But Java makes things easier.

Conclusion:

Both C++ and Java are excellent object-oriented languages. C++, in addition to this, is also a procedural language.

There exists a few new features which are available in both but differ in their characteristics.

Likewise, a few features of C++ are powerful compared to Java. Such features make C++ stay in the reckoning for a long time to come.

Web-based applications would embrace Java more for features like templates, automatic garbage collection, etc.

read more
AppsSoftware

5 Best iOS Emulator for Android in 2021

5 Best iOS Emulator for Android in 2021

If you’re also in search of the best emulator for using iOS on your android device, then you have found the right place.

We have listed one of the best iOS Emulator for Android in this article but before anything, let me clear up that emulators are entirely legal to use but sharing copyrighted ROMs is not. So you can easily use any app or game on your android device.

You won’t get any of these emulators on the google play store, so you have to go through the links.

Not everyone can purchase an iPhone device, but there are some applications and games that are only designed for iOS, and if you want to use them, it is one of the best methods.

All you need to have to use these emulator applications on your android mobile phone is a device with at least 1GB of RAM. And to be very honest, any phone in this era can quickly fulfill this simple requirement.

If you’re set with all, then let’s go with every detail:

What is an Emulator, what is it meant for?

An emulator is software that helps you run the games & applications of any other OS on your device. No matter whatever your current OS is, you’ll even be able to have the experience of the iOS user interface of most of the applications and games on your current device.

In short, these emulators create a virtual OS environment for your device to let you install and run the iPhone applications and games.

So, finally, now you have an idea of what an emulator is and what it means. So, We should probably move forward with the five best android emulators.

What are an Android emulator and an iOS emulator?

Android emulators create a virtual android OS environment for your device to run and test android applications on iPhone and other devices. Even so, many developers use these emulators to try new apps.

iOS emulator creates a virtual iOS environment for android. Similarly, it helps you have the experience of iPhone apps and games without letting you have the physical apple device.

Difference between an Android emulator & iOS emulator

Android Emulator iOS Emulator
  • There are tons of android emulators available in the market.
  • Apple doesn’t allow such applications to exist, but still there are some available.

What is the need for the iOS Emulator for Android?

As we all know, most of the updated games and applications are launched on iPhone, and not everyone has enough money to have Apple devices. Here, emulators come into work.

5 Best iOS Emulator for Android

#1 Cider:

When operating iPhone Applications in an Android emulator, there is no better choice than cider, which used to be known as Canada. If your device has enough storage and required RAM, then you’ll have a wholly lag-free and butter-smooth experience. This app is designed in a way that you’ll get a complete feel as you’re using an Apple device. You’ll hardly see any lag or freeze in your device.

All you have to do is install the app on your device and then run the apps you want. It is entirely malware and viruses free. Thus it is a wholly safe and secure way to transform your Android into iPhone.

Pros

  • You’ll experience the delightful interface as you’re using the iPhone device itself.
  • It is entirely free of cost, and you even need not pay for any in-app purchase.
  • Your device need not be of high specifications to run such emulators to transform your Android into iPhone.
  • Your device will be able to use two OS at the same time.

Cons

  • This app is not supportable for all devices.
  • It is not available on the google play store, so you’ll download it at your own risk.

#2 iEMU:

This is a very popular iOS emulator among people and works effortlessly on any device. This won’t let you face any storage or specifications issues during its use, but if you go towards the heavy games and apps, you might face some minor issues because it requires a good RAM smartphone. So if your device has at least 1GB of RAM, then you’ll have a far better and lag-free experience.

This application is also free of cost and doesn’t require any in-app purchases. And in fact, this application can easily be used in rooted and unrooted phones. But if you want to use it on the PC, iEMU is not available for PC right now, so you can go to any other app.

Pros

  • You’ll not lose any data even after uninstalling the apps
  • It has far better graphics than any other app, and its interface is also appreciable compared to others.
  • This will let you use almost all the iPhone apps while also allowing you to use android ones simultaneously.
  • It also doesn’t require any cost and is also small in size.

Cons

  • It supports almost any device but not all devices.
  • This is also not Google play store verified.

#3 Appetize:

If you need a web-based emulator, then this one can be your pick. Even though I like this one, all you have to do is browse it, and in the next second, you’ll see the iPhone interface on your device. It’ll save you lots of time rooting the phone and then installing the whole Emulator.

It is majorly helpful for those who have little work with an iPhone and don’t want to install any complete app or software. Because it is a cloud-based Emulator, this Emulator has benefitted many people and hopefully yours as well. So, I recommend you to check this out.

Pros

  • It doesn’t require you to install an app; browse and use it.
  • No matter what your device is, you can easily use it on any device.
  • It works well on chrome and thus even gives a lag-free experience.
  • It won’t charge you any cost to use this Emulator to transform your Android into iPhone.
  • You’ll easily be able to use the apps which are only for iPhone.

Cons

  • Since it works on chrome, It lags if you don’t have good connectivity.

#4 iOSEmus:

We have listed this Emulator because, among all the emulators, its demand & popularity is very high because it has the most easy-to-use functions compared to others. In this app, you have to search for any app or game you want then you can easily download it. Indeed, its features are unique and won’t disappoint you at all.

And as with others you don’t need to spend even a single rupee to use it. Moreover, its unique features make it even more straightforward. I must say not any other app or software will give you such premium features without charging even a single penny, not even in the name of in-app purchases.

Pros

  • It is customizable as per your demand.
  • Besides, It is not required to root your device; it works in both embedded and non-rooted devices.
  • Even the low specifications mobile devices will be able to give you a lag-free and butter-smooth experience.

Cons

  • Like other emulators, even this is not available on the play store. Thus it is not at all a verified app.
  • You’ll have a lot of annoying ads that disturb you a lot.

#5 All in one iOS Emulator:

We have listed this Emulator because of its uniqueness and offering. One of the XDA members has made this beautiful application that Siri offers. Yes, I’m not at all kidding. The best part of this Emulator is its inbuilt Siri, similar to the Siri we have in an accurate and expensive iPhone.

Likewise, other emulators also give you the ability to download and access almost all the applications and games and, in fact, the paid ones for free of cost. The user interface of this Emulator is not that good; you can say it is pretty and decent. You get two more benefits: the first iPhone music app and the second iPhone Camera. Regardless of its appearance, this Emulator offers excellent features.

Once you’ve installed this Emulator, you have to browse the application or games you want, and then in one click, it will start downloading. Besides general emulator features, this application offers so many different features as well.

Pros

  • It is entirely free of cost.
  • This gives you an extra feature of inbuilt Siri in the Emulator itself.
  • It has no more relation with the device’s specifications; even a regular android phone can run this application.
  • It is free from malware and viruses.
  • You can even enjoy the paid apps for free in this Emulator.
  • You will get regular updates.

Cons

  • You won’t get this Emulator on the play store. Hence it is not a verified app.
  • It can cause some problems in some devices.
  • Ads will disturb you a lot.

Conclusion

So, these were the five best iOS emulators for android that I’ve mentioned in this article, with the help of which you can efficiently operate any iPhone game or app. You need to have an android device with basic specifications, and then you have your iPhone device in your hands for free. You can go with any of the emulators mentioned above according to your need and comfort, but I’ll recommend you to go with the Cider because it runs smoothly on my device. And I also like the “All in one Emulator” because of its extra features.

Please choose according to your own, and I hope this article has helped you find out your required one.

read more
1 2 3 4 5
Page 2 of 5