close

Technology News

Do It YourselfSoftwareTechnology News

What is Ctfmon.exe File or CTF Loader?

What is Ctfmon.exe File or CTF Loader?

Have you found that the CTF Loader is running on the system in the Task Manager? Therefore, now you may want to know what this is or if it is a virus or malware. Furthermore, you may wonder if it is possible to disable it. This article will give answers to all your questions related to Ctfmon.exe alias CTF loader. Let’s dig in.

What is Ctfmon.exe File?

Ctfmon.exe file is called CTF loader and the term CTF stands for Collaborative Translation Framework. It is a Microsoft procedure that always runs in the background. Microsoft Office uses the app so that it can control the Alternative User Input Text Input Processor and the Microsoft Office Language Bar.

You should note that the ctfmon.exe/ ctf loader process offers test support to identify speech, handwriting, and so on. Besides, the procedure can provide other alternative user input services. Therefore, if you use any of these above, it is recommended not to disable the process on the PC. But remember that the process can always run in the background. However, it won’t interfere with the system’s functions.

Where is ctfmon.exe File Located on the Computer?

The loader is available in the C:\Windows\System 32 folder on the Computer. Moreover, you can get this available in the C:\Windows\SysWOW64 folder.

CTF Loader Error Messages:

These are a few of the common Ctfmon.exe error messages. Let’s check it

  • exe – Bad Image.
  • exe Application Error.
  • exe could not be found.
  • exe could not be installed.
  • exe could not be launched. Class not registered.
  • exe could not be started.
  • exe failed to initialize properly.
  • exe has encountered a problem and needs to close. We are sorry for the inconvenience.
  • exe is not a valid Win32 application.
  • exe is not running.
  • Cannot find ctfmon.exe.
  • Error starting program: ctfmon.exe.
  • Faulting Application Path: ctfmon.exe.
  • The file ctfmon.exe is missing or corrupt.
  • Windows failed to start – ctfmon.exe.

The Root of Ctfmon.exe Problems:

In most cases, the  Ctfmon.exe issues can be seen due to virus infection or missing or corrupted ctfmon.exe. Whereas invalid Windows registry entries linked with the MSDN Disc 1755 can cause the issues.

Here, we have given a few reasons behind the Ctfmon.exe problems. So, let’s have a look.

  • Corrupted or invalid Ctfmon.exe entry.
  • Corrupted file exe due to virus infection.
  • Software that does not link to the MSDN Disc 1755 application deleted exe by mistake.
  • Any program that conflicts with MSDN Disc 1755 shared referenced files.
  • MSDN Disc 1755 (ctfmon.exe) gets corrupted while downloading or during the installation process.

Is Ctfmon.exe a Virus?

We have already mentioned that it is a Microsoft process, not a virus. So, you can remain worry-free as the process will not cause harm to the PC. But a few viruses and malware can be found which disguise aa ctfmon.exe files. As a result, it remains undetected on the PC. Hence, you need to pay attention to this.

You need to check the file location if you want to determine whether the file is a virus or not. The actual file location is C:\Windows\System32. Hence, you need to tap on the CTF Loader process in the Task Manager. After that, you should select the Open file location. Suppose you find the file in the System32 folder. If it is the case, try performing a virus scan. Remember that this loader needs to have a light workload on the hardware. But if you see high system resource usage, you should check for malware.

Scan for Viruses or Malware:

If you are using Windows 11, use Windows Security to scan the system, but one thing to note is that the scanning method is unable to catch everything. Sometimes, malicious codes can be disguised as a CTF Loader.

If you want to scan the system for malware, follow the steps below.

  • Your first job is to tap on the Windows key. Then, you should type windows security. Finally, tap on the top result after that.
  • After that, you need to choose Virus & threat protection on the left by going to the column. Then, you should hit the Quick scan button on the right.
  • Once you complete the scanning process, if Windows Security does not find anything but you see the usage of the CTF loader is high, then you have to run the deeper system scan.
  • After that, you should tap on the Scan options link. Next, you should choose a Full scan or a Microsoft Defender Offline scan.

AndIf you perform the deeper scan, it will take more time to complete, but it can discover and troubleshoot the malicious codes. If Windows Security finds malware, try to run a scan with a free and reliable antivirus suite.

Why Leave CtfMon Running?

The loader is advantageous for those who can use an alternate language or language input device. Besides, the tool is handy for keyboards and similar input devices which depend on voice recognition, unique input schemes, or electronic input like an electronic touchpad, the main task of which is converting handwriting into text. Here, we have given a few benefits of CtfMon. Let’s check it.

  • You should know that if you keep the process running in the background, it is advantageous.
  • It allows the users to type in Mandarin without a keyboard featuring Mandarin characters.
  • People may want to use a keyboard with characters from a non-English language.
  • A person using Windows 10 prefers typing with a braille keyboard.

Can CtfMon Be Harmful?

The file is not harmful on Windows 10 or other Windows versions. But remember that this file never weighs down the central processor or memory resources. It indicates that leaving this running in the background won’t affect the primary computing needs. The process does not consume any system resources when it runs in the background. Therefore, you will not experience any performance drop when the Windows task manager activates the loader. If you want to close the file, tap on the Task Manager’s loader. Then, you have to tap on the End task.

Is CtfMon in System32?

You may feel frustrated if the file keeps popping up at Startup or after you turn it off. But if you find CtfMon.exe outside of the System32 folder, you should know that it can be a virus that disguises itself as CtfMon.

How to know whether the location of CtfMon is system 32 or not?

Follow the below steps to determine the location of CtfMon:

  • First, you need to open the search bar. Now, you have to type Ctmon.exe.
  • Now, your task is to right-click on ctmon.exe. Then, you need to tap on the option open file location.
  • Now, the system 32 directory can be seen in Windows File explorer.

Is the directory other than system32? Then, you need to perform a full system scan using the latest antivirus software.

How can you enable ctfmon.exe automatically on Windows 11?

  1. Use the ctfmon.exe shortcut:

  • Your first job is to hit Win + R keys so that you can open the Run dialog.
  • After that, you should enter the Ctfmon.exe What is an Aspx File? path in the input field. Next, you should tap on Enter. Hence, C:\Windows\System32 is the path.
  • Now, you need to find the file. Once you find the file, you need to tap on this.
  • Then, you have to select Send to. Now, you have to choose Desktop (create a shortcut).
  • After that, your task is to open the Run dialog again.
  • Then, you should execute the following command.

shell:common Startup

  • You can find yourself in the startup location’s folder.

C:\ProgramData\Microsoft\Windows\Start Menu\Programs\StartUp

  • Now, your job is to copy the file by going to the Desktop. After that, you should paste this into the startup folder.
  • Finally, you need to reboot the Computer. Then, you should check whether this file starts automatically in Windows 11 or not.
  1. Use Registry Editor:

  • In this case, you have to open your Start menu first.
  • Then, you need to find the Registry Editor and open this.
  • After that, you have to head towards the following path:

HKEY_LOCAL_MACHINE\SOFTWARE\Microsoft\Windows\CurrentVersion\Run

  • You need to tap on the empty place and choose the option New. Then, you should select the String value.
  • After that, you have to name ctfmon, the new string.
  • After tapping two times on this, you have to choose the Value to
  • C:\Windows\System32\ctfmon.exe.
  • Finally, reboot the PC to fix the issue.
  1. Use the Task Scheduler:

  • Your first task is to open your Start menu.
  • Now, you should find Task Scheduler and later open this.
  • Next, click on expand Microsoft.
  • After that, tap on expanding Windows.
  • Now, you have to choose TextServicesFramework.
  • After that, you need to click on MsCtfMonitor, which is available on the right side. Then, you have to choose Enable.
  • Now, you need to shut down the Task Scheduler.
  • Finally, you have to reboot your Computer to check whether the file is still running automatically at Startup.

How Do You Disable Ctfmon.exe:

A few people find the process not useful as it keeps running in the background always. So, they want it to disable this. But there is a fact you should know. You can disable it directly if you use neither the Language bar in Windows nor any alternative input device ( pen tablet). So, here we will mention the methods you need to follow to disable ctfmon.exe.

Disable ctfmon.exe at Startup—

If you want to prevent the file from running at Startup, perform the steps.

  • You should first tap on the Ctrl+Shift+Esc so that you can launch the Task Manager. Next, you should tap on the taskbar. After that, you have to select Task Manager to launch this.
  • After that, you have to move to the Startup tab. Then, tap on the CTF Loader, and then you should select the option: Disable.

Completely Disable Ctfmon.exe—

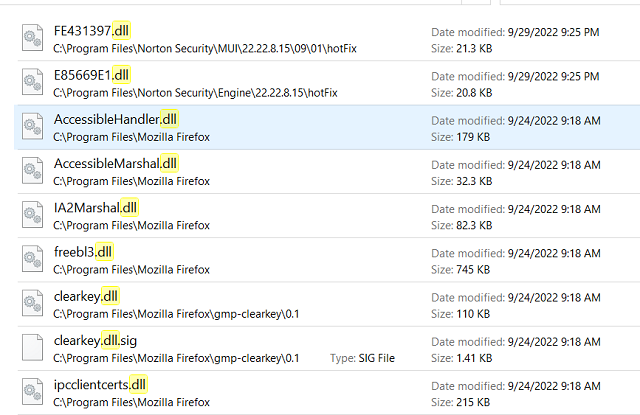
Do you want to stop running this permanently? Those who want to know the ctfmon.exe Windows 10 disable method need to unregister the DLL file connected to alternative user input. Follow the below steps to do so.

  • Your first job is tapping the Windows+R keys on your keyboard, which helps bring up the Run dialog box. After that, you should tap on the Windows Start menu. Now, you need to open this by selecting Run.
  • Next, you have to type these commands one by one. You need to hit Enter after every command so that you can unregister the DLL files.

regsvr32.exe /u msimtf.dll

regsvr32.exe /u msctf.dll

Disable through the services console:

If you disable the loader, it can result in malfunctioning specifications in Office. But people can disable this if they want. Although if you wish, you can enable this again. It is possible to disable the process on Windows through the services console. You just need to follow the below steps to do so.

  • Your first job is to use the Windows key + R, a keyboard shortcut that allows you to launch the Run dialog. Then, you should type services.msc. Now, you need to tap on OK.
  • After that, you have to look for the Touch Keyboard and Handwriting Panel Service entry. Then, you should tap on this and choose Properties.
  • Once you open the Properties display, you should set the Startup type to Disabled. Then, you need to tap on Apply.
  • Finally, you have to choose the Recovery tab. After that, you must change the failure fields to Take No Action. Now, tap on Apply and OK.

Turn Off CtfMon.exe in Administrative Tools:

However, you can follow this alternative: turning off Administrative Tools. Unfortunately, the solution can cause problems with Bluetooth keyboards and other onscreen keyboards. However, according to other users, the process prevents CtfMon from appearing continuously at Startup.

  • Your first task is to open the Control Panel. Then, you need to find the Administrative Tools, which can be seen in the upper right search bar.
  • Double-click on the option named Services after opening the Administrative Tools window.
  • After that, you have to scroll the page down in the Services window. Now, you should choose the Touch Keyboard and Handwriting Service Panel.
  • Next, you have to change the setting of the Startup type to Disabled.

How can you fix ctfmon.exe not starting automatically?

These are a few methods through which you can solve the ctfmon.exe not starting windows 10 error.

  1. Run SFC Scan:

  • You should open the Start menu first.
  • After finding Command Prompt, you need to tap on this. Then, you have to select Run as administrator.
  • Now, type the sfc /scannow command and hit Enter.
  • Then, you can find the Computer scanning the problem.
  • Now, you have to restart the Computer.

If you want to fix the issue, try another way which is scanning the Computer deeply.

  1. Check for Windows updates:

  • You should first hit Win + I buttons to open Settings.
  • Now, you need to choose Windows Update, which can be seen on the left pane.
  • Then, you should hit the Check for updates button.
  • Your system checks for the latest updates after that. If the system detects any update, it will install the update automatically.
  1. Re-enable CTF Loader Service:

  • You need to tap on This PC first and choose Manage.
  • After that, you have to choose Services and Applications.
  • Now, you need to tap twice on Services.
  • Next, your task is to find Touch Keyboard and Handwriting Panel Service.
  • Then, you should tap on this and select Properties.
  • Now, you should choose Startup Type as Disabled.
  • Tap on Stop.
  • After that, you have to tap Apply and OK.
  • Then you need to restart the Computer.
  • After restarting your Computer, you need to repeat these steps. But you have to enable the service this time.

Remove CTFMON Using Freeware App:

In case none of the methods work, you can try this process. CTFMON Remover is a freeware program that displays whether you have installed this or not. So, with the help of the app, you can remove it. Besides, if you want, you will be able to restore this.

You only have to hit the Deactivate CTFMON.EXE button so that you can begin the method of removing the Windows process. You should know that it is an old program that supports only previous versions of Windows, such as Windows XP, Windows 2000, etc. If you want, try this on Windows Vista and 7, but remember that it won’t work.

Conclusion:

Ctfmon.exe is a Microsoft process used for the Language Bar and Alternative User Input Text Input Processor. But if you don’t want to use such services, it is possible to disable it from Startup. However, it uses minimal system resources. Therefore, when you find a problem with your CPU or hard drive, ensure that you solve the issue by performing a virus scan.

Frequently Asked Question:

  • What is Ctfmon exe?

It plays an important role in monitoring active windows and offering text input service support for different purposes, such as speech recognition, handwriting recognition, keyboard, translation, and so on.

  • Is Ctfmon exe needed?

It is a Microsoft procedure for the Language bar and Alternative User Input Text Input Processor.

  • Should you delete Ctfmon exe?

This process helps in recognizing handwriting, speech, etc. So, ensure that you do not disable the procedure on the PC.

read more
AppsDo It YourselfGadgetsTechnology News

Google Chrome Brings New Shortcuts for History, Tab, Bookmarks: How It Works

Google Chrome Brings New Shortcuts for History, Tab, Bookmarks: How It Works

Currently, Google has announced three new paths through which you can search your bookmarks, tabs, and history in Chrome. Using these three latest shortcuts, built into the Chrome address bar (@tabs, @bookmarks and @history) you will be able to search easily.

With the help of the @history shortcut, it is possible to find the history of your browser from the address bar. Suppose there is a vast collection of bookmarks, and you are willing to find any bookmark among them. In this case, you should take the help of the @bookmarks shortcut. It enables you to find the specific bookmark among the bookmark folders from the address bar.

Suppose you have opened many tabs. If it is the case, you need to take the help of the @tabs shortcut to find a specific one. As per the statement of Google, @Tabs are able to sift through a lot of tabs about flights, hotels, activities and rental cars so that the correct tab can be found. It can make your task easier by combining with tab groups. Remember that you can not easily find the tab or bookmark that you want to find. But don’t worry, as the Chrome address bar on PC comes with an upgrade. Therefore, it is now possible to directly search bookmarks and history through the Chrome tabs, from the address bar.

How to Use @tabs, @bookmarks and @history shortcuts:

These three default shortcuts are @tabs, @bookmarks and @history.

You need the @Tabs shortcut if there are a lot of tabs. Hence, you need to type “@tabs” in the address bar. After that, you should hit the “search tabs” button. Now, you need to type the title so that you can see the available matching suggestions.

While searching, sometimes, we need to visit the earlier website again. But you didn’t remember to bookmark. Therefore, it can be challenging to find it again. @history is useful hence as it enables users to search through the browsing history from the address bar. Thus, it can lead you to get back to the page you are looking for.

Image of the Google Chrome address bar with the text “Search History“:

Are you finding anything from the history section? Finding it may be challenging for you. Hence, your job is to type @history. Then, you need to enter a few characters. Next, a preview of Chrome browsing history will appear in your address bar.

You can see a browser’s gif appearing with the text “@” and “Search Tabs” in the address bar. After that, you have to type the “W” letter. Then, you should scroll down the cursor so that you can choose a YouTube video. Once you type @tabs in the address bar, you have to put the name of the tab’s title. Now, a suggestion will appear in the address bar directly.

If you are finding a bookmark, you have to type @bookmarks. Next, you should put the name of the bookmark. The matching suggestions will appear in the dropdown.

Save time with custom site search shortcuts:

Several people are there who need to visit particular sites. Are you one of those who visit YouTube or Google Drive often? It is possible to activate the custom site shortcuts by finding these from the address bar directly. In this case, your job is to head toward the “Manage search engines and site search” (chrome://settings/searchEngines) on your computer. Once you visit, you need to activate these. Remember that you use Chrome Actions to reach there quickly and you need to type in “customize site search”.

As per Google’s announcement, you could find tabs, history, & bookmarks by only using “@” as a prefix on the PC. You need to do this like you make custom prefixes for accessing various search engines from the address bar.

The “@tabs” allows you to switch from one tab to another. You can do this by typing the title or website’s URL which you have opened. Suppose you bookmarked any site. So, using “@bookmarks”, you can get them available except by opening the bookmarks manager or the sidebar. But sired that you have not opened in any tab or that you have not saved as a bookmark, you should use the “@history” shortcut so that you can find them.

You should know in this regard that a few features are available already in chrome. For instance, suppose you want to visit a site opened in another tab. In such a case, the browser can give you a shortcut in the address bar suggestions for opening the tab. If you wish to find it through the open tabs, use the chevron that exists in Chrome’s top right corner. Otherwise, you need to use the cmd/ctrl + shift + a keyboard shortcut.

Google Chrome 108

The new shortcuts helps to making the search process easier.

In Google Chrome 108, these shortcuts are currently available. If you want, you may try out these on your pc. Whether you are willing to open a duplicate tab, the address bar displays that you have opened the tab already. Then, you should go to this by hitting the “Switch” tab option.

Modern browsers like SigmaOS, Arc, allow the users to open multiple tabs in the background. People can access them via a search bar or keyboard shortcuts. As a Chrome user, you can access tabs, bookmarks, and history similarly via these modern shortcuts.

Conclusion:

You will get to see these modern shortcuts available in Chrome 108. Using these three new shortcuts @tabs, @bookmarks and @history, you can start searching for the websites. With the help of the @bookmarks shortcut, you can find the bookmarks that you are searching for. This specification will help to redirect the user to the relevant bookmarked site. Whereas it is possible to find the browsing history with the @history shortcut. Whereas using the @tab, you will get to see the matching suggestions from the open tabs. Therefore, there is no chance of getting juggled between the open tabs on the browser. Using this feature, you can easily locate a particular tab quickly when multiple tabs remain opened.

read more
Do It YourselfAppsTechnology News

How to Identify Font from Image?

How to Identify Font from Image?

Do you find such a font that can make your project amazing? But its name is unknown to you? Sometimes, you can find a perfectly suitable font for your project, but you may be confused by pondering how to identify it. Approx, all of us have faced these kinds of issues. However, sometimes it happens that clients want a font that can match with the existing design. In this case, identifying the font becomes crucial.There fore let us know how to identify font from image in this blog post.

Are you working with any clients? Then, you should learn if your client knows the font name and whether they need to pay for it or not.

In this article, we have mentioned a few tools with the help of which you can detect fonts from any picture or website. You must know how the fonts work and where these are available. Knowing about these details is a vital design skill, as fonts are considered an unabated part of designing language. You may find many resources that can help you to detect them. While a few are community-driven, a few are automated. Your aim should be to find a resource that can offer accurate results and continued support & feedback. Thus, it becomes helpful for you to enhance your skills in font identification.

How to Identify Font from the Image:

Your first task is to understand what you are looking for. However, several tools are available in the market for this purpose. But all these tools have limitations. In this case, you should know about typography theory to understand which font resembles the most closely to your required one.

Ensure that you understand the font anatomy correctly. It helps you to understand why you have to choose this one for your project and what makes the fonts different from others. Do you want to search more effectively? Then, focus on bowls, terminals, counters, loops, etc.

You must optimize the picture for the search engine before finding anything. First, you need to create a high-contrast black-and-white image. Then, ensure that it comes with glyphs that can help you to find anything more quickly with better accuracy. Make sure that you do not include complicated things. For example, you should avoid using ligatures as these can branch across letters. Most identifiers can not detect these properly. Therefore, you need to find a unique character that you can recognize easily. For instance, a lowercase g comes with unique identifiers in most fonts.

Tools required to Identify Fonts from Image:

These are the names of some tools used to detect fonts.

WhatFontIS Website:

Suppose you are looking for a tool to find the fonts; use WhatFontIs. It enables you to find the restaurant’s sign’s font. Besides, when you read a book, it can help you to detect a quote.

Need help understanding the font on a label of medicine? Try to use this tool. If you want to find a site’s font used at the button or heading, you can take help from this. This tool enables you to find the font used on a product’s label that you have purchased from a shop.

These are the steps that you should follow to find a font used in an image using this tool:

  • First, your task is to drag the picture and drop this into the blue box on the right. Then, it is possible to browse and choose the picture, or you may put its link.
  • You should highlight a new crop box so that you can choose the picture’s part containing the font. Ensure that you have selected 4-10 letters only from the font you are searching for.
  • Want the most effective visibility? Then, manage the brightness and contrast of the text.
  • If you want to optimize the picture, you must verify each image on the right-hand side of the screen. After that, you need to input the proper characters. For example, suppose you see any letter divided into more than one picture. In such cases, you need to drag them on top of each other. Thus, it becomes possible to make a unified character.
  • WhatFontIs said that users could get free and premium font suggestions. In addition, you can get an option to save the list. But remember that you need to register here.
  • The tool has more than 850,000 fonts. But you can experience a few pesky Ads, which are its drawbacks. On the other hand, it can make more than sixty fonts, both premium & free.

WhatTheFont:

Are you looking for a web-based tool just like the previous one? It is a suitable option in this case. But it also has a drawback: It never accepts image URLs. Therefore, you have to upload the image here.

It is possible to flip the picture and crop it after uploading. Thus, you can choose the font that you are willing to detect. This is one of the simplest ways to find fonts. All you have to do is to drag a picture first and drop this next onto the page. After that, you need to crop it around the font. Now, the tool tries to find similarities between those fonts with more than 130,000 selections.

The tool is useful because it can work with any picture. For example, the image may be text on a PC, a white background, or typed. It can easily recognize the font. In addition, it can display a few fonts which resemble the same or are close to the actual one. It is possible to download them when you find these for free. Users can access this on mobile with the help of a dedicated app for Android and iOS.

Font IN LOGO:

Try to look for different fonts so that you can find new options. With the help of this tool, it is possible to find fonts that specific brands and companies use. First, put the brand’s name or company and check if it exists in the database. Then, the brand takes the help of search results to reveal the font’s name. Next, your task is to tap on the search results and check the name of the font used by the brand.

You have to detect the proper typeface first. Then, test various fonts to check which ones can work together. Hence, you can generate easy logos with the help of some fonts. Then, see which one is looking good.

IdentiFont:

The tool may not be useful, but it is quite interesting because people can use it in various ways. For example, you not only find the font by name. But also, it is possible to find the fonts even by appearance, similarity, symbol, and design. Although this one is not as intuitive as the other tools that are mentioned in the list, it can offer effective performance.

Google Web Fonts is one of the examples of famous fonts published by a specific font designer. Are you looking for an alternative one designed similarly to the font that you have already used? Then, you need to use the tool.

Are you using the Calibri of Microsoft as your default web font? This tool allows you to find other fonts which come with similar designs. So, check if there exists any better choice.

Font Squirrel:

This is one of the best tools you can use to detect free fonts. First, it is possible to browse via the extensive curated collections of fonts. After that, you must choose the font that suits your needs the most. Besides, if you are willing to upload a picture to the tool’s Font Identifier Tool, you can do so.

Use this one whenever you think about a tool that can detect any font without any hassle. First, upload the picture, Or the URL of the image and the tool can help you to detect it. Next, this tool will display all related fonts which you can download.

  • First, your task is to navigate to the site of this tool.
  • After that, input the link of the picture or upload the picture.
  • Next, you should crop the picture so that you can easily highlight the text. Finally, ensure that you drag only the box’s blue borders so that it will cover merely the text on the picture.
  • Tap on Matcherate It. Then, you can get many fonts that are similar to it under the picture.
  • Want to download the actual font or buy this from the given website? Then, you should know that it is possible to do so. Alternatively, selecting Font Squirrel from the menu under the picture is possible. Thus, you can view the free ones only.
  • You should download those which match the most.
  • Manage the characters manually so that these can match the actual font when the finder can’t detect the characters’ shapes in specific fonts.
  • Hit the Manually Adjust button to make it happen.
  • The finder tries to enter the text’s actual characteristics in the open box to find the proper shape & font’s character in the database. You can remain worry-free by using this tool; you can get the suitable font as per your needs.

WhatFont Plugin:

With the help of this versatile Google Chrome extension, you can easily detect the fonts on a site. Are you a web designer? Then, you should use this to recognize the fonts on a webpage. After setting up and installing the extension, go to the extensions menu and tap on the WhatFont extension shortcut. After that, you should hover over a section on a webpage. The extension can reveal the font’s name. Hence, the proprietary algorithm can make this tool exceptional. Using this tool can lead you to find a font from any webpage easily.

ADOBE PHOTOSHOP:

With the help of this useful tool, you can easily extract one font family from a picture. These are the steps required to follow to identify a font from the image in Photoshop.

  • First, you need to open the photo in this tool.
  • Next, try to make a rectangle around the font, taking help from the Rectangular marquee tool.
  • Choose the Rectangle Marquee tool after that.
  • Again make a rectangle around the text.
  • Choose Type → Match Font from the toolbar.
  • Choose one font from the list containing names of those fonts which are installed already on the PC. Now, from the web, you can download those fonts which are matching with your desired one.

Font Matcherator:

If you are looking for the best font identifier tools with the most accuracy, go for it. It comes with a database of more than 900,000. So, here you can get both free & commercial fonts. First, try to upload a photo containing a sample of letters. Otherwise, you may drag and, after that, drop it into the tool’s search box.

If you are willing to use this online tool to identify a font from an image, follow the steps.

First, you should upload an image file of the font to detect it. This software can recognize glyphs. But it is essential to draw a manual crop box around the word so that you can detect this. After that, the tool displays a list containing the same fonts with URLs. If you want, you can buy these from the list.

FontSpring:

You can use the tool in terms of finding the font from an image quickly. If you are willing to detect the fonts with the help of the tool, follow the steps.

  • Head toward its website first.
  • After that, you need to upload the photo.

If you want to input the picture link, you should choose the image URL option.

  • Next, crop the text to the photo area where the font is.
  • Hit the Matcherate It button.
  • Once you hit the button, a font-matching algorithm is used. This algorithm is applied to the photo to detect genuine fonts.
  • Check the results. You can see plenty of results with fonts matching the photo.
  • If you plan to download the font or buy one from the list containing results, you can do so. But you will need to manage the characters manually when the finder can’t detect the characters’ shapes.
  • You should tap the “Manually Adjust” option to type the photo’s exact characters.
  • Hit the Manually Adjust button in this case.

Conclusion:

Everyone knows how challenging it is to identify a font from the image. The tools mentioned in this article are useful and can help you in different ways. However, keep in mind that these need top-quality photos. Otherwise, these tools will not work the best. For instance, pixelated images don’t give beneficial results.

On the other hand, design Bootcamp can let you know how to put design knowledge into practice. For example, after going through this article, you have learned how to identify fonts from images. Still, if you have any queries, let us know via comments.

Frequently Asked Questions:

  • What is the best tool to identify a font from an image?

Undoubtedly, Font Squirrel Matcherator works the best in this case. With the help of this tool, you can scan & detect the font quickly.

  • Can a font be found from an image?

Font Matcherator enables you to recognize the font in a photo. You need to use this tool for merely a few minutes, and you will get the result.

  • Can the font identifier match cursive fonts?

Remember that fonts containing cursive or script characters do not match accurately when these are connected. If you are willing to determine which one is the most effective, use an image editing program to identify the font from the image. With the help of this program, you can separate every letter before you upload the photo.

read more
Technology NewsAppsDo It YourselfSoftware

14 Best Cursive Fonts in Word

Best Cursive Fonts in Word

People can insert graphics, images, word art, charts, 3D models, screenshots, and other modules here. In addition, it can provide different fonts that we can use in our documents to add value to your text. Ensure that you choose a suitable font for the text so that it can be easier for people to read.  We use these primarily for decorative invitations, stylish text work, informal letters, etc. Upon installation, this software includes a few default best cursive fonts in Word with different designs. While professional cursive fonts in Word are used on more serious matters, there are a few casual but beautiful cursive fonts in Word on the list.

Microsoft Word, acquainted as “Word,” is a famous platform you can easily access. Besides, you can use Word processing software easily. We use this for writing documents. It is the best software available in the technology market for this purpose.

What are Cursive Fonts in Word?

Cursive is a font style where letters touch each other. It means that the characters are joined. The font’s stylishness is one of the specialties of writing. If you use these in your document, the letters would be in flow. After that, you can see the text appearing as if it is handwritten.

A lot of fonts are available. So, when you apply them, these would look amazing in the document. If you are finding a few of the best cursive fonts in Word, go through the entire guide.

How to Use Cursive Fonts in Microsoft Word:

  • Your first job is to write any text you want in the Word document.
  • After that, you must choose the text or highlight it using the mouse.
  • Hit the Home tab.
  • Find any cursive font on the Font Box as per your wish. However, it is possible to browse several fonts to look for the best one.
  • Tap on your preferred font style or hit enter.
  • Finally, you can choose text appearing in cursive font.

How to Download New Cursive Fonts for Microsoft Word:

You can download these from several places online. While a few of these are free, a few of these are paid. You need to follow the following steps to learn how to find a cursive font, download it, and install it on your Windows 10.

  • Your first job is to head toward the font at https://fonts.google.com/.
  • Write a term into the search field at the window top. Next, you have to hit Enter. You should know that “cursive” doesn’t return many results. So, you should use something like “script” or “handwriting” instead.
  • After that, tap on your preferred font.
  • Choose the Download family option at the window’s top-right.
  • You must select a location for the downloaded zip file on the PC.
  • Your job is to tap on the file and select the Extract All option.
  • Hit the Extract button.
  • Finally, you must tap on the file and choose the Install option.

NOTE:

If you download this file from the internet, it could be downloaded as a zip file. Ensure that you need to extract the zip file before installing the font.

Suppose you have an active window of this software or other apps. Hence, your installed fonts will not reflect in any currently active software. Therefore, you should exit and close the program entirely to access new fonts.

Have you used third-party fonts in your projects or presentations? It is essential to take the installation file with the project because you have to install it on the System that will be used to give the presentation. In simple terms, try to keep a backup of these files.

How can you download Fonts using Feature-on-Demand (FOD) in Windows 10?

  • You need to head toward the ‘Settings’ of the app and open it after that on the computer. Then, you need to tap on ‘Apps.’
  • After that, tap on ‘Optional Features’ below ‘Apps & features.
  • Now, tap on ‘+ Add feature’ on the display screen.
  • Then, you should write the font family’s name in the search box. For instance, we use ‘Cherokee fonts’ as an.
  • As soon as you have found this, check the box beside its listing in the search results.
  • Tap on ‘Install’ at the display bottom.
  • Finally, your Windows 10 can download and install this from Microsoft’s servers.

Remember that the wait time relies on the connection speed and the number of background tasks being performed on the System. However, it will take up to sixty seconds.

How to Install the Fonts on Windows 10 PC:

Before knowing the best Cursive Fonts in Word, you should first learn how to install these on the System. Once installed, you can use them outside of Word because these are installed system-wide. It is possible to use installed fonts in all apps like MS PowerPoint, Adobe PhotoShop, etc.

Different websites are available where you can get the fonts. It is possible to download and install them to use inside the software. Besides, you can use them inside other software on your System. In this regard, you should know that these are mostly free to use. But there are a few elegant cursive fonts in Word which you need to buy. You have to pay a certain amount to download & install them. You should follow these steps to download and install them on a Windows 10 laptop.

  • Your first task is to download a font. After that, you must tap twice on the TrueType Font file (extension . TTF) to open this.
  • Next, you will see your file. Finally, hit the Install button to install the respective font on the PC.
  • You can use this in MS Word and other software on the System.
  • Alternatively, if you go to the given folder, you can install the following:

C:\Windows\Fonts

  • Copy the TrueType Font file and paste this inside the above folder.
  • Finally, you have to reboot the computer. Your Windows would install this automatically on the System.

Install Cursive Font On macOS:

  • You should head toward the font which you have downloaded recently and then tap two times on the font.
  • After that, you should tap “Install Font” on the display’s bottom-right corner.
  • It is possible to use that font in the projects moving forward.

Some Default Cursive Fonts in Word:

These are names of a few of the best cursive fonts in Word online to which you have access before finding your own.

  • Segoe Script
  • Lucida Handwriting
  • Edwardian Script
  • Kunstler Script

You can try out many cursive fonts in Word documents by choosing the Home tab at the window top. Next, you must highlight the text you want to make cursive. Next, tap on the Font drop-down list and choose a cursive font option.

These are some of the best cursive fonts in Word:-

  • Brock Script Font
  • Simplesnails
  • Edwardian Script
  • Bradley Hand
  • Brush Script
  • Palace Script
  • Freestyle Script
  • Monotype Corsiva
  • Viner Hand
  • Vivaldi

How to Add Any Cursive Font To Microsoft Word?

If you want to add a custom cursive font to this software, you should download and install this on the PC. Afterward, you must head towards the Home tab and tap on the Font group. Now you should choose More Fonts. As soon as the dialog box appears, your task is to choose the Custom tab. Now, you should browse for the font installed by you. Choose this and tap on OK. At last, you can get the font in the software.

How do you write in the cursive font style In Word?

If you want to write in this style, choose the text you wish to format. After that, navigate to the Home tab. Next, choose the Cursive option from the drop-down menu in the Font group. Finally, you can see the text in this style.

What Are Some Common Cursive Fonts For Signatures In Microsoft Word?

These are a few common ones for signatures in this software, including:-

  • Script MT Bold
  • Brush Script MT
  • Lucida Handwriting.

Head toward the Home tab to choose these and tap on the Font group. After that, scroll down to the Cursive section and choose the desired font.

How To Add Fonts To Word in macOS:

If you use macOS, you should extract these with the help of Winrar for Mac OS if you want.

Different Cursive Font Styles with Applications:

You can now have an improved knowledge of these. So, you should know about a few beautiful font options that could be used on projects. Different styles are designed for simple tasks on personal branding projects.

Cursive Fonts for Logos

  1. Palmer Script & Sans:

This one is a bold script font which generally provides a handmade feel. Therefore, it is ideal for brands & businesses who are willing to emulate a retro spirit. In addition, it becomes flexible for various applications due to the thickness & weight of both upper and lowercase characters.

  1. Audrey:

This handwritten script font is stylish and ideal for logos & quotes. It is feminine but comes with a bit of an edge. As a result, it becomes suitable for unique designs. In addition, this one ranges plenty of ligatures to offer a real handwritten feel.

  1. Heather Oliver:

It comes with solid strokes, which can help you to translate many branding materials. Oliver is hailed by its designers as a “swiss army knife” among typefaces for its versatile usage. It has stylistic alternates for lowercase characters. Therefore, it is possible to tweak every Word as you wish.

  1. Thistails:

If you are looking for a monoline font, Thistails is something you should choose. It combines vintage aesthetics with modern sensibilities to provide a special effect. As a result, Thistails is suitable for youthful brands with an old soul.

  1. Signature Collection:

This is the font you must have seen at the end of an editor’s note or newspaper. It was designed to look so natural. In addition, it provides a complete set of stylistic alternates for lowercase letters and charming watercolor overlays for additional oomph.

  1. Barley

It is something made with an authentic modern calligraphy look. In addition, Barley comes with modern curves. It ensures its legibility in various applications. The unique thing is its handwritten quality making it suitable for digital sign-offs. You can use all lowercase letters to add a few essences of cuteness.

  1. Faustine:

It can add some flourish to digital signatures. Besides, Faustine can emphasize the handwritten effect with its “messy” style.

  1. Haute Couture:

This one features multi-thickness strokes, and it appears like every letter was scribbled using a fountain pen. Due to its excellent quality and calligraphic flair, this one has become a suitable option. It is perfect for fancy events such as weddings, black-tie parties, and metropolitan cocktails.

  1. Wild Love:

Wild Love Collection can amaze you if you prefer using fonts. This set has two ideal fonts. In addition, it includes a set of beautiful symbols that can give Instagram quotes and websites unique looks.

  1. Desirable Calligraphy:

It is the fanciest one on the list. Besides, Desirable Calligraphy’s classic elegance is palpable with grand flourishes. These can make the text pop.

  1. Groovy:

This one can offer a touch of retro to any media type. You have to use Groovy to lend an authentic vintage vibe to ’60s- or ’70s-themed designs. In addition, Groovy is perfect for pop culture collectibles such as posters, special product packaging, shirts, bags, and stickers.

  1. Theodore Bagwell:

This typeface is rough and clean. Besides, Theodore Bagwell comes with a combination of a sans serif and script font so that you can create an exceptional look. Therefore, it is ideal for traditional typography lovers who wish to make various layouts.

  1. Monoline:

It is very simple, so people prefer to use this for web design and other digital media. Even Monoline can be used in newsletters and digital magazines. This one is easily legible. Besides, it has versatile usage.

  1. Wild Irish Rose:

Wild Irish Rose is a very charming brush script font. It becomes handy on plenty of media like book covers, album covers, posters, social media posts, web pages, etc., due to its raw, “just painted” quality. In addition, you can use this as a t-shirt design.

We have given the names of a few more cursive fonts in Word.

French Script Microsoft Font:

It is an excellent option if you are looking for one that can offer a touch of elegance to your documents. The stylish lettering and flowing lines can make the texts unique.

Segoe Script:

If you want to make a document for work, go with this. It can add a dash of class. Therefore, there is no need to wait too much. In addition, your default doc has it. So there is no need to download it.

Vladimir Script:

It is a beautiful font to use in your documents. In addition, Vladimir Script comes with flowing lettering features to add a touch of elegance to your document.

Edwardian Script:

If you are writing a legal document or love letter, Edwardian Script is a good choice. It can add a touch of je ne sais quoi. Therefore, with this one, you can boost your documents.

Freestyle Script Font Family:

It is ideal for making your text look stylish. Besides, the flowing lines and beautiful lettering make it special among others. So, try this out if you find an elegant font to use in your document.

Magneto Bold:

If you are willing to add a few personalities to your work, Magneto Bold is the one you should choose. It is perfect for you when you want to write a love letter or make a fun invitation. Magneto Bold can add an additional touch to your document.

Palace Script MT:

If you want to make a flyer, write a letter, or work on a presentation, choose Palace Script MT. Whether you have planned to make your text stand out, Palace Script MT is the best. As Palace Script MT is a Microsoft-certified font, ensure that it can work seamlessly with other Microsoft Office products.

Lucida Handwriting:

It comes in an elegant design. Besides, this one is ideal for adding a touch of class to your documents. The swirls and flourishes make Lucida Handwriting an excellent choice.

Kunstler Script:

Kunstler Script is a good option if you are searching for fun cursive fonts in Word to use in your documents. It can easily add a personal touch to any document. In addition, this one is very simple to use. When the drop-down menu appears, you can choose Kunstler Script to make a new document.

Brush Script MT:

This one is very common and features a bold look from its heavyweights. In addition, it can display subtle textures to deliver a brush effect. Besides, the letters are conjoined for that look. A few users advise that it is the exact one to use its uppercase settings for beginners.

Script MT:

It is bold and used in logos & packaging. An exciting fact about this is that early twentieth-century German writing styles inspired it.

Vladimir Script Font Family:

It can mimic a hand-painted style font in the 1950s. Besides, it is perfect for those looking for something informal yet presentable. Several users say it will look ideal on personalized printed cards and paper items.

Kunstler Script Font Family:

Hans Bohn designed it. You can find an elegant style in this one. It is perfect to use for formal invites or certificates.

Rage Italic:

It features cursive letters. Besides, it is perfect to use for playful designs.

Third-Party Cursive Fonts:

  • Nexa Rust Script
  • Bickham Script
  • Zapfino
  • Citadel Script

Conclusion:

You already got to know that numerous cursive fonts can add a touch of elegance to your projects. Using these fonts, you can add an essence of sophistication to your website. However, if you have further queries, let us know via comments.

Frequently Asked Question:

  • Does Microsoft Word have a cursive Font?

Yes, it has many options to select from.

  • What font is most like cursive?

If you want to avoid adding other fonts to MS Word, choose Edwardian Script. But if you need other options, try to download a free one. Then, you should install this in the System and will be able to use it in the document.

  • How do you type in cursive on Microsoft Word?

If you want to write in cursive, decide which you are willing to use and choose it from the available cursive handwriting fonts. After that, you should head toward “Home > Select” and begin to type in cursive.

read more
AppsDo It YourselfGadgetsTechnology News

LogiLDA.dll: How to Fix It on Windows

LogiLDA.dll: How to Fix It on Windows

Whenever Windows 10 comes with any updates, it will bring multiple features to the device. But sometimes these may cause problems also. For example, users have encountered a problem regarding LogiLDA.dll, a Logitech file. So whether you connect any Logitech devices to your computer, ensure that this file is on the PC.

The error messages might appear after starting up your device or being turned on, awakened from sleep, or restarted. If you are using an old PC or your PC is running many tasks at once, the warning may appear after some minutes when the Windows 10 system becomes active and usable.

If the problem exists on the computer, you will see the message while booting your Windows 10: There was a problem starting C:\Windows\System32\LogiLDA.dll — The specified module could not be found. This article lets you learn how to resolve the system32 logilda.dll issue and prevent it from happening.

What Is the LogiLDA.dll File?

LogiLDA.dll is a Dynamic Link Library file of Windows, a Logitech Download Assistant software component, meaning a legitimate process file. The location of the file is the C:\Windows\System32 folder.

You can find the Logitech Download Assistant installed on the computer while it is attached to a Logitech device, like a Logitech gaming mouse or keyboard. It mainly checks new Logitech drivers and software updates. When you see any essential files for the function are damaged or missing, this problem will appear.

What Causes the LogiLDA.dll Error?

You can encounter a problem if the file is directly affected. The usual causes of the problem include:

  • The file is not installed correctly, or you use an unsupported version.
  • File corruption in LogiLDA.dll or the file location.
  • Software conflicts.
  • A Windows 10 update may cause an issue while finding the file in the wrong directory.
  • Missing or corrupted files are the most common cause of the problem.

If you can not access the file and its contents, the Logitech Download Assistant will fail to launch. Instead, it will showcase the error message: There was a problem starting C:\Windows\System32\LogiLDA.dll.

Guide To Fix LogiLDA.dll Errors in Windows 10:

These solutions are for PCs, laptops, and tablets supporting Windows 10, running Windows 7 or 8.1, etc.

Restore the LogiLDA.dll File:

Dynamic link library files often get corrupted, missing, or get deleted. Numerous sites can assist you in downloading and replacing a .dll file.

You should download the file from a trusted source to solve the problem. Never download files without knowing if it is legal to use in your country. Sometimes, it is dangerous to acquire these files from a third-party website. However, you can avoid facing the issue of the DMCA and related laws.

  • Your first task is to head toward dll-files.com in your preferred browser. It is advised to use this website when downloading missing DLLs.
  • Scroll down the page to find the file. First, ensure that you should check for the architecture and version number. Then, hit the Download button.
  • Finally, you should install the file accurately onto the PC.

Remove Logitech Download Assistant From Startup:

Disable the Download Assistant to boot the PC and fix the windows system32 logilda.dll error. Remember that once you apply the process, you must manually find the Logitech driver and software updates.

  • Your first task is to tap on a space in the taskbar. Next, you should select Task Manager.
  • Once you see the Task Manager launching in compact mode, you must expand the details. In this case, you should hit the “Mode details” button.
  • Now, move to the Startup tab. Tap on the Logitech Download Assistant and choose Disable from the context menu.
  • Finally, you should reboot the PC to see if the dll error on startup exists.

Make a Registry Edit:

After disabling the Assistant, if your problem remains, try to delete the corresponding key from the Registry. Then, follow these steps to perform the process.

  • Hit the magnifying glass icon to open the search bar in the taskbar. Then, if you want, use the Windows + S keyboard shortcut to bring this up.
  • After that, your job is to write “RegEdit” or “Registry Editor” in the search box. Then, tap on the matching search result to launch this application.
  • You should take the help of the Navigation pane to reach the Registry key. Instead, you may use the address bar and copy the file’s location. After that, you should paste the file location: HKEY_LOCAL_MACHINE\Software\Microsoft\Windows\CurrentVersion\Run.
  • Tap on Logitech Download Assistant, and choose Delete from the context menu to remove the Registry key.
  • You should tap Yes to confirm once the dialog box opens.
  • Restart the PC and check if the dll error Windows 10 exists.

Uninstall Logitech SetPoint:

The error may not be connected to the Assistant but could be connected to different software. If you are willing to test this, uninstall the SetPoint. Check if the issue exists on the pc.

  • Tap the Windows + R keys on your system keyboard to bring up the Run utility.
  • You should write “control” without quotation marks. After that, hit the Enter key on your keyboard to launch the Control Panel app. First, ensure that your view mode is set to Category. After that, tap on Uninstall a program.
  • Tap on this version and hit the Uninstall button to remove the software.
  • Finally, you should reboot the PC to check if the dll missing problem exists in your System.

Reinstall Your Mouse Drivers:

Whether you currently use a Logitech mouse, try reinstalling the drivers to solve the problem. You can perform the step by following the steps.

  • Tap on the Windows + X keys on the keyboard. After that, you should select Device Manager from the context menu.
  • Next, you need to expand the Mice. Tap on the Logitech mouse. Next, choose the option “Uninstall device to remove the driver.”
  • Disconnect the mouse and reboot the PC. Once you boot, you should try to connect the mouse back to reinstall the drivers.
  • At last, check if the file reappears after uninstalling the mouse drivers.

Download the Logitech Gaming Software:

It is a new app used to update your hardware. In this case, your first task is to uninstall the Assistant. Next, try to download it from the Logitech website. It helps to fix issues without losing update functionality.

You can download the Gaming software. Besides, you may use the Logitech G HUB for further hardware customization and functions.

Update Windows 10:

Try to upgrade your Windows to the newest Windows 10. It enables you to fix bugs, bring new features, patch security holes, etc. These are the steps you should follow.

  • Hit the Windows icon in the display’s bottom left to bring up the Start menu.
  • After that, you should select Settings. Instead, you may use the Windows + I shortcut.
  • Hit the Update & Security tile. You can find most Windows Update settings here and select when to receive updates.
  • Ensure that you should stay on the default Windows Update tab. After that, hit the Check for updates option. Then, wait until your Windows 10 can’t find available updates.
  • Once you see the available updates, please tap on the View all optional updates link to see and install them.
  • Whether you find any updates, tap on the Install option. Then, wait till your Windows 10 is not downloading essential updates and apply these.

Use CCleaner:

Whether you want to avoid Windows Registry issues, try to use automated software like CCleaner. It is a program launched in 2004. This small program is primarily for PCs that can delete useless files. But these aren’t limited to temporary files, broken shortcuts, etc. You need to follow these steps to delete the Assistant Registry.

  • First, you need to go to the CCleaner app to download this from the official CCleaner website.
  • Then, install the application and run it.
  • You should choose Tools and Startup from the app’s main menu.
  • Find Logitech Assistant and delete it. Thus, it is possible to delete the Assistant Registry without damaging the Windows Registry.
  • Finally, you should reboot your System for the changes to take effect. Then, check if you are experiencing the issue.

Use a Third-Party App:

The System 32 logilda.dll error can occur because problematic files on your PC are required to be addressed. It is possible to install a third-party system restoration app to scan devices for corrupted files, data, and malware. After that, the app will remove or repair them.

Hence, you should try to fix the issue by launching and following the on-screen instructions to start the process. Then, try to perform the software’s automated processes to cover everything. After that, you can fix the issue in these ways.

  • Your first task is to download the app and install it after that.
  • Now, you need to launch the software.
  • Next, you may scan the computer for stability issues and possible malware.
  • Tap on Start Repair.
  • Finally, you should reboot the computer to take effect.

Once you complete the process, you will find the new computer. Thus, you won’t need to see BSoD problems, slow response times, or other similar issues.

Perform an SFC Scan:

If you want to resolve any stability problems, you should run the System File Checker (SFC). This checker prevents it from loading the file, which launches the Logitech Download Assistant.

If you want to perform this scan, you should first open an elevated Windows PowerShell console. Hence, you need to hit the Start button. After that, choose Windows PowerShell (Admin)) and run this command:

sfc /scannow

Clean the System Registry:

Sometimes, problems regarding the Registry can prevent the Assistant from loading on the PC. However, it is possible to fix any outdated or broken registry entries with the help of a free registry cleaning app.

Once you have installed a registry cleaner, perform a Deep Scan for registry problems. After that, you should choose the Clean option to fix the problem. Remember that the complete method won’t take a few minutes to complete.

Perform a System Restore:

Try to perform this method if you are willing to disable the Logitech Download Assistant from loading at startup. It enables you to revert the OS to a time when the issue didn’t appear.

In this case, you should tap on Windows + R to open the Run box. After that, you need to execute your sysdm.cpl command.

Your job is to move to the System Protection tab and choose System Restore on the System Properties box. Next, you should choose Recommended restore. Then, at last, revert to the current restore point.

Conclusion:

This guide wraps up every detail required to know about the LogiLDA.dll error file. In addition, we have given all the necessary methods to fix its related problems. After performing the essential techniques, you can use your Logitech-branded peripherals and devices.

Frequently Asked Questions:

  • Where should you put Logilda.dll in Windows 10?

It can install itself automatically. Therefore, there is no need to place it manually anywhere. If you have to manually put it somehow in its correct place, ensure that you must keep this in the C:/WIndows/System32 folder.

  • What do you do if you accidentally uninstall Logilda.dll?

You must disconnect and reconnect the device to the PC to reinstall it.

  • What is LogiLDA DLL used for?

It is part of the Logitech Download Assistant. You can use this to check for updates to the drivers for Logitech devices, including mouse, keyboard, video cameras, etc., whenever Windows starts up.

read more
Technology NewsDo It Yourself

ISDone.Dll Error: How to Fix It?

isdone.dll Error: How to Fix It?

This ISDone.dll Error is related to installing important programs and games. You should unpack the compressed data on your hard drive if you install big apps or games. The Donnell error message occasionally pops up if you install games or run them in your Windows 10. Users can see an error message displaying an error that occurred while unpacking: archive corrupted. Unarc.dll returned an error code: -7.

It is not mandatory to always see the same message, as it may vary slightly. However, installing or running the game becomes impossible once the message appears. This one can consume your PC’s hard disk and RAM. So, if RAM or hard disc can’t handle the process during installation, you can experience the isdone.dll Error fix windows 10 problem.

What is the isdone.dll Error?

isDone. dll is an error related to the installation of PC games and programs of large size.

What is the use of Isdone dll?

Installers use it to unpack the compressed archives. Once you download an installer from the web, you should download the file again.

What Causes The Isdone.Dll Error Windows 10?

Have your system files corrupted? If so, you can’t access the game files in the operating system. As a result, you will encounter the issue.

You must see if RAM or hard drive is experiencing any issues or faulty sectors. The reason for that is you can also encounter the problem of a defective storage device.

The Unarc.dll file is required for several applications and games to run correctly. The error message “isdone.dll error” may appear if this file becomes corrupted or missing.

The installation method can face issues with third-party or startup components. In this case, you should perform a clean boot. In addition, you should not use the game to install Windows Firewall or your antivirus program. If necessary, disable the firewall to test it.

How To Fix Isdone.Dll Error for Windows 10:

These are the methods you can try to fix isdone.dll error code 7.

  1. Change The Folder Of The System Files:

First, you should copy the setup file for the program to install it in a new place and paste the file after that. Then, your job is to install it from another location.

  1. Boost Virtual Memory File Size Or Windows Page File Size:

Your operating system comes with a Page File or Virtual Memory feature used to process data that the RAM can’t handle completely. Try this process though it can slow down the method. If you want to expand Windows Page File or Virtual Memory, you should go through these steps.

  • Your first job is to launch the Run command box by hitting Windows + R on your keyboard. Next, write “sysdm.cpl” in the Run box to head toward the System Properties and open it.
  • Head toward the Advanced tab in the “System Properties” section. After that, choose the Settings button in the Performance section.
  • Navigate to the Advanced tab in the “Performance Options” window. Then, you should hit the Change button in the Virtual Memory area.
  • Ensure that you have not selected the option that automatically adjusts the paging file size for all drivers in the following box.
  • You should select the Custom size from the drop-down menu. Then, you can enter the increased numbers in the Initial and Maximum size fields.
  • As 2.5 GB is ideal for games, 400 and 3000 MB values will work fine.
  • Once you have fixed the values, tap on OK. Then, you should close other active windows and reboot the PC.
  • Hold down the Windows and R keys simultaneously.
  • Write “%temp%” into the box and hit OK.
  • After that, you should delete all program files in the folder.
  • Next, see if the issue persists.
  1. Run SFC Scan and DISM Command:

You may face issues while installing big games or software on the PC if you use corrupted system files. In this case, perform an SFC scan to ensure that you have updated Windows system files and are ready to install the files.

  • Type cmd in your Windows 10 search box. After that, you should select Run as Administrator from the menu.
  • Then, you can see the window for the Command Prompt. Write the cmd command and hit the Enter key on your keyboard.

sfc /scannow

  • Once you complete scanning, reboot the PC.
  • You should try to install the game or software. Then, check if the problem remains. When you see the installation went OK, perform a DISM scan.

Remember that you should perform this as the SFC scan has not repaired faulty system files completely.

  • Your first job is to open the CMD section in Admin mode. After that, you should write your command:

DISM /Online /Cleanup-Image /RestoreHealth

  • Once you complete scanning, you should repeat the method for running another SFC scan.
  • Reboot the PC after the completion of the scanning. Next, you should try to install the game or software again. Thus, you can fix the problem.
  1. Check RAM:

A damaged sector can prevent a big software from installing and displaying it. As a result, the RAM could cause other problems. It can put the computer’s overall health at risk. You can use the Windows Memory Diagnostic tool. It helps to check the computer for RAM-related issues.

If there exists an isdone.dll error Windows 8 issue, you should replace it because it can cause additional problems on the pc. Once you replace faulty RAM, install the game or software again.

  1. Troubleshoot it in Clean Boot:

These are the steps you should follow.

  • Navigate to the Run box and write msconfig in it. Then, you should tap on “Enter.”
  • Head toward the Services tab in your new window. Next, you should uncheck the Hide All Microsoft Services box.
  • Hit Disable all button and Apply to save all changes.
  • Head toward the Startup tab and tap Open Task Manager.
  • Disable all programs in the Task Manager tab. Shut down Task Manager once you have disabled all programs. Then, you need to tap OK.
  • Reboot the computer at last and install the game after that.
  1. Replace Isdone.Dll & Unarc.Dll Files:

You must download the DLL files which need to be replaced with the originals. Ensure that you must download these files separately.

  • Your first job is to copy the isDone.dll file which you have downloaded and extracted.
  • Head toward the C drive, and enter the Windows folder. Next, you should enter the System32 folder.
  • You should paste the copied file into the folder. Then, choose Yes in the dialogue box to exchange the genuine file.
  • Now, you should copy the unArc.dll file from the extracted folder. Then, your task is to place the file in that folder.
  • Re-register the inserted files with the help of the Command Prompt.
  • Finally, you should reboot the computer and install the re-registered DLL files.
  1. Re-Register Isdone.Dll & Unarc.Dll Files:

You must re-register the isDone.dll and unArc.dll files on the operating system. Hence, you can fix the problem by following the procedure.

  • Log in as an administrator to use cmd. First, hit the Windows + X keys and hold them simultaneously. Next, choose the Command Prompt (Admin) option from the Win + X menu.
  • If you want to re-register the isDone.dll file, write the following command into cmd and tap on “Enter.”

regsvr32 isdone.dll

  • Once you have re-registered the DLL files, apply this command and hit Enter.

regsvr32 unarc.dll

  • As soon as you run both programs, you should reboot the computer. Now, you can install the game or software again.
  1. Disable Antivirus Software And Windows Defender Firewall:

It may prevent you from installing some games. Therefore, try to disable third-party antivirus. Different Antivirus tools come with a disable or turn-off option. Safe Mode can help you to turn off third-party antivirus software. If you are willing to disable Windows Firewall, perform the process.

  • Hit the Search icon in the Taskbar. Next, you should write Windows Defender Firewall.
  • Select the Windows Defender Firewall option.
  • You should tap Turn Windows Defender Firewall on or off in the left pane.
  • Then, your job is to choose the Turn off Windows Defender Firewall radio buttons in the Private and Public sections.
  • Hit the OK button.
  • You should enable the Windows Defender Firewall once you install the game.
  1. Check Hard Disk With Windows Memory Diagnostic Tool:

Hard drive failure can cause the issue. Therefore, you must check your hard drive. In this case, try to inspect the disc.

  • Hit the Start button to choose Command Prompt (Admin) from the list menu.
  • After that, your job is to write “chkdsk C: /f” at the elevated command prompt and hit Enter.
  • You should exchange the “C” letter with your hard drive letter, where you will install your game. It will fix the issue automatically. Now, install the game to check if the isdone.dll error-7 problem persists.
  1. Clean Up the PC Hard Drive And Reboot:

It is a disc maintenance program that frees up disk space on the hard drive and deletes unnecessary files. These are the steps you should follow.

  • Your first task is to choose Settings from the Start menu. Hence, you need to hit the button first.
  • After that, hit the System tab.
  • Select a storage option.
  • Next, choose the Free up space option from the drop-down menu.
  • Check the boxes adjacent to the options and decide who you want to remove.
  • Tap on Remove files once you complete marking the selections. It helps you to clean out the temporary files.
  1. Check the Game’s System Requirements:

  • Hit the Windows key + S and write the system.
  • After that, your task is to select the System information option.
  • Then, you should check if your device fulfills the requirement to run the game.
  • See if the computer has the minimum RAM specification and if the hard drive comes with free space for the game.
  1. Install the Game In Safe Mode:

Restarting the PC in Safe Mode ensures that your device uses the minimum RAM.

  • In this case, your first job is to begin the PC in Safe Mode. Next, you need to close it. Then, start using it. Once you see the starting display, hit the F8 key repeatedly with a 1-second delay between each push.
  • As soon as you begin the PC, install the software or game.
  • But if this Mode is not serving the purpose, you should try to boot your PC in Safe Mode with Networking.
  • With the Safe Mode option, you can see an option which can boot the PC in Safe Mode with Networking.

Where can you find ISDone dll?

It is available on many sites like dll-files.com. Hence, it is only essential to download and install the computer in the Windows system folder. However, there are a few games for which you need to move the file into the apps folder for smooth installation.

You can move the installation folder to another place on the drive. It is one of the simple tactics which you can try. So, try to install the game and run it. Besides, you should add modern RAM and erase temporary files to fix the issue.

How do you fix Isdone DLL in Windows 11?

These are the steps you should follow for Windows 11.

  • Your first job is to tap on Windows + R from the keyboard. Thus, you can open the Run command.
  • Write regsvr32 ISDone.dll.
  • Hit OK.
  • Shut down the Run command window. After that, check if the problem persists.

Conclusion:

You can’t install big game files because of the computer’s lack of space in the RAM. The problem may appear while trying to install the video game. Our top methods can help you hence easily to fix the problem. It is advised to download the PC Repair tool to address them. Once you complete installation, hit the Start Scan button and tap on Repair All.

Frequently Asked Question:

  • What causes ISDone DLL error?

A lack of memory to run the game can cause the issue. In this case, your RAM, HDD, or both might not have sufficient space to fulfill the game’s requirements. Besides, corrupted DLL files are one of the reasons which can cause the problem. Use a dedicated DLL fixer in this case.

  • Where Do you Install Isdone.Dll?

ISDone.dll file is in the System32 folder on 32-bit systems and the SysWOW64 folder on 64-bit systems.

  • Is Isdone.Dll Error A Virus?

The game files can’t access the Windows PC when you have corrupted system files. As a result, the problem can appear. If you want to protect the PC against malware, use Windows Firewall.

read more
AppsDo It YourselfTechnology News

What is a DLL File?

What is a DLL File?

For Windows OS, DLL is the one that offers most of the OS functionality. Besides, the dynamic link library provides much of the program functionality if a program runs on any Windows OS. For instance, a few programs can contain different modules. Every program’s module is contained and distributed in dynamic link libraries.  It can promote modularization of code, code reuse, efficient memory usage, and reduced disk space. As a result, the OS and programs can load & run quickly. Besides, these consume less disk space on the PC. Now, let’s know what is a DLL file is. How to open it?

What is a DLL File?

DLL is the shortened name of Dynamic Link Library. It is a type of file with instructions that other programs can call upon to do specific things.

For instance, many programs can all call upon the veryuseful.dll for finding the free space on a hard drive, finding a file in a specific directory, and printing a test page to the default printer. But you can not run these directly, unlike executable programs.

However, other code running already can call upon it. These are in the same format as EXEs. A few users even use the .EXE format. In most cases, the Dynamic Link Libraries end with .DLL while others use .OCX, .CPL, or .DRV.

More information about DLL Files:

The term “dynamic” in Dynamic Link Library is used while you put the data to use in a program. In this case, the program actively calls for it rather than keeping it in memory forever.

Plenty of these come preloaded in windows. However, third-party programs can also install these. But people don’t usually open it as they don’t need to edit. Besides, if you do so, it may create problems with programs. So, if you know what you are doing, follow Resource Hacker in this case.

A program can separate its components into unique modules using them. You can add the modules or remove them to include or exclude specific functionalities.

If the software works this way, the program will consume less memory. The reason is that the program does not have to load all at once.

You can also update parts of a program without rebuilding or reinstalling the complete program. You will get more benefits when a program uses a dynamic link library. The reason is that all apps can get the benefits of the update from that single one. ActiveX Controls, Control Panel files, and device drivers are a few names used by Windows as Dynamic Link Libraries. These use the OCX, CPL, and DRV extensions.

A dynamic link library uses instructions from another one. Thus, the first one becomes dependent on the second one. As a result, its functionalities can break more easily. If the second one experiences any problem, it could affect the first one. Once you update a dependent dynamic link library to a newer version, overwrite it with an older version, or remove it from your PC, the program (depending on the dynamic link library) may stop working.

Resource dynamic link libraries are data files in a similar format but use the ICL, FON, and FOT extensions. ICL types are icon libraries, while FONT and FOT types are font ones. This list will let you know about it.

ActiveX Controls (.ocx): This calendar control is an instance of an ActiveX control. It enables you to choose data from a calendar.

Control Panel (.cpl): This one is available in the Control Panel. Every item is a specialized dynamic link library.

Device driver (.drv): It is a printer driver that can control a printer’s printing.

DLL advantages:

These are the benefits it can provide.

Uses Fewer Resources:

Most programs use the same library of functions. However, it can decrease the duplication of code loaded on your disk and in physical memory. Besides, it helps to influence the performance of programs running in the background and the Windows OS.

Promotes modular architecture:

It helps promote the development of modular programs. Besides, you can develop extensive programs that need many language versions or a program that needs modular architecture. For example, an accounting program is an instance of a modular program. The accounting program comes with multiple modules which can be dynamically loaded at run time.

Makes deployment and installation simple:

If a function requires an update, you don’t need to relink the program with a dynamic link library for the deployment and installation. In addition, many programs will benefit from the update using a similar dynamic link library. You can encounter the error more often using a third-party dynamic link library.

DLL troubleshooting tools:

Many tools can fix these problems. We have given the names of these tools:-

Dependency Walker:

This tool can scan for all dependent dynamic link libraries a program uses. While opening a program in this tool, it will check the following:

  • Missing dynamic link libraries.
  • Program files or invalid dynamic link libraries.
  • Import and export functions match.
  • Circular dependency errors.
  • Invalid Modules because these are for a different OS.

The dynamic link libraries can be documented and used by a program with the help of Dependency Walker. It can prevent the issues which might occur in the future. The location of this tool is in the following directory while installing Visual Studio 6.0:

drive\Program Files\Microsoft Visual Studio\Common\Tools

DLL Universal Problem Solver:

It helps to audit, compare, document, and display dynamic link library information. DUPS contains the following utilities:

Dlister.exe: It can enumerate all dynamic link libraries on the PC.

Dcomp.exe: It compares only those which are listed in two text files. In addition, the utility can make a third one containing the differences.

Dtxt2DB.exe: It loads the text files made with the help of the Dlister.exe and the Dcomp.exe utility into the dllHell database.

DlgDtxt2DB.exe: It offers a graphical user interface version of the Dtxt2DB.exe utility.

DLL Help Database: This utility can locate specific versions of dynamic link libraries installed by Microsoft software products.

DLL development: It describes the problems and requirements that should be considered while developing dynamic link libraries.

Types of DLLs:

Dynamic Link LibraryYou can call the exported functions in two ways while loading a dynamic link library in an app. These are as follows: load-time dynamic linking and run-time dynamic linking.

Load-time dynamic linking: In this case, an app makes explicit calls to exported functions such as local ones. If you want to use this, give a header (.h) and an import library (.lib) file while compiling and linking the app. While doing this, the linker will provide the necessary information to the system to load the dynamic link library. Thus, it is possible to fix the exported function locations at load time.

Run-time dynamic linking: An app can call the LoadLibrary or the LoadLibraryEx function to load the dynamic-link library at run time. Once it is loaded, use the GetProcAddress function. It will help you to obtain the exported function’s address. An imported library file is of no use in the run-time dynamic linking.

We have given here applications letting you know when to use them.

Startup performance: If the app’s initial startup performance is crucial, use run-time dynamic linking.

Ease of use: The exported functions are the same as local functions in load-time dynamic linking. As a result, it becomes simple to call the functions.

Application logic: An app may branch to load various modules in run-time dynamic linking. It is vital while developing multiple-language versions.

The DLL entry point:

While making a dynamic link library, you may specify an entry point function. You can call function while the processes or threads connect to the dynamic link library or disconnect themselves from it. This function helps to initialize data structures or destroy these.

In addition, if the app is multithreaded, use TLS, thread local storage, for memory allocation. Remember that the memory is private to every thread in the entry point function. This code is an instance of this entry point function.

C++:

BOOL APIENTRY DllMain(

HANDLE hModule,// Handle to DLL module

DWORD ul_reason_for_call,// Reason for calling function

LPVOID lpReserved ) // Reserved

{

switch ( ul_reason_for_call )

{

case DLL_PROCESS_ATTACHED: // A process to load the DLL.

break;

case DLL_THREAD_ATTACHED: // A process to create a new thread.

break;

case DLL_THREAD_DETACH: // A thread usually exits.

break;

case DLL_PROCESS_DETACH: // A process to unload the DLL.

break;

}

return TRUE;

}

If the function returns a FALSE value, the app won’t begin if you use load-time dynamic linking. But if you use run-time dynamic linking, the individual dynamic link library will not load only. Therefore, this function should perform simple initialization tasks only. It must not call other loading or termination functions. For instance, you must not call the LoadLibrary or the LoadLibraryEx function directly or indirectly in the entry point function. Besides, you must not call the FreeLibrary function while the method is terminating.

Ensure that access to the dynamic link library is synchronized in multithreaded apps to avoid data corruption. In this case, you need to use the TLS as it can offer unique data per thread.

Export DLL Functions:

If you are willing to export these functions, try to add a function keyword to the exported functions. Instead, you may generate a module definition (.def) file listing the exported functions.

Whether you are willing to use a function keyword, declare every function to export with the following keyword:

__declspec(dllexport)

If you want to use exported functions in the app, declare every function to import with the following keyword: __declspec(dllimport)

The header file contains a defining statement and an ifdef statement which can separate the export and the import statement. A module definition file can help you to declare the exported functions.

While using this, you may not need to add the function keyword to the exported functions. Instead, you can declare the LIBRARY and the EXPORTS statement in this. The code is an instance of it.

C++:

// FileedgeDLL.def

//

LIBRARY “FileEdge”

EXPORTS Hi FileEdge

Sample DLL and Application:

It is possible to make a dynamic link library by choosing the Win32 Dynamic-Link Library or the MFC AppWizard project type in Visual C++ 6.0. Hence, you should check out this code.

C++:

// FileEdgeDLL.cpp

//

#include “stdafx.h”

#define EXPORTING_DLL

#include “FileEdge.h”

BOOL APIENTRY DllMain( HANDLE hModule, DWORD ul_reason_for_call, LPVOID lpReserved

)

{

return TRUE;

}

void HelloWorld()

{

MessageBox( NULL, TEXT(“Hi FileEdge”), TEXT(“In a DLL”), MB_OK);

}

// File: FileEdge.h

//

#ifndef INDLL_H

#define INDLL_H

#ifdef EXPORTING_DLL

extern __declspec(dllexport) void Hi FileEdge();

#else

extern __declspec(dllimport) void Hi FilEdge();

#endif

#endif

This code is an instance of a Win32 Application project calling the exported function.

C++:

// SampleApp.cpp

//

#include “stdafx.h”

#include “sampleDLL.h”

int APIENTRY WinMain(HINSTANCE hInstance, HINSTANCE hPrevInstance, LPSTR lpCmdLine, int nCmdShow)

{

Hi FileEdge();

return 0;

}

Ensure that you link the FileEdgeDLL.lib import library made while creating the FileEdgeDLL project in load-time dynamic linking. But for run-time dynamic linking, use code that is the same as the following code. Hence, it is used to call the SampleDLL.dll exported dynamic link library function.

C++:

typedef VOID (*DLLPROC) (LPTSTR);

HINSTANCE hinstDLL;

DLLPROC Hi FileEdge;

BOOL fFreeDLL;


hinstDLL = LoadLibrary(“FileEdgeDLL.dll”);

if (hinstDLL != NULL)

{

HelloWorld = (DLLPROC) GetProcAddress(hinstDLL, “Hi FileEdge”);

if (Hi FileEdge != NULL)

(Hi FileEdge);

fFreeDLL = FreeLibrary(hinstDLL);

}

While compiling and linking the SampleDLL application, the windows OS finds it in these locations in this order:

  • The application folder
  • The current folder
  • The Windows system folder
  • The Windows folder

How to Call the DLL File Function

If you want to call this function from your script, go through these steps.

  • Your first task is to add this to the project as a support file. Ensure that you should do this if you haven’t done so.
  • Tap on InstallScript in the View List under Behavior and Logic.
  • After that, your job is to tap on the InstallScript file (.rul), calling the function in the InstallScript explorer.
  • At the beginning of the script, you should prototype the function using the following syntax:

prototype [CallingConvention] [ReturnType] DLLName.FunctionName( ParamType1, ParamType2, … );

  • You should load it by calling the UseDLL function. For example:

UseDLL( SUPPORTDIR ^ “MyDLL.dll” );

There is no need to load _isuser.dll, _isres.dll, or Windows API dynamic link library files like User32.dll, Gdi32.dll, and Kernel32.dll. Remember that you must not call UseDLL and UnUseDLL to load and unload them.

  • Ensure that you need to call this function like others. For instance:

bResult = MyDLL.MyFunction( nInt1, nInt2, nInt3 );

  • Once you have made all script calls to the dynamic link library, you should unload the file by calling UnUseDLL. For instance:

UnUseDLL( SUPPORTDIR ^ “MyDLL.dll” );

What is DLL Hijacking?

It is a process through which you can inject malicious code into an app. Hence, it is essential to exploit similarly, like a few Windows applications, search and load Dynamic Link Libraries. Only Microsoft OSs are susceptible to these hijacks.

How to Import DLL Files For Advanced C Function:

If you want to include these files in the Advanced C function, perform these steps.

You will need the file to create the modulation signal. In this case, you might use several methods to let you know how to make a DLL file.

Once you make this, add its location in the “DLL functions” tab in the Advanced C function menu. In addition, you should try to add the H file (aka header file). As soon as you configure, search for the function’s interface in the “Name” tab.

If you want to add the “Controller” function in the Schematic Editor, use this output_fcn function. Let’s see the implementation of the “Controller” function.

output_fnc(){

Controller(Vo,&duty,Vref);

}

We have given it in C language.

/* Replace “dll.h” with the name of your header */

#include “dll.h”

#include <math.h>

#define Dmin 0.

#define Dmax 1

//PI

//double Vref = 40;

double Vsense = 0.;

double err = 0.;

double anti = 0.;

double Rc = 0.;

double Rsat = 0.;

double intg = 0.;

double ka = 166.67;

double kp = 0.006;

double ki = 0.436;

double in0, in1, out = 0;

void Controller(double Vo,double* duty,double Vref)

{

#define Ts 100e-6 //100kHz

Vsense = Vo;

err = Vref – Vsense;

anti = err – ka*(Rc – Rsat);

intg += ki*Ts*anti;

Rc = kp*err + intg;

if ( Rc < Dmin ) Rsat = Dmin;

else if ( Rc > Dmax ) Rsat = Dmax;

else Rsat = Rc;

*duty = Rsat;

}

You should know that the PI regulator is implemented in the void function “Controller .”These inputs are the reference voltage. Hence, its source is the SCADA Input component and the output voltage of the Boost Converter. Here, the duty cycle is set for the PWM modulator as output for this function.

The header file is as follows:

#ifndef _DLL_H_

#define _DLL_H_

void Controller(double Vo,double* duty,double Vref);

#endif

You can see the function interface implemented in the header file needed for the app.

How to Open DLL Files:

You should follow these steps to learn how to open a DLL file.

  1. Determine the Use:

These run in the background while using Windows programs. This type of file might have many functions that it can perform. Besides, the programs may need access to perform that function. There are a few functions which it has to include:

  • Drawing graphics
  • Displaying text
  • Managing fonts
  • Making calculations
  1. Find a Program to Open a DLL File:

Several programs can open it. For example, windows computers come with a registry program where it is possible to register them. Visual Studio or a decompiler help to read these. You can download them if necessary. Besides, you can use Visual Studio online, allowing you to see the dynamic link libraries without downloading or finding a program ahead of time.

These are four processes which you should follow to open it.

Microsoft Windows 7 and Newer Registry:

These steps could assist you in opening a file on Windows 7 and newer ones.

  • Your first task is to navigate to the Command prompt and open it. Hence, your task is to first move to the Windows Start menu or hold Windows Key+R. Then, you need to type “cmd” in the prompt appearing on display.
  • Use this to open the folder. As soon as you look for the folder, hold the Shift key. Afterward, your task is to tap on the folder to open CMD directly in that folder.
  • Write “regsvr32 [DLL name].dll” and tap on Enter. This function enables you to add this to the Windows Registry and access the file. In addition, it is possible to use the function to add new files to the PC.
  • Now, write “regsvr32 -u [DLL name].dll” and hit Enter. If you want to remove this from the registry, use the function. The function can help you to remove those that are not behaving correctly.

Microsoft Windows Visual Studio:

It is a program used to see, edit and build code into a file. Thus, you can learn how to edit a DLL file. Once you import code into Visual Studio, it will convert it into the programming language C#. It doesn’t matter if the programming language was different before.

  • Your first task is to download the Microsoft Visual Studio. Before downloading the program, check if the PC fulfills the needs to run the program. Once you are sure that your PC can run the program, try to run the installer to add it to the pc.
  • Choose “Export to Project” after opening the folder containing the file. It is possible to use another program to see the code. Besides, the program helps to find something which you need to change. Tap on the file in another program to export it to Visual Studio. As a result, you may find the file being moved into Visual Studio.
  • Try to edit the code with the help of Visual Studio. Thus, you can run the functions which you need. In addition, it lets you learn how to read dll files without editing the code.

Visual Studio Online:

Have you not installed Visual Studio in the Window of your computer? Then, you can go with the Visual Online Studio. You should follow these steps to use the online version of Visual Studio.

  • First, your job is to open the web browser so that you can reach the online Visual Studio more efficiently. It is because you are familiar with the browser already.
  • Now, your task is to enter this web address for Visual Studio. When you go to the browser’s address bar, write https://online.visualstudio.com/login to reach the site. You may find the term “visual studio online.”
  • Next, your task is to log in to your account or make a new one. If you wish to use the Visual Studio Online, you should use a registered Microsoft account. So first, sign in whether you have one already.
  • Finally, you need to upload it. When you enter Visual Studio Online, find this in the file explorer. Then, you should upload this to the program to read a DLL file and edit it.

Decompiler Program:

It is another process you can try. The DLL File Decompiler is designed to take the functional code. Besides, it makes a usable file where it can adjust and redesign the code as functional. You can use this one safely as it lets you look at the code without changing it and affecting the PC. We have given the steps you need to follow to open them.

  • First, you must look for a decompiler program and install it. This program can offer you some choices. However, you need to select one with which you feel more comfortable while using.
  • Now, you have to open the files in the decompiler. The method varies from program to program. First, however, there is a button that you need to click labeled “File.” Then, a list will open where you can find it.
  • Next, your job is to use the “Assembly Explorer” for browsing it. These store information as “Nodes” & “Subnodes,” and it is possible to explore it in a decompiler. When you tap on one node, all subnodes will be available.
  • At last, you need to tap on the node twice to see the code contained within it. Once you see the code, scroll through to review. You must ensure that various aspects are involved in executing your desired functions.

Missing DLL Files Error Messages:

These are a few error messages which you can encounter.

” The .dll file is missing.”

“.dll file not found.”

“This application failed to start; an important component .dll is missing. Reinstalling the application may fix the error.”

Reasons for Missing DLL Files:

You can experience the most common “missing or not found DLL errors” due to missing DLL file in Windows 10. However, there can be very reasons why you can encounter the problem.

  1. Mistakenly deleting a DLL file:

If a program is installed or uninstalled, the error can happen. Besides, you can experience the problem if you have attempted to clean up space on the hard disk.

  1. Overwriting this file: Installing a current application can overwrite an existing file with an incompatible or invalid one.
  2. Malware Infection: It can happen if any malicious program has been deleted or damaged.
  3. Corrupted or crashed: A bad installation of a program that corrupted one or more than one can cause the error.
  4. Hardware Malfunction: If a bad hard disk drive has damaged the data on the drive, you can encounter the problem.

How to Fix Missing DLL Files:

These are a few steps you should learn how to fix missing DLL files.

Fix 1) Reboot the PC:

Restarting the system can help you to fix the problem. Sometimes, these errors are temporary. A few examples include ‘Not Found’ or ‘DLL is missing.’ Therefore, you should perform this method. If it works, there is no need to try complex ways.

Fix 2) Find Those Which You Removed Mistakenly:

Sometimes, you may delete them in a hurry. But remember that all of these are not useless. Therefore, you should try to find these in the Recycle Bin. You might not remember if you have deleted it. In this case, you should navigate to Recycle Bin and restore it once you find it there.

Fix 3) Use the Power of System Restore:

Performing a system restoration can help you to fix the problem. Therefore, the problem will not appear after that. If you are a Windows user, you must have made a system restore point, a copy of the Configuration. Whether you are willing to protect the PC, save a Copied Configuration. It will note the time before making any changes to the system. Creating a restore point can be a lifesaver. Go through these steps to fix the problem.

  • First, tap on This PC or My computer.
  • Then, move to the Properties option.
  • Next, tap on System Security and System protection.
  • After that, you should look for the ‘System Restore’ option.

You can use Safe mode for any situation, including starting this process. If you are a windows 10 user, perform these steps.

  • If you use Windows 8/10/11 on your PC, hit the Restart button first. You must hold the Shift key while doing so.
  • Then, the ‘Choose an Option’ menu appears.
  • Tap on the ‘Troubleshoot’ option.
  • After that, ‘Advanced Options’ will appear on it. Now, you need to tap on it.
  • Next, tap on Restart in the ‘Startup Settings’ menu.
  • If you want to access Safe Mode, tap on a key. Then, you can see any Safe Mode version.
  • You should select Command Prompt (Admin) option by hitting the Start button.

For Windows 7:

  • If you use Windows 7, tap on the F8 key. You should do this while the computer is starting. In this case, it is possible to access the Advanced Boot Options menu. Ensure that you should perform the step quickly. Whether you use SSD, try it more than once.
  • Now, choose Safe Mode with Command Prompt option using the Arrows Keys. The Command Prompt window (CMD) will appear in a few seconds.
  • Once you enter this, write cd restore.
  • After that, write the command rstrui.exe.
  • Then, the System Restore window appears.
  • After starting the System Restore tool, you can see the dialogue box. Follow the steps properly to end the process of Restoration.
  • Once you complete the method, check if the errors still exist.

Fix 4) Use a File Recovery App:

Sometimes, you or malware can delete it. Therefore, you need to reinstall Windows operating system or download it from the third-party dynamic link library sites. However, you can use a file recovery app. It is possible to recover a lost one within a few clicks. In addition, it allows you to recover over 1000 types of files.

Then, you should use the software to scan the partition. If you wish to perform a full scan, it will take more time. You may look for the necessary files and try to recover them during the scan. If you want the best recovery, never stop the scan. You need to wait until the full scan is completed.

The software will show all found files in the result. If you are willing to look for the missing ones, try to unfold each folder. But it may take more time. In this case, there is a Find option ( in the upper left corner) that you need to use. Now, write the correct file name and hit the Find button. You must repeat the step if you are willing to find other ones. After finding these, you need to check the boxes. Hit the Save button.

You can see a small pop-up. Remember to save these in any location or directory according to the requirements.

Fix 5) Run System File Checker:

Run this to solve the corrupted errors by your Windows OS. SFC Scanner is a tool from Windows that you can use to eliminate the problem. In this case, you should perform these steps listed below:

  • Head toward the “Start” menu button and hit it. After that, you should tap on it. Then, select Command Prompt (Admin).
  • Enter the command given underneath and hit the Enter button:

Sfc /scannow

  • Then, you need to wait until the method is completed. This is because it can take a while to scan the entire pc to detect the errors.
  • Reboot the PC after completing the above step.
  • At last, check if it is missing or not.

Fix 6) Run DISM:

You can try to use Deployment Image & Servicing Management tool if the scanner can not repair system files or find the missing one.

  • Run “Administrative Command Prompt” by hitting the start button.
  • Then, you should enter the following command into Command Prompt and hit “Enter”:

DISM /Online /Cleanup-Image /RestoreHealth

  • Now, wait for a while till the process is not completed.
  • After completing the method, you need to reboot the PC.

It is expected that DISM will help you to fix the issue. But if it fails, you may try to fix it manually.

Fix 7) Scan for the Malwares or Viruses:

As the internet is a dangerous side, your browser or a Pendrive might harm your device. Besides, a cyber threat can cause errors. Sometimes, a virus or malicious piece of software can create issues. In those cases, you should perform a thorough Device Scan. You need to download authentic antivirus software. Therefore, it is possible to scan all causes of the problems. Once the virus or malware is removed, you will not face errors. Try to update all Virus Definitions and avoid system problems in the future.

Fix 8) Reinstall the Software:

If you encounter a problem because of installed software or app, you should go through these steps:

  • Your first task is to uninstall the software installed from the control panel.
  • Reboot the PC.
  • Then, reinstall your software.
  • Visit the official download page of the software and download the setup file.
  • After downloading the setup, you should install it accurately.
  • Whether you get a “repair” option from your software, your task is to select that first and check if it can help.

Fix 9) Time to Maintain the Registry Keys Hygiene:

The registry is a key module of each version of Windows. Remember that any registry error can affect the operating system. It contains records of all information and settings. In this record, you can find your hardware and software information. Most users save their database. When someone modifies any settings, the registry has a record of it.

It has information regarding:

  • Software Installations
  • Control Panel settings
  • Files and their properties

Remember that the sources of additional data may be any of these:

  • application errors
  • Incomplete installations/uninstallation,
  • configuration conflicts, etc.

These issues can decrease PC Performance. As a result, you can experience problems. Using Registry Tools can help you to fix the problem.

Fix 10) Manually Re-registering a Contaminated DLL File:

Again, perform the steps with utmost care. But before this, you should write the actual name appearing in System Prompts. After that, you should begin performing the steps.

  • Open cmd with the help of your Admin Account. Hence, you must keep the Admin privilege active. Then, use the key-combo of Windows + X. Next, choose Command Prompt (admin).
  • After that, you should run the commands. First, write the command and hit Enter key.
  • You can repeat it for the second command.

The solution is expected to be effective for Windows 11, 10, 8, 8.1 & 7.

Fix 11) Reinstall the Visual C++ Redistribution:

If necessary, address the errors with this.

As soon as you reinstall Visual C++ Redistribution, these errors will stop appearing. You could view this while installing applications, games, or similar installations. However, several desktop apps will not function without the correct version of Redistributions. These are the steps you should follow.

Visit the Visual C++ Redistributable Packages download page by opening it in the browser. Unfortunately, a few software might need their previous version. Therefore, you have to reinstall the related version. After that, these problems should disappear.

Fix 12) Copy it from Another Healthy System:

There are multiple software developed to run on the Windows older version. Therefore, you may need a specific windows version to run them. You may copy it from the systems where the software is running perfectly. In this case, you need to replace the copies one on the PC by pasting it in the proper Directory. Then, check if the process can fix the problem.

Fix 13) Download it Manually:

Download it manually if no method works. Hence, checking the software’s official website for the missing ones is better. You can get many chances to get these on a genuine website. Whether you can’t find the original one and can’t fix the issue, visit the following websites from where you can download the missing one. In this case, you must investigate whether the site is genuine before downloading.

DLL-FILES.COM

dllme.com

dlldump.com

dlldownloader.com

How To Manually Unregister/ Register dll File:

How to manually register a DLL file or OCX file:

For Windows Server 2012, Windows 8, Windows Server 2012 R2, Windows 8.1, or Windows 10:

You can find the Start button hidden in these versions of Windows. If you want to see this button, move the cursor and hover it over the desktop’s lower left corner, where you see it in earlier versions of Windows.

  • Hit the Start button, which comes in front of you, and a menu will appear. Choose the Command Prompt (Admin).
  • A cmd window shows the “Administrator: Command Prompt” term at the Window top.
  • At last, you should enter REGSVR32 “PATH TO THE DLL FILE” at the Window top.

Windows 7, Windows Server 2008, or Windows Server 2008 R2:

Is User Account Control or UAC enabled? If yes, then you should register it from an elevated Command prompt. Next, you need to perform these steps.

  • Tap on Start.
  • After that, click on All Programs, and after that, Accessories. Next, you should tap “Command Prompt” and choose the “Run as Administrator” option. Then, or once you are in the Search box, write CMD. Then, tap on it as soon as you see cmd.exe in your results.
  • Now, choose “Run as administrator.”
  • Finally, you must enter REGSVR32 “PATH TO THE DLL FILE” at the cmd.

But if you find UAC disabled, you need to perform these steps.

  • Your first job is to tap on the Windows key and hold it afterward. Now, tap on R.
  • When you go to the Run line, enter cmd and tap on OK.
  • Enter REGSVR32 “PATH TO THE DLL FILE” at cmd.
  • Finally, tap on OK.

OR

  • Tap on Start, and Run. Instead, you can hold the Windows key after tapping on it. Next, you should tap on R.
  • Write REGSVR32 in the Run line.
  • Hit the Space button on the keyboard.
  • Choose the pertinent .dll file from the file location.
  • Drag and drop it into the Run line after the space.
  • Hit OK.

How to Manually Unregister a DLL File:

With the help of the REGSVR32 tool within Windows, you can unregister it to fix the problem.

  • If you want to unregister these, tap on Start. Then, go to Run. Instead, you may use the Windows command line. Hence, you should navigate to Search and CMD, respectively. Then, tap on Run as Administrator.
  • For instance, use REGSVR32 /U “C:\Program Files\Microsoft SQL Server\80\Tools\Binn\SQLDMO.dll” to unregister the SQLDMO.dll type. Then, if you take the help of a Customer Support Analyst, you will get a path and file name.
  • At last, hit OK.

The Bottom Line:

Several PC users encounter messages like ‘Missing DLL files .’You might need to reinstall Windows to avoid the message popping up again. But are you encountering the problem every time while restarting the PC? Remember that the most common Windows errors are Runtime errors. These can appear in multiple different forms. Different run-time errors depend on different reasons.

Frequently Asked Questions:

  • How do you open it?

These are generally called upon by an application. If you want to see the code, you need to decompile it with a third-party app.

  • How do you install it?

You can not install it like others. However, it is possible to install by placing these in the directory where an app is set to find a specific one.

  • How do you fix the Startupchecklibrary DLL?

You need to download an automatic software used to fix the problem, or you may perform it manually.


read more
AppsDo It YourselfInternetSoftwareTechnology News

What is an Aspx File?

What is an Aspx File?

Recently, we have been experiencing filename extensions that leave us scratching our heads. For example, files like HEIC, XAPK, and standard FLAC files can turn up; therefore, you might not know what to do with them.  A perfect example of this is the ASPX file, where you might not know what an ASPX file is used for. But it can irritate you as Windows does not know what to do with them by default. So Microsoft made the file format. However, it is possible to open the .aspx files.

But it isn’t necessary to do this if you work in IT on web servers or web development. You should know that .pdf, .jpg, and other file types can sometimes appear as them. Let’s dive into the article to learn what is a .aspx file and how do I open it.

What is an ASPX file?

ASPX, Active Server Pages, is a file format that web servers use. It is created using Microsoft ASP.NET, an open-source development framework. Web developers use it to make dynamic web pages using the .NET and C# programming languages.

It iterates on the ASP, a technology that precedes it. But it never uses Microsoft’s .NET language. Rather than that, you can find the File written in other frameworks. For example, it is known as a .NET Web Form. Besides, it is possible to determine if a web page is written in ASPX while a ‘.aspx’ suffix is applied to the URL.

These files can contain different scripts or other open-source files browsers receive from web servers. In addition, these are web service components that can offer dynamic elements on a page. If you are an end user, you cannot see or interact with these file types during the online experience. But when they do it, you can experience an error with the web service’s configuration. Let’s know more details about what is an aspx file extension.

More Information:

These pages are known as “.NET Web forms.” It is possible to recognize these pages in a web browser using the URL in the address field ending in .aspx.

Microsoft developed and released it in 2002 to succeed Active Server Pages (ASP). Web developers use this web app framework to create dynamic sites and apps.

Common ASPX File Names:

Default.aspx is a default webpage. It is loaded if a client browser requests a web server directory on a Microsoft IIS-based server. In this case, the server, which is Microsoft IIS-based, must use ASP.NET.

For instance, if a client requests HTTP:/​/​www.sampledomain.com/​, the server will load the following URL HTTP:/​/​www.sampledomain.com/​Default.aspx unless you configure it to load another one.

How Do You Convert .ASPX to HTML?

The HTML ones are static. Therefore, if you convert this type to HTML, you might lose all the dynamic elements of the page. If you are willing to convert it, load the page in your browser and tap on it. After that, you should tap on the View Page Source and save that to the local HDD. You may try to load this. It will appear on your page, but nothing will work.

Programs to Open ASPX File on Different Devices:

Programs depend on which type of device you use. Therefore, we have given names of the supported programs for different devices.

Windows:

  • File Viewer Plus
  • Microsoft Visual Studio 2019
  • ES-Computing EditPlus
  • Adobe Dreamweaver 2020
  • Any Web browser

Mac:

  • Adobe Dreamweaver 2020
  • Any Web browser

Linux:

  • Any Web browser

Android:

  • File Viewer for Android

 .ASPX File Format:

ASP.NET web forms depend on the event-driven model to interact with the web app. In this case, the browser submits a web form to the server as an end user. In return, the server returns a full markup page or HTML page. Besides, the ASP.NET component model can provide an object model for these pages. The model describes:

Thre are server side counterparts of all HTML elements or tags, like <form> and <input>.

Server controls are used to develop the most challenging user interface, like the Calendar or the Gridview control. These use the ASP.NET Code Behind model to create pages.

In-Line Code:

It is a sample code that can offer all the functionality for user implementation. This code displays a sample ASP.NET page with inline code:

<%@ Language=C# %>

<HTML>

<script runat=”server” language=”C#”>

void MyButton_OnClick(Object sender, EventArgs e)

{

MyLabel.Text = MyTextbox.Text.ToString();

}

</script>

<body>

<form id=”MyForm” runat=”server”>

<asp:textbox id=”MyTextbox” text=”Hello World” runat=”server”></asp:textbox>

<asp:button id=”MyButton” text=”Echo Input” OnClick=”MyButton_OnClick” runat=”server”></asp:button>

<asp:label id=”MyLabel” runat=”server”></asp:label>

</form>

</body>

</HTML>

Code-Behind:

You can write the code and store it in separate class files for clean separation of HTML from presentation logic. As a result, the presentation layer becomes independent of the executable code. It is the code-behind for presentation purposes.

<%@ Language=”C#” Inherits=”MyStuff.MyClass” %>

<HTML>

<body>

<form id=”MyForm” runat=”server”>

<asp:textbox id=”MyTextBox” text=”Hello World” runat=”server”></asp:textbox>

<asp:button id=”MyButton” text=”Echo Input” Onclick=”MyButton_Click” runat=”server”></asp:button>

<asp:label id=”MyLabel” runat=”server” />

</form>

</body>

</HTML>

The genuine logic’s C# implementation for the presentation layer is as follows:

using System;

using System.Web;

using System.Web.UI;

using System.Web.UI.WebControls;

namespace MyStuff

{

public class MyClass: Page

{

protected System.Web.UI.WebControls.Label MyLabel;

protected System.Web.UI.WebControls.Button MyButton;

protected System.Web.UI.WebControls.TextBox MyTextBox;

public void MyButton_Click(Object sender, EventArgs e)

{

MyLabel.Text = MyTextBox.Text.ToString();

}

}

}

How do you open an ASPX file as a PDF?

If you want to open it as a PDF, you should first open it with the standard app on the computer. Next, navigate to File and then Print. You should, after that, choose “Microsoft XPS Document Writer” as your printer. After that, tap on “OK” or “Print.” Now, you should select a destination for the XPS file and tap on the “Save” option.

How to open an ASPX file:

While downloading any file from the internet to your system, you will see the download in a .aspx format though you were expecting other formats like PDF. In this case, renaming this can work for you. Besides, you may change the type to the one you expect to have, like .pdf.

If the File you want to open is in the correct format, several options are available. Microsoft initially wanted it to be available in its open-source integrated developer environment (IDE) Visual Studio Code. However, there are other programs, both free and paid. So, you may use an alternate.

Open ASPX files with Notepad++:

It is a free source code editor. As it is compatible with many languages, it becomes a perfect replacement for Notepad. This editor can support even CGI format. While the code is in C++ programming language, it depends on the editing component Scintilla. In addition, it can provide a higher execution speed and smaller program size for using Win32 API and STL.

Rename the ASPX File:

If you find your Windows unable to open this, try to rename it. Renaming it to PDF allows you to open and view it. Here are the steps you should follow to rename it.

Before renaming this, set up the PC to see the file extensions. Then, go through these steps to do so.

  • First, your job is to tap on the “Windows” + “R” key on the keyboard to bring up the Run box.
  • After that, write “control folder” in the text field.
  • Hit the “OK” button or tap on the “Enter” key on the keyboard to bring a “File Explorer Options” window.
  • Move to the “View” tab.
  • Next, tap on the “Uncheck” where the box asks, “Hide extensions for known file types.”
  • Then, hit the “Apply” button.
  • Now, hit the “OK” button.
  • Thus, it is possible to view the file extension on the PC.

Let’s know how to rename it to PDF:

  • First, find the .aspx File on the pc and tap on it.
  • After that, select the “Rename” option from the context menu.
  • Next, change the file extension to PDF.
  • Now, the prompt appears to confirm your action, and tap on “Yes.”
  • It helps you to change this to PDF. Then, it is finally possible to see and read the PDF. But renaming it can make your content corrupted. Besides, you might not see the content in PDF format.

Open ASPX File with Adobe Reader:

Using Adobe Reader to open it is a simple way to see it. In this case, ensure that you have successfully installed the software on your laptop or computer. Then, follow these steps to learn how to open it.

  • Tap on the “Start” menu on the pc.
  • After that, you should tap the “View by” option on the window top.
  • Next, you should select “Small icons” and tap on “Default Programs.”
  • Then, you should tap “Associate a file type or protocol with a program” and find the “.aspx” protocol.
  • Now, your job is to tap on “Change program” and select “More apps.”
  • Head toward the “Adobe Reader” program.
  • Finally, you should hit the “OK” button to switch the program.

Thus, once you implement the steps, you can set this with Adobe Reader to see it. This software is also compatible with other formats.

Convert the .aspx into PDF File:

You can use browsers, including Google Chrome, Firefox, etc., to see and open it on your PC because it is an Internet media-type document. If you can use the web browser to see the File, go through these steps.

  • Tap on the one which is in the extension format.
  • After that, tap on Open within the menu bar.
  • Choose Google Chrome below the Open with context menu.
  • Next, you should tap on Google Chrome.
  • Now it becomes easier to open it locally in the browser. Select other browsers such as Microsoft Edge, and Firefox, if you want.
  • Finally, you can view it in any web browser supported by Windows 10. However, if you wish to see it on the computer, it is essential to convert it into pdf format. After that, you can see the contents of it.

What if Google Chrome is not available?

  • If this web browser is unavailable in the menu option, tap on the “Choose another app” option.
  • After that, you should browse it under the “Program” file.
  • Choose the “Google Chrome” folder. Thus, you can select the app to see this type.

How to open the .aspx File if you use windows 7?

If you use Windows 7 and are willing to know how to open it, go through these steps.

  • First, look for it on Windows 7.
  • Then, you should tap twice on it. Hence, an error pops up asking, “Windows can’t open this file.”
  • Afterward, you should choose the “Select a program from a list of installed programs” option.
  • Hit the “OK” button.
  • Then, browse to select “Google Chrome” from the list.

If you are willing to convert it to pdf, these are the steps you should follow.

  • Open it in Chrome. Then, tap on the Ctrl + P key to open the Print page pop-up window.
  • Navigate to the Destination drop-down and choose the “Save as PDF” option.
  • Once you select the Save as PDF option, hit the Save button marked in blue color. Thus, you can convert it into a pdf.
  • You will see this converted into a pdf as soon as you perform these steps.
  • Thus, it is possible to open this on the computer and see its content.

Use online converters:

You can use the online converters’ help to convert these to pdf. The process may take some time, but you can download a PDF. These are a few online converters.

If you want to convert it into a pdf with online converters, try to upload it first. Then, hit the Convert to PDF button. In this case, its size is a dependable factor. Based on that, it will be converted into a PDF. Next, a download button appears. Tap on it. Now, you can see the downloaded PDF that you can open on Windows 10.

Other .ASPX files:

Suppose you see a URL ending with .aspx in a browser bar. It indicates that the page is run as part of an ASP.NET framework. Besides, you can not open it yourself because the browser has to do it automatically. The web server running ASP.NET usually processes the code inside the File. Instead, use Microsoft’s free Visual Studio to open and edit. It is possible to open it up with the help of a normal text editor.

Still Can’t Open It?

Ensure you must not confuse other names with the names of the .aspx file extensions. For instance, ASX files appear to have connections to them. However, they might be Alpha Five Library Temporary Index files supporting the context of the Alpha Anywhere platform. The same occurs for ASCX also.

Conclusion:

You cannot open these on Windows PC. But the given tricks allow you to open and read them. You can open it using Google Chrome and save it as a PDF. This one is the most effective way to open it. You can open this even in the future. It is all you can learn from this article what an aspx file pdf is.

Frequently Asked Question:

  • How do you open ASPX files on Android?

Open it first, as usual, and head toward File. Then, go to “Print” and select print as a PDF.

  • How do you open an ASPX file on a Mac?

Microsoft comes with a Mac version of its Visual Studio software to open it on Mac. You only need to download Visual Studio and install it on the company’s website.

  • How do you create an ASPX file using inline code instead of code behind?

You should create a new web page using inline code in Visual Studio. Ensure that the Place code remains unchecked.

read more
AppsDo It YourselfTechnology News

How to Open Pages File?

How to Open Pages File?

The Pages app is actually a Mac word processor, which is the same as Microsoft Word on Windows. Usually, this document is saved as a format file by default with a “.pages” file extension. And let us know how to open pages file or files with .pages extension.

Mac users can not see it. But if you send this to someone on a Windows computer, they can see this extension file. In this case, you should know that most Windows apps and Microsoft Office can’t read the format by default. You might think your Windows can’t use it, but that’s not the case. So let’s dive into the article to learn how to open pages File in Microsoft Word.

What is a PAGES file?

It is a document made by Apple Pages, a word processor and page layout program for macOS and iOS. This document can save as a report, poster, resume, newsletter, book, certificate, or brochure made from a blank page or built from a template. These documents contain text and page formatting information. In addition, it has images, tables, graphs, and charts.

These are the same as Microsoft Word. But still, it is impossible to open them directly on a Windows device. Therefore, we have given different methods in this guide to inform you how to open pages File in Word.

More Information About .Pages File:

It is available in the iWork office suite with Numbers and Keynote. We use pages to compose different documents and save them as PAGES files. If you want, you can convert these to another format.

It appears while using an Apple device, like a MacBook or iPad. Besides, you can save documents with the Pages application. However, you can face it if you don’t use any Apple device. For instance, your friend using Pages on a Mac can share a letter only if it is saved as a PAGES file.

How to Create a PAGES file:

Do you know how to open pages File on Mac? Before that, you should read this section carefully. The app saves documents as PAGES files by default, similar to Word saving documents as DOCX files by default. So, if you want to make a file on a Mac, you should choose File first. Then, New…, select a template or a blank document, and choose File → Save….

How to Open Pages File ( .pages ) Extension:

1) iCloud:

It is the cloud computing and storage service of Apple. People can use web-only access to iCloud though they don’t have an Apple device, and access the Drive, Pages, Keynotes, Notes, Contacts, etc.

These are the steps to follow:

  • First, you need to launch one browser.
  • Navigate to the iCloud website.
  • Sign in to the Apple ID.
  • You should make new when you do not come with any.
  • Hit the Pages icon.
  • Head toward Settings.
  • Tao on Upload Document.
  • As soon as you upload the .pages document, you can open it on your device to edit.

2) PDF Reader:

These are Zip files containing the document information and a JPG file.

Besides, there exists an optional PDF file to preview the document. Thus, it is possible to change the file extension to zip and open it using a PDF reader. Here are the steps to follow:

  • Your task is to look for the File with the format on the system.
  • Then, you need to tap on the File.
  • Next, navigate to Rename from the drop-down menu.
  • After that, you should delete the extension.
  • Exchange it with .zip.
  • Now, tap on “Enter.”
  • Tap Yes while asking for confirmation.
  • You need to tap it twice to open it using WinZip or WinRar.
  • Next, navigate to the Quicklook folder.
  • Finally, tap on Preview to open it using the correct app.

3) Zamzar:

It is an online file converter used to convert more than 1200 formats. With the help of a converter, you can convert .pages format to Word. After that, you should use MS Word to open the converted File. The steps you should follow are:-

  • Head toward the website.
  • Navigate to Document Converters.
  • Choose Pages Converter.
  • Then, tap on Add Files.
  • After that, you should move to the .pages file you prefer to open.
  • Tap on it.
  • Then, tap on Open.
  • Choose doc or docx in the Convert To drop-down menu.
  • Next, you should tap on Convert Now.
  • Now, choose Download to save and open the converted File.
  • It is possible to convert them to .txt, epub, or PDF to open on the device with the correct app.

4) FreeConvert:

If you are a non-Apple user, you should use this online conversion tool. It helps you to upload the File securely via HTTPS protocol. In addition, it enables you to convert it to other preferred formats.

  • Navigate to the website.
  • Then, head toward Document Converters.
  • After that, choose Doc or Docx below the Convert My File To option.
  • Now, you should tap on Choose Files.
  • Navigate to the .pages file which you are willing to convert.
  • Choose the File.
  • Tap Open.
  • Choose Convert to Docx.
  • After completing the conversion, tap on Download Docx.
  • Tap two times on the File to open it in MS Word.
  • It is possible to convert many files of this format to other formats.

5) Cloud Convert:

You can open these files while converting them into DOC or DOCX format. It helps to maintain the quality of Apple’s iWork suite. In addition, it is possible to convert multiple formats into different ones.

  • Navigate to the website.
  • Then, you need to tap on the arrow in the box adjacent to the Convert option.
  • Move to Documents in the drop-down menu.
  • Choose Pages.
  • Head toward Documents in the box beside the To option.
  • Then, choose Doc or Docx.
  • After that, tap on Select File.
  • Now, move to the .pages file which you are willing to open.
  • Choose this by tapping m on it.
  • Tap Open.
  • Next, tap on Convert.
  • Once you see the file processing, you should choose Download to save the File on your device.
  • Tap two times on this to open in the device. It is possible to convert to PDF and TXT formats.

How to open pages File on Windows:

Different ways are there that let you know how to open page files on a windows computer.

Here are a few ways that will let you know how to open pages File on a PC:

Solution 1) Open Pages through a zip compression:

Ensure to change the file extension .pages to change the format. Hence, you should change the File into a zip format via a simple file extension modification from the Windows file system. Before beginning, ensure you have saved a copy to access Windows Explorer. After that, do the following to know How to Open Pages File in Windows 10:

Steps to Follow:

  • First, create a copy of the File.
  • Then, you need to tap on the File and select the “Rename” option.
  • Exchange it with the “.zip” extension after deleting the “.pages” extension. Next, hit the Enter key to save the extension change. For instance, your file name is “today.pages”, and you need to change it to “today.zip.”
  • If you want to unzip it, tap twice on the newly renamed .zip File. Thus, you can access the Pages format content within Microsoft Word, Office, or WordPad.
  • You can see three files in the zipped folder. Next, you should tap twice on the “QuickLook” folder to open it.
  • Find QuickLook Folder.
  • Then, look for PDF and JPG files in the QuickLook folder. Now, tap twice on the PDF file.
  • Do you want to read or edit the document on Word? If yes, then converting the PDF document to a Word document is essential.

If you are willing to use the solution, you must have the file extensions visible in Windows to change the .pages extension. These are the steps you should follow to make the file extensions visible and to know How to Open Pages File on a PC in Word:

Steps:

  • Navigate to the Folder Options.
  • Tap on View.
  • Next, you should uncheck the “Hide extensions for known file types” option.
  • Now, you can see the extensions.
  • At last, uncheck the Hide extension for visible files you are familiar with.

Thus, You Get To Know How To Open Pages File On Windows.

Solution 2) Upload the Pages Document on Google Drive:

Upload the document and save it to Google Drive. Ensure to have a Gmail account to access Google Drive. Make a new one if you haven’t one already. Here are the steps to let you know how to open pages File in Google drive.

  • Tap on the document in the Drive and select the option “Open With.”
  • Then, you need to select CloudConvert below the “Suggested Apps” option. Now, you should log in with your Gmail account.
  • Find the cloud convert.
  • Review the service terms if required and tap on the option “Allow.”
  • Make a new account if you do not have one already.
  • Your document can convert easily. After reading “Ready,” hit the drop-down menu. Then, you should select “Document” and then “doc” or “docx” file; after that, unzip it in Word.
  • While it is ended, hit the red “Start Conversion” button at the display’s bottom-left.
  • Then, hit the green “Show File” button adjacent to the document.
  • You can see a preview opened in Drive. Tap on “Download” at the display’s top-right.
  • Wait till the Download is completed. After that, tap the arrow adjacent to the download bar at the display’s bottom-left. Then, you should tap on the option “Open.”
  • Finally, you can see the doc opening in Microsoft Word.

How to Open Pages File on Android:

These ate the steps to follow to know how to open pages File on an android phone.

  • First, your job is to move to https://cloudconvert.com/ in the Android web browser. By default, Chrome is used on most Androids. However, you may use any web browser. Whether you haven’t downloaded it already to your Android, ensure to do it first. You should download any of these from the Play Store if you don’t use Google Docs or Microsoft Word. Remember that one app is essential to open the converted File.
  • Next, you should click Select Files to open Android’s file manager.
  • Choose the File you are willing to open. Then, it can upload the File to the server.
  • Hit the select format button. You can see a drop-down menu containing various file types.
  • Click on docx. You may convert the File to a PDF.
  • Now, you should click on Start Conversion. It is a red button. This File can convert to the new format. After completing the conversion, hit the “Start Conversion” button. It will turn green and ask the option “Download.”
  • Click on Download to download the File to the Downloads folder on the Android device.
  • You need to click on the File in the Downloads folder to open it in Google Docs or Microsoft Word.

How to Open a Pages File on iPhone or iPad:

Ensure to install the app from the App Store. These are the steps you should follow to know how to open pages File on an iPad.

Step 1:

  • First, you should navigate to the App Store and open it.
  • You can find [[Image:|techicon|x30px]] on the home display on your iPhone or iPad.
  • After that, you should click on Search.
  • Now, you need to write pages into the search bar.
  • Click on Pages. In this case, you should hit the orange icon containing a pen drawing a line.
  • Next, click on GET.
  • Then, click on the option Install.

Step 2:

You should open the app after that. You see the orange icon with a pen drawing a line inside. It is available on the home display. Whether you are in the App Store, launch the app by clicking on the option OPEN.

Step 3: You must click on Browse at the display’s bottom-right corner. Hence, you can see a list opening your files in iCloud Drive. You can view only those files which are saved to iCloud Drive.

Step 4: Now, your job is to browse the File. If you find the File saved to iCloud Drive, it must appear on display or within a folder. Whether you use a different cloud server, you should click two times on the left arrow at the display top, left of the “iCloud Drive” header. Thus, you can head toward the “Locations” screen. After that, browse to the Drive and folder where your File is.

Step 5: Finally, you should click on the File to see it. You can see it opening in the app.

These are the steps to go through to know how to open pages File on iOS.

Conclusion:

It is essential to know what is a Pages file. Thus, you learn how to open pages File on laptop, why it is impossible to open and read it directly on any device other than Apple’s, etc. But different workaround can help you to open this on other devices.

Frequently Asked Questions:

  • Q 1) How do you open a .pages document?

Answer: Using an online document converter is the simplest process. It helps to convert the .pages format to another compatible format like Docx or PDF. Then, you only need to download the converted File to your device and tap twice on it.

  • Q 2) How do you convert a .pages document to Word?

Answer: It is possible to use any file converter. Just navigate to the online converter, choose the Convert format to Pages, and format to Doc or Docx, and hit Convert. Download the File after the completion of the conversion. Then, tap twice to open it with MS Word.

  • Q 3) How do you open a .pages file in Chrome?

Answer: First, your task is to sign in to the Google account and move to Google Drive. After that, you need to tap on New and choose File Upload. Next, move to the Pages file you want and select it. Then, you tap on Open with and choose Google Doc. Now, you can see the File. Therefore, we hope that now you have understood how to open pages File on Google docs.

read more
Technology NewsSoftware

Top 10 Video Enhancer: How to Enhance Video Quality

Video Enhancer: How to Enhance Video Quality

Are you looking for a video enhancer? These tools allow you to improve the resolution of a video. Besides, with the help of these apps, you can change the brightness, saturation, and contrast of clips. In addition, it allows you to crop, rotate, edit, and zoom clips. Multiple apps enable you to edit 360 videos with minimal effort. We have given both open source (free) and commercial (paid) software.

What is a Video Enhancer?

A video enhancer is a tool used to improve the resolution. For example, you can perform cropping, rotation, edit, etc.

Why Should You Use a Video Enhancer?

These have plenty of features that can breathe new life into your footage. You should use them for—

  • Upscaled resolution
  • Better lighting
  • Improved stability
  • De-noising
  • Brightness adjustments
  • Cropping, rotating, and flipping
  • Filters
  • Effects and animations

How to Enhance Video Quality?

These are the essential ways through which you can improve it:

  • First, your task is to use the upscale resolution.
  • Then, you need to manage frame rate, codec, aspect ratio, and bitrate.
  • After that, you should decrease or remove the noise.
  • Now, adjust shaky videos.
  • Next, you need to optimize contrast, brightness, and saturation.
  • Then, your task is to rotate, crop, and flip clips.
  • After that, your job is to apply those transitions, filters, and visual effects.
  • Finally, you can add your favorite texts, sound, music, subtitles, and watermarks.

Top video enhancers:

1) Adobe Premiere Pro CC:

This video quality enhancer allows you to improve the quality easily. Besides, it enables you to export video formats like AVI (Audio-Video Interleaved), MXF (Material Exchange Format), etc.

Features:

  • While it can reformat videos automatically, it also adjusts curve adjustments.
  • In addition, it helps to extend the editing platform.
  • You can mix audio with video.
  • This video offers tools using which you can make and share stories.
  • It supports Windows and Mac.

2) Topaz Video Enhance AI:

You can increase resolution using the tool. Besides, it enables you to upscale these. It is compatible with DVD, DSLR, Game, and HD stock footage.

Features:

  • You can remake high-resolution video from low-resolution footage.
  • In addition, it enables you to increase quality up to 8K.
  • Besides, this software allows you to analyze multiple videos.
  • You can use it for commercials, movie content, YouTube videos, etc.

3) AVCLabs Video Enhancer AI:

It is an AI-powered upscaling software that improves quality via a neural network. Besides, it can upscale videos from SD to HD (720p or 1080p), to 4K, and up to 8K in a single tap. It is an excellent super-resolution upscaling and multi-frame enhancement tool.

Features:

  • AI power can enhance video quality.
  • Moreover, it offers a 5-day money-back guarantee.
  • In addition, it can process videos 100% automatically without fine-tuning.
  • Besides, it can support automatic face refinement to enhance faces’ details.
  • Its Super Resolution allows you to recover a high-resolution video from a low-resolution material. Besides, the tool can make additional pixel data to fill in the missing gaps. It uses the multi-frame convolutional neural network that helps to boost the video quality. In addition, it allows you to remove motion artifacts, stabilize video shake, remove overlay noise, etc. Classic programming can’t achieve these natural results.

4) PowerDirector:

This software allows for improving video quality. Besides, it enables you to include customized shapes and objects. Moreover, you can use the app supporting motion graphics and animated titles for Android.

Features:

  • This free video enhancement software enables you to import 8K videos.
  • Besides, it allows you to create a video in a 1:1 output ratio.
  • In addition, the tool can offer plenty of ready-made templates.
  • Moreover, this software can provide slow motion and fast motion effects.
  • It allows you to correct color distortion in a clip.
  • You can stabilize shaky footage.
  • The tool can import and edit video shots on camera.
  • It supports Windows and Mac.
  • In addition, the software can give a 30-Day Money Back Guarantee.

5) Ashampoo Video Optimizer:

This robust movie editor tool can offer your shots the best. In addition, you can stabilize shaky videos and optimize colors & contrasts. Besides, you can sharpen footage by tapping on the button once.

Features:

  • It enables you to improve contrast and saturation. Besides, it can make photos more vivid.
  • The tool can offer a tilt-shift filter to make a selective blur. Thus, it can provide your captures with a unique look.
  • It can remove fish-eye effects from videos and photos.
  • You can improve the sharpness of your images to make them crisper.
  • Sometimes, poor lighting and high ISO settings cause noise. This software allows you to remove it.
  • It only supports Windows and offers Basic Free Version.

6) Pinnacle Studio:

Pinnacles Studio is a video quality improvement tool that has enhanced color grading features to improve video quality. It contains more than 2000 effects. In addition, this tool helps you to stabilize shaky videos.

Features:

  • It lets you edit video in 4K and HD format and offers 360 video editing.
  • The tool allows you to crop, rotate, edit, and zoom videos.
  • It lets you split-screen video and edit videos captured from your camera.
  • The tool only supports Windows.
  • In addition, this software can offer a 30-Days Free Trial.

7) VEGAS Pro:

You can import video from cameras, tablets, and mobile devices. In addition, it can provide a nested timeline to speed up your workflow. It is a perfect tool to enhance video quality free.

Features:

  • It can offer plenty of effects.
  • In addition, it can remove whole sections of a video clip without any problem.
  • Besides, the tool supports HDR (High Dynamic Range).
  • It allows you to edit a video of 8K. Additionally, it can save your work automatically.
  • It can give a drag-and-drop interface.
  • This tool has an advanced version offering a lens correction plugin.
  • In addition, it can create a slow-motion video.
  • It supports only Windows. Besides, it can offer a 30-Days Free Trial.

8) Pikavue (Online):

With the help of the tool, you can boost the resolution and quality of the upscale video. In addition, it lets you increase the quality with no hardware limitation. You can convert any low-definition video to full HD.

Features:

  • This application supports 4x the size and up to 4K UHD.
  • In addition, you can compress them easily.
  • It allows you to develop upscale AI.
  • Moreover, it enables you to upgrade the quality online easily.
  • It supports a Web-Based platform and can offer Basic Free Version for trial.

9) Final Cut Pro X:

It can dramatically accelerate graphics tasks such as rendering, real-time effects, and exporting. In addition, you can use gift cards for Apple’s digital content and subscriptions.

Features:

  • It can sync up to sixty-four angles automatically with the help of different formats.
  • The software comes with an intuitive, comprehensive set of tools.
  • It can accelerate post-production work.
  • The software allows you to add 2D and 3D titles to the 360° video. Besides, it asks you to apply blurs, glows, and 360° effects.
  • This tool is optimized for the new Mac Pro.
  • It can support Mac only.
  • The tool offers a 90-Days Free Trial.

10) Lightworks:

With the help of this platform, it is possible to edit any digital video in multiple formats like 2K resolution, 4K resolution, and HD formats. Besides, it lets you export these for YouTube, Vimeo, etc.

How it works:

  • Your first job is to tap on the “Create a New Project” link.
  • Next, you should choose the video clip to import. Then, you need to use Ctrl/shift to choose many clips.
  • Now, your task is to drag this to the Timeline. Hence, you can zoom the content using the plus button in the upper left corner of the display.
  • A yellow bracket means parts adjacent to cuts are now separated from clips. Coop frames are available on both sides of a cut in Trimview mode. You need to tap on Preview below Viewer to see both in sequence.
  • Tap on it in the Timeline and choose Speed.
  • After that, put the speed percentage as you prefer and tap on Do It to save.
  • Now, tap on the edited clip, sequence, or Timeline. Then, choose Export from the drop-down menu.

Features:

  • It allows you to edit video timelines and trim.
  • In addition, it lets you create 2D and 3D titles.
  • You can share a clip with other people and assign read or write access.
  • Besides, the tool can help you to customize the shortcuts.
  • You can use English, German, Italian, and more languages.
  • It offers an easy way to trim your video.
  • It supports platforms including Linux, Windows, Mac, and OS.
  • Basic Free Version is available.

11) Clip Champ:

It allows you to edit and boost the quality of any clips. Besides, the app can provide customizable video templates. In addition, you can mix and match stock footage and audio.

How it works:

  • It enables you to log in or make a free Clipchamp account.
  • After that, you can see the editor opening while hitting the purple Create a video button. Next, hit the Untitled video bar to Rename in the editor.
  • Then, you should drag the audio files and drop them into the white pull-out tab.
  • As soon as you upload your music clips, you will find them appearing under the Your media tab.
  • After that, drag the audio file and drop it onto the Timeline after it is added to the media tab.
  • Tap on the plus symbol on the left sidebar. You can see a pull-out tab appearing and uploading the music videos.
  • Then, drag the video footage and drop it onto the Timeline.
  • Choose the Text tab on the left sidebar and put a motion title.
  • Finally, your job is to export the music after editing.

Features:

  • It lets you compress, covert, collect, record, and make videos.
  • In addition, it enables you to cut, crop, and rotate.
  • You can make these using media assets from the stock library.
  • It can decrease file size, convert clips into MP4, etc.
  • The tool supports Windows and Mac.
  • Basic Free Version is available.
  1. Filmora:

It is an excellent option if you are searching for a reasonable desktop tool to increase quality. However, you must invest $60/year or purchase a lifetime license for $90.

Although there is a free version to use, it leaves a watermark on the content. Besides, you can never access the app’s vast library of effects through the store.

It can improve with stabilization, brightness, contrast, tint, and saturation controls. Besides, many overlays, motion graphics, and title templates exist.

Tips For Shooting A High-Quality Video:

These are the tips you need to follow.

Light Up Your Work Area: You must use well-lit environments. Hence, it is better to get near a window or open up all blinds while shooting indoors. However, whether you shoot outdoors, you must look for a spot in direct sunlight.

Invest in a Good Camera: Which camera you use is a significant factor in differentiating the quality. Of course, it is better to use a DSLR camera. However, you can have perfect results using a top-quality point-and-shoot camera. If possible, you should shoot them in high definition. It ensures that your music clips look perfect while uploading to the web.

Improve Audio Quality: Audio is another vital aspect to consider. First, ensure that you use a top-quality microphone to record your audio. After that, you should look for a quiet place to shoot music clips. These tips can create a top-quality video that appears excellent.

Conclusion:

You know how it is possible to improve the quality. Therefore, it is time to practice. You can create better videos by putting in a little effort.

Frequently Asked Questions:

  • Can you convert low-quality video to high quality?

You can convert the low-quality clip to a high quality with their help. Besides, it is possible to use readily available sites and software for converting clips into HD.

  • How does it work?

It can convert low-resolution video to HD. Then, you should check different parameters, including sharpness, bitrate and footage stability, contrast, brightness, etc., to increase the quality.

  • What is the best free video enhancer?

The names include:

  • Kawping.
  • Clipchamp.
  • Flexiclip.
  • Avidemux.
read more
1 2 3 4 5 6 20
Page 4 of 20