close

Technology News

InternetTechnology News

RCS vs SMS- Know the Difference Between Them

RCS vs SMS- Know the Difference Between Them

If you are an adrent Smartphone user, then you definitely have used any of these new messaging protocols such as iMessage, WhatsApp, and Facebook Messenger. Or the Short Message Service namely SMS defined as per the 1990 GSM standards. Let us see the advantages over RCS vs SMS

With the help of Rich Communication Services, the users can interact with their favourite brands, effortlessly.

In Rich Communication Services, you can send files of up to 100 MB. But the Short Messaging Service is unable to do it. In this article, we are going to elaborate the topic based on RCS vs SMS.

What is RCS 

RCS stands for Rich Communication Services. It is a protocol that used for communication between mobile-telephone carriers and phone carriers. The main target of these services is to replace SMS messages with a text-message system. With the help of these services, you can transfer any contact by choosing it from a phonebook and move all the multimedia data. Rich Communication Service is a part of the broader IP Multimedia Subsystem.

A group of industry promoters formed the Rich Communication Services in 2007. The GSM Association was the project planner named as ‘home’ in February 2008.

These services are a compelling messaging platform. According to the details of last week, people in the United States who have Android phones can get access to the Rich Communication Services. It is a great alternative to the widely-used text messaging protocol Short Message Service.

What is SMS

We know SMS as a short message service.  You can send messages to any recipient by using the Service.

At the time of sending a text message, you need to connect the Rich Communication Services with a nearby cellular tower over a pathway of 400. It is the control channel Short Message Service centre (SMSC).

RCS vs SMS

Advantages of Rich Communication Services in business: 

Delivery and read receipts: Rich Communication Service helps you to know whether the recipient has read your message or not. The services help to analytic and see the read rate.

Verified sender: The Rich Communication Services help to let you know about the difference between the fraud and verified users. In this Service, the blue tick is mandatory similar to Twitter. It is helpful for business purposes, as it helps to identify a ‘Verified Sender’ quickly. Therefore, when you get any Rich Communication Services message from a business account, you can understand that the message is legitimate.

Include images and videos: This Service allows the participants to add pictures and videos within the body of your messages. As a result, it becomes very interesting for users.

These Rich Communication Services allow the users to share different types of dynamic pictures. As well as it offers the customers various options, QR codes, and so on.

Share your location: Rich Communication Serviced help customers to find the location of them quickly.

Make payments: The Rich Communication Services Messaging app contains a purchase button. It helps the users to not leave the screen while using the messaging app. Therefore, people can buy these services only by clicking on the button.

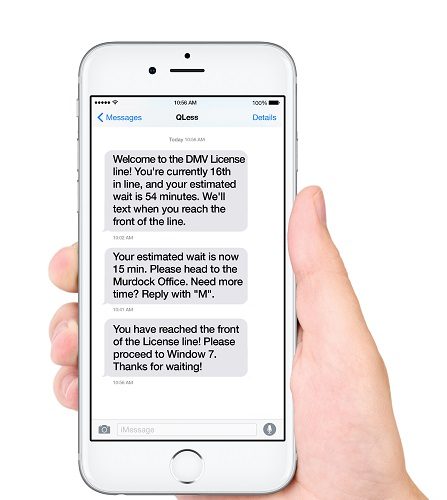
Rearrange appointments: Usually, other businesses give us appointment reminders through Short Message Service. The most attractive case for Rich Communication Service is that users can fix the timing of the meeting themselves. In addition to this, this service also allows you to add the meeting into the specific date of a calendar. You only need to tap on a button.

Advantages of Short Message Services in business: 

Simple messaging: Short Message Service allows you to communicate with other users with a text message. The character size of the Short Message Service is from 1 to 612 characters in length.

Include links: Using the Short Message Service, you can add links in the body of the message.

Include preview images: In the Short Message Service, you can’t directly add the photos as these are not appropriately instructed. What you can do is that you can add a link to the picture. It will

the preview image of the linked page.

Which is better between these two

RCS comes with an essential upgrade in recent times over Short Message Service. Using this services, one can send GIFs and high-resolution pictures and videos. The RCS services have no character limit, but Short Message Service characters are limited to 160 characters.

Designers made the Rich Communication Services Chat so that it can replace SMS and MMS. It is the only difference between Rich Communication Services and short message Service.

When it comes to defining RCS vs SMS, you need to compare these two on the functionality of WhatsApp and Short Message Service. As we can send images with our friends on WhatsApp, Rich Communication Service also has the same rule. On the other hand, the Short Message Services was made for simple communication. But the purpose of Rich Communication Services is to increase communication and bring it into the modern world.

According to Google, the use of RCS is increasing as a first-party texting app after it’s upgrade. As soon as people will download Android Messages from the Play Store, they can use this app on their phones.

Frequently asked questions:

  • How will you be able to take the benefit of RCS messaging?

If the option Chat Features exits, click on that. Then, you need to enter the phone number. And then, watch for the “Status” that you have given to move from “Setting up” to “Connected.” As soon as you do it, you can get the benefits of Rich Communication Services.

  • Do you need to take the help of WiFi while using Rich Communication Services?

It uses a mobile network or WiFi as a data connection for sending messages between two RCS-enabled Android devices. In this case, both receiving and sending devices need to support Rich Communication Services.

  • Is it safe to use Rich Communication Service?

The messages we do are encrypted between our phone and Google’s servers. And that’s why it is safe and secure to use. Whether messages are decrypted, it is unsecured as Short Messaging services.

read more
Do It YourselfTechnology News

Connect Multiple Bluetooth Speakers Android

Connect Multiple Bluetooth Speakers Android

Nowadays, there are many Bluetooth devices available in the market like Google Home, Amazon Echo, etc. If you want to connect multiple Bluetooth speakers Android at a time, you can take the help of apps such as AmpMe, Bose Connect, etc. These Apps also allow you to send any audio at the same time.

In this article, we are providing a procedure by following which you will be able to connect multiple Bluetooth speakers Android.

By following the method, you can pair multiple Bluetooth speakers with ease.

Using AmpMe app to Connect Multiple Bluetooth Speakers Android

Among all types of Bluetooth devices, AmpMe is the most helpful app as it can be used in a versatile way. And while using this app, you don’t need to have any specific brand Bluetooth. It is one of the special benefits that AmpMe offers to its users.

  • First, you need to install this application.
  • Next, use your Facebook account or Google account to sign up.
  • After that, check whether any of your contacts are using this AmpMe app or not.
  • Then, you can start enjoying with your friends and family.

Apple HomePod Stereo Pair:

The setup procedure of a HomePod stereo pair:

While setting up a HomePod, you get to see an option. It asks you to use both speakers as a stereo pair. Besides, if you are an Apple user, you can fix a stereo pair with HomePod speakers.

  • First, you need to place two HomePod speakers in the same room.
  • Then, go to the Home app. And press it for a while.
  • After that, make a stereo pair.
  • Next, you need to select the second HomePod that you use as a stereo pair.
  • Then, click on the HomePod on any side to identify it. And then, swap these two.
  • At last, click back option. And then, click on the ‘Done’ option.

Samsung’s Dual Audio Feature:

Want to pair two Bluetooth earphones into a single Samsung device? Then, Samsung Dual Audio can help you in this case.

 The process of using Samsung Dual Audio with dual:

  • First of all, you need to pair each headphone with the Samsung device.
  • Then, open the settings.
  • After that, what you need to do is to click on the Bluetooth option. And then, you need to switch on the slider.
  • After that, enable Bluetooth pairing mode available in your headset. Sometimes, thou may need to press and hold it for some time.
  • After that, go to the notification option. And then click on the media.
  • Then, you need to go to the Samsung device that you are going to use.

Android pie features

  • It helps to line up all the apps in a horizontal row.
  • For the pixel users, Android Pie allows us to copy and share it easily.
  • It has improved battery life. As a result, it can detect which apps we use most.
  • Besides, the battery saver mode closes all the apps that can consume much battery life.
  • Can you connect 2 Bluetooth devices to Android?

Yes, you can connect two Bluetooth devices at a time to Android. People who have Bluetooth devices like Android Auto; Smartwatch, Bluetooth headphones must get advantage from this latest update.

  • Is there any app to Connect Multiple Bluetooth Speakers Android?

Yes, there are a few apps that can assist you to connect multiple Bluetooth speakers. The names of the apps are AmpMe, Bose Connect, Ultimate Ears. However, if you keep your Bluetooth headphones and smartwatch with you always, you won’t require any app.

  • Can my phone connect to multiple Bluetooth devices at once?

Whether it is any smartphone, laptop, computer, or any tablet, thou can connect your phone to any Bluetooth devices at a time. For doing this, you have to go to the settings app available on your device. If thou are using Windows 8.1, you also have to follow the same procedure for setting up many Bluetooth devices.

  • Can you connect multiple Bluetooth speakers to TV?

The smartphone you have can quickly help you to manage the paired Bluetooth devices. The models of the speakers and TV sets are different. You should have a efficient app on your phone that can help connect multiple Bluetooth speakers to TV.

  • Can you Connect Multiple Bluetooth Speakers Android?

If you are using any old versions of Android, then click on the option’ menu’. You can get it at the top of the right side. Then switch on the dual audio toggle button. If thou want to use it, you have to connect it with two other speakers. But if you are using any Android pie, then you can experience an advanced process.

  • Can we connect 2 Bluetooth devices to one laptop?

Usually, you can pair your device with one headphone or music stream. But you cannot connect two speakers at a time with your device.

When you are using a laptop, you can pair it with multiple Bluetooth devices at once. But it is only for those devices that contain the “multipoint

functionality” option. In this case, it doesn’t matter which type of adapter you will choose.

  • How do I connect multiple Bluetooth speakers to my laptop?

To connect many Bluetooth speakers with a laptop, you can follow these steps given underneath.

  • At first, you need to collect some speakers which are of similar brand. If you get the same model, then it will be helpful for you.

However, you can use various models of the same brands. It doesn’t make any significant issues.

  • Then, charge the speakers to connect these laptops you have. Sometimes, people face difficulties while pairing their speakers with the computer. That is why we have given some simple but effective steps by following which you can pair Bluetooth devices with your laptop.
  • If you want to access the Bluetooth settings quickly, you should have an updated windows version. In case you have an old version of windows, then you need to press the Windows key. And click the “F” button at a time.
  • After that, you get to see a windows search option. Here, you need to write the name of the device that you want to connect. After that, tap on the ‘enter’ button of your laptop.
  • At last, you get to see an “Add Bluetooth

device” option. Tap on it.

  • How do I stream music to multiple devices?

If you want to stream music to many devices, then you can follow the instructions that we have given below.

Step 1:

At first, you have to pair all the devices.

Step 2:

Then, sync the clocks.

Step 3:

After that, you need to choose any time while going to start this process.

Step 4:

Next, share the starting time to all those devices where you want to stream.

Step 5:

Then, keep all the devices in sleep mode. And keep it until the time that you have set up will begin.

Step 6:

At last, you can play or stream music.

In case you face any problem in this entire process, thou have to fix it again. Besides, while using multiple devices, you should not keep many background apps in running condition. It is because these can reduce the playback speed of streaming music.

  • Can you play 2 Bluetooth speakers at the same time on an iPhone?

According to the latest updates, the iPhone is coming with a new double Bluetooth system. With the help of this system, one can send any audio or music to the other two connected devices. However, now Apple also allows us to connect multiple Bluetooth earphones, speakers, etc. But the difference is that you cannot play the audio in two devices at a time.

  • Can you use 2 Bluetooth headphones at the same time?

Yes, you can use and pair two Bluetooth earphones in a single time. Bluetooth multipoint can help you to use two Bluetooth earphones easily. For example, you can use your laptop or computer and your phone at the same time.

  • How do you connect two Bluetooth headphones at the same time?

Bluetooth multipoint is helpful in this case as it allows you to connect many devices at a time easily. Thou have to go to the settings option and click the Bluetooth multipoint option.

  • Can you pair 2 Bluetooth headphones at once?

It is a simple method. For this, the only thing you are required to do is to switch on the Bluetooth device at first merely. Then, connect these with Bluetooth multipoint earphones. You have to keep these both earphones in pairing mode. Then, pair the first earphone. Next, you have to keep these in pairing mode again to connect the second one.

read more
Technology News

CFexpress- Know More about Future Media Cards

CFexpress- Know More about Future Media Cards

Technology is showing its new colors every day. Thanks to technology that our lives are becoming so smooth. It has worked wonders for the professionals, whose lives revolve around gadgets. CFexpress one such new addition to the tech world. Let’s find out more about this new kid on the block.

If you are a professional photographer/videographer, you must have felt the need of a much-advanced memory card. CFexpress comes in with high speed and higher resolution when compared to the existing formats. It comes with a higher bit rate image capture in devices. It has a faster off-load speed.

What is CFexpress?

CFexpress is proposed by CompactFlash Association. CFexpress memory cards have three formats – Type A, B, and C. With a different internal connection, CFexpress Type B utilizes the form factors 38.5 mm x 29.8mm x 3.8mm. The form factor is similar to that of XQD. The goal of CFexpress is to create removable storage with highly used PCI Express interface and NVM Express rules.

CompactFlash Association announced CFexpress on the year 2016. A year after that it introduced the specifications for CFexpress 1.0 which uses XQD form factors. The association announced CFexpress 2.0 in early 2019 with Type A and Type C on board.

The two new formats have more specifications. Type A has one lane and is more compact than Type C. However, Type C is a bit bigger and thicker than Type A with four lanes. They have plans to improve the speed further by introducing PCIe 4.0 interface.

XQD Vs CFast

CFexpress is the successor of XQD and CFast formats. Many of the manufacturers have stopped making XQD cards. CFexpress Type B cards have the option of backward compatibility to XQD cameras. XQD has one lane whereas new CFexpress cards use two lanes of PCIe. While XQD evolved from CFast, providing higher speed, CFexpress has come to conquer them all.

Type A is pretty similar to the SD cards but is a bit smaller and thicker. Sony a7S III was the first device to use this format. Type A will be best for cameras with smaller form factors. Hopefully, this format is going to be the most popular one in the coming years.

CFexpress Type B and XQD use the same form factors as well as the same connector. Devices like Panasonic X series and Nikon Z series, come with XQD card support. But now Firmware updates enable us of CFexpress in the same device. It has a conventional look with many benefits to look up to.

On the other hand, Type C is very close with respect to the size of a CFast and Compact Flash. Type C offers a much higher speed. It has not been used in and devices to be used by the consumers. Hopefully, this particular format will play a major in cameras that are used for cinema.

Is CFexpress worth it?

The answer to this question will always be yes. The latest generation media card support recording of high-resolution raw video. If you use it for shooting cinema, be assured to have a flawless video. It includes 4K, 6K, and 8K at high bitrates and frame rates and Raw continuous burst photos. CFexpress is compatible with most of the news devices like Canon (C300 Mark III, C500 Mark III, 1D X Mark III, R 5), Nikon (Z6, Z7, D6), Panasonic (Lumix DC – S1, Lumix DC – S1R)

Top three brands to go for

Type B cards are going around for quite some time now. Most of the memory card manufacturers are into making the advanced removable memory card. Here are the brands to look out for:

SanDisk – The brand name says it all, one of the pioneers of memory card manufacturer offers Extreme PRO CFexpress Type B Cards. The 128 GB and above cards reach 1400 MB/s speed to write and 1700 MB/s to read. However, the 64 GB version has 800 MB/s speed to write and 1500 MB/s to read.

Cobalt – Cobalt stands out among the crowd with its minimum sustained speed to write at 1300 MB/s. Working with raw videos will be a cakewalk with Cobalt until the card is full.

Sony – With a strong brand value, comes a huge commitment. Sony lives up to it. They offer both Type A and B formats. Sony’s CFexpress Type A card is a direct replacement of SD cards with 700 MB/s writing speed and 800 MB/s reading speed. Type A has only 80 GB and 160 GB at the moment. Sony’s Type B has variants of 128 GB, 256 GB, and 512 GB.

Future

Above all, the best part of working on this format is that you are a step ahead in working with new PCIe 4.0 spec which will speed up quite drastically. In addition, CFexpress is going to take the position of an SD card and will soon become the standard removable memory card for many users.

So, ready to give CFexpress a try? Let us know what you think about it?

In conclusion, CFexpress is the next generation removable media card. In no time, it will become the standard memory card for the professionals, here’s everything that you must know about CFexpress.

read more
GadgetsTechnology News

WatchOS 7 Adds Significant Personalization to Apple Watch

WatchOS 7 Adds Significant Personalization to Apple Watch

Apple may not have added a ton of features to it’s smart watch by way of WatchOS 7 but the update to Apple’s smart watch line up is nevertheless a significant one. Apple revealed WatchOS 7 at WWDC 2020 where it normally releases news of such things. At the event Apple showed off some of the new features that will sit inside it’s watch. The official version of  WatchOS 7 will only come out this fall but the beta version of it is out for developers to tinker around with. At the end of the keynote dealing with  WatchOS 7, there were not many features that will be released with the OS. However the few features that will be released have got us excited. So let’s take a look and see what WatchOS 7 has in store for us, shall we?

WatchOS 7 in a Jist:

WatchOS 7 may come with a few features but the features lined up will surely grab your attention. A new feature that will sit inside the OS is going to be a timer that automatically starts when you wash your hands. This is to ensure that you get in the needed 20 seconds amidst this period.

Apart from the hand washing countdown, Apple watch will also be able to tell you how many calories you burn when busting a move on the dance floor. But besides all these minor features, Apple’s WatchOS 7 will undergo changes that will make you reassess your use for the watch. With these changes in tow you will change the way you interact with your watch. Now you will be able to change the face of the watch so that it suits your needs and tastes more, you will also change the way you interact with the watch at bedtime.

Apple will no longer have full control over your Watch Face in WatchOS 7:

Up until now you would be able to only add one app onto your watch face. And that to from an app that was Apple. But now with WatchOS 7 you’ll be able to add more complications as well as information onto your watch’s face. Not only you but third party app developers as well. For example you can set your daily agenda, get a weather report and get a shortcut to messages all from your watch face itself.

With this new feature under the hood you’ll even be able to see multiple updates from the same app.

Track your Sleep Patterns with Latest WatchOS Update:

With this new feature in tow you’ll not only be able to track your sleep patterns but will also be able to wind down before you eventually go to sleep. Other smart watch manufacturers have had sleep tracking on their watch menu for years. With latest WatchOS update, Apple has also added the feature to the agenda.

Share Custom watch Faces with WatchOS 7:

This new feature will allow you and app developers to customize a watch face based on your needs and information layout patterns.

read more
Technology NewsApps

Google Docs Tips: Use These Tips to Make Google Docs More Productive

Google Docs Tips: Use These Tips to Make Google Docs More Productive

Here are some best Google Docs tips to make it more productive. When it comes to work and documents, besides MS Office, another popular choice seems to be Google Docs. For those doing work related stuff, you may even have the paid G- Suite version. Google Docs seems to be the go to place when it comes to sharing, editing and general working on documents related stuff. The reason why it’s so popular is that it can be used just about anywhere form any device that has an internet connection. Your work gets synced no matter which device you decide to do it on.

Google Docs becomes the popular choice as everyone nearly has a Google account and has access to an internet connection. So doing work related activities becomes easier when on Google Docs. But another factor at play, is do you have sufficient knowledge about the tools on Google Docs? There are various tools in place to make working on Documents easier on Google. So sit back and relax while we take you through the various Google Docs Tips we know.

Keep Track of Your Work Count On Google Docs as the First of the Google Docs Tips to Know:

If you’re a student or even working in a place where submitting reports is commonplace then here’s a fantastic tip to know. If you’re one of the above, you know how important it is to stick to the word count. With Google Docs it is easy to check your word count so you do not lose track of how much you need to type.

It’s a simple question of going on over to tools and then word count to get an idea of the threshold you’ve reached. You can get a break up by page, the words per page and even characters.

This all great and all when you have to keep the word count within a certain limit for the entire document. But what about knowing how much you’ve written per paragraph? That’s simple enough too.

All you have to do is select the section you’d like to analyze and repeat the steps mentioned above. The only thing different now is that you’ll get the word count per section highlighted. This will help you in deciding whether you have enough words left to finish the entire content or not.

Superscripts made Easier:

The next in the series of Google Docs Tips to know is using superscripts. This one is for the scientist, mathematician and students who have a difficult time placing superscripts or subscripts within their text. Here’s a tip you can lay your hands without the frustration of looking through an entire catalog of characters.

All you have to do is select the text where you’d like to place the superscript or subscript in question and then choose format and then text. Then just choose the superscript or subscript you want.

An alternative route is to use your keyboard instead. Just press on “Ctrl –“ or “Cmd-“ to get to where you need to go.

Have Your Pick of Google’s Awesome Fonts as another in the Series of Google Docs Tips:

So straight of the bat you have some dozen or so fonts to choose from. But if that still doesn’t please you we’ve got you covered. For more fonts you’re just a few more clicks away. So stay tuned..

There is a huge collection of fonts available on Google Docs. To access it you simply go to the drop down menu and select more fonts. You’ll then be taken to a whole collection of fonts to which you can scroll through and use. You can even download them for any future use too.

If you don’t know what you’re really looking for then you can head on to Google’s Font site. Here you can do a search for the type of font you need and much more.

Need a Transcription Tool Google Docs is here to Help:

Transcription may be a pretty boring thing to do especially when you have to listen to yourself or another drone on for three hours straight. Well now no more. With this Google Docs tip in mind you’ll never have to bore yourself out of your mind doing transcription work ever again.

You can use Google’s built in dictation tool to transcribe whatever you need to without you having to go to the hassle of typing it all out by yourself. Besides needing a Chrome browser, all you need are a pair of headphones, to not confuse the tool, and you’re done.

But before you go ahead and start using the tool there are a few tweaks to settings you need to do. Go on to File, Language and then tools and Voice Typing. After that hit on microphone and talk to get your work transcribed for you.

Go Offline With Your Work:

Here’s a Google Docs Tip to know if the internet proves to be a distraction for you. You can work on you documents without the internet too. This is especially crucial when it comes to meeting that all important deadline.

Before you can go on ahead and switch off your Wi- Fi, you’ll have to first follow these simple steps. To work offline you’ll have to first download the Google Docs Offline extension. Once installed, go to the document you’re working on and select File and make available offline.

Once this is done all your work will be done locally and then synced when you’re back online. To know when you’re offline, you’ll notice a small lightening bolt at the side of your document name, indicating that you’re offline.

Create a Link to Everything with this Google Docs Tip:

Ok, referring to a link in your document is pretty simple. All you have to do is press on “Ctrl- K” or “Cmd- K” and type in the URL you want. This you have to do after you’ve highlighted the text where you’d like to place the URL.

But this is not the end of the tip too. If you’re working on multiple documents with multiple people, you can always refer to a particular document you’re working on by following the same tip. Simply select and copy the URL of the document you’d like to share. Then paste it, following the same steps above.


read more
AppsTechnology News

15 Best Chrome Extensions That People Love and You Will Too

15 Best Chrome Extensions That People Love and You Will Too

When it comes to the browsers the one name which people often remember instantly is Google Chrome. It’s mainly because of its tons of features which makes it’s so popular. Google Chrome is the best browsers which are available today. It’s far ahead from other browsers like Safari, Firefox and other browsers. Now it has the Best Chrome Extensions too.

Google has put lots of efforts in chrome to craft this clean interface which is so smooth in performance. The chrome’s extensions ability has enhanced its functionalities and helped lots of users to be more productive while using Google Chrome.

In this article, I will let you know about the 15 Best Chrome Extensions that people love and you will too. Usually, there are a hell lot of extensions in Google Chrome which often blows the users mind. Mainly because there are lots of options and alternatives so most of the users get confused about what to pick.

So, in this article, I will help you out to get the best chrome extension you would love to have. While installing chrome extensions always remember one thing that you shouldn’t have more extensions on google chrome as it can affect the performance of your browser. Hence, you should keep only useful extension that you need.

Let’s get into the post,

15 Best Chrome Extensions that people love and you will too:

In this best chrome extensions list, I will let you know about the chrome extensions according to the category to make your work much more easier.

Best Chrome Extensions for Productivity:

This is one of the crucial categories when it comes to extensions. people always search for best productivity extensions just to stay productive in what there are doing. Productive tools can save you a hell lot of time from taking note to password managers all will make a huge difference in making your digital life easier.

  1. Evernote Web Clipper:

 Best Chrome Extensions Evernote Web Clipper

Evernote is the best and most robust chrome extension which is loved by lots of people. It’s the best tool when it comes to productivity. Evernote web clipper does a great job while you save web page clippings. This can even save a webpage which includes your email. You can highlight text from the article and then send it the Evernote. Organizing your notebooks and adding tags is also easy for you when you do the job with Evernote Web Clipper.

Best features:

  • You can clip all the pages to Evernote web clipper.
  • Evernote allows you to Highlight and Annotate text.
  • Quickly take Screenshots.
  • You can easily bookmark Pages you love.

Download:  Evernote Web Clipper

  1. StayFocusd:

Best Chrome Extensions StayFocusd

StayFocusd is another best productivity extension for Google Chrome. This special extension enhances your productivity by limiting the amount of time you spend on time passing websites. With this extension, you can quickly check how much time you have wasted on the internet.

Features:

  • Set time for particular sites to stop wasting time on the Internet.
  • Stay focused by blocking unwanted sites which you explore.
  • Quickly have a glance at the time stats.
  • Customize your settings to increase concentration on the work.

Download: StayFocusd.

Best Chrome Extensions for Gmail Productivity:

Do you want to more organized when it comes to the mails? Want to monitor all your mailing results. Then there are some special google extensions for you.

  1. MailTrack:

MailTrack

I personally use mail track to stay organized and be more productive on Gmail. This mail track has a special feature that identical to WhatsApp. I am speaking about the popular double-green check marks features which say whether message read or not.

Mail track applied the same thing for Email. With mail track extension you can monitor your email reply whether your email is read or not. This is free to use service which you have to use when you want to be organized.

Features:

  • Check out which email has been read and how long it took for users to read your mail.
  • Access the dashboard and filter emails that have been “Read” or “Not Read”.

Download: Mailtrack.

Best Chrome Extensions for VPN:

Almost all people love to use VPNs mainly to secure their browsing patterns. Some browsers mainly install VPNs to escape from the eyes of Google and also to access blocked websites from different servers as well. So, if you are the user who loves using a VPN means you can check out these recommended VPN Extensions.

  1. ZenMate VPN:

 Best Chrome Extensions ZenMate VPN

If you love to use VPNs means you have to use ZenMate. It is one of the best VPN Extensions for Google Chrome. The best thing about ZenMate is it offers an unlimited free plan for a lifetime. This special VPN has everything for free. It offers Good Speed, multiple servers, security features like webRTC Blocking, NAT Firewall and more.

Features:

  • ZenMate VPN encrypts browser traffic to provide Total Security & Privacy
  • This special VPN allows you to change Geolocation to view blocked sites.
  • ZenMate is one of the fastest VPN Application.

Download: ZenMate VPN

Best Chrome Extensions for Reading News:

There are literally a number of websites on the internet. So, visiting each and every news site takes hell lot of time. So, we have done that for you, in this post you can check out best chrome extensions for news which help you get the latest updates.

  1. News Tab:

News Tab

News Tab is one of the best Google Chrome Extension. We can quickly say it as People’s Choice Extension because it is hugely popular. This special tool automatically curates all the trending news from popular journals and other reliable sources and delivers them at a single place for you.

The good thing about this extension is it lets you select specific topics just to add it to your feed. All the headlines will flash on your screen every time when you open a new tab. So, its a perfect extension for you.

Download: News Tab

Best Chrome Extensions for Reading Articles:

If you had a habit of reading online articles regularly, then you must have come across the distracting ads or other elements present on the webpage.

So, to improve your reading experience, Google Chrome has some special extensions which help you get rid of annoying ads, Videos and pop-ups.

  1. Easy Reader:

Easy Reader is one of the best chrome extension which helps you customize the user’s readability. With this extension, you can quickly open up a new interface with no distracting elements. The best thing is you can get rid of annoying pop ups as well.

Features:

  • Get rid of annoying popups and ads.
  • Remove all the distractions and improve your readability.

Download: Easy Reader

  1. Pocket:

Best Chrome Extensions Pocket

Pocket is the best chrome extension people love to install on their browser. Its a read it later service extension which allows users to save all their articles offline for reading them later in their free time. If you love reading articles online then you will Pocket.

Features:

  • Save online articles to read them online.
  • Easily gain offline access to all the articles.

Download: Pocket.

Best Chrome Extensions for Developers:

If you are a developer who is striving to do your development tasks hassle-free? Then you should have these extensions to make your process far easier.

  1. UserSnap:

Best Chrome Extensions UserSnap

The UserSnap extension is a special extension which is helpful for developers. This extensions helps developers to test their application and can capture screenshots, or even collect feedback on different prototype apps. This is one of the best tools for the daily workflow of the developer.

Features:

  • UserSnap has in-browser Screenshot features which can take screenshots of what users see.
  • Track bugs on your website with bug tracking feature in UserSnap.
  • You can invite your colleagues into using Usersnap and can discuss screens and different solutions which works.
  • JavaScript Error Recording helps you to track log client-side errors.

Download: UserSnap

  1. Checkbot:

Checkbot

Checkbot is another web development extension which helps you analyze both the optimization & safety of the website. Usually, web developers often take web security seriously, so this tool is helpful.

Checkbot helps you to run & test hundreds of web pages at once for Security, speed and broken links as well.

Features:

  • Perform test for webpages to find out about the security glitches.
  • Find out duplicates, invalid codes, unsafe password and more errors with this special extension.

Download:  CheckBot

  1. Speed Test:

People often want to check out their net speed. If you are one of them then install SpeedTest Extension. This will give access to the information about the ping, download and upload speed. This is a useful tool for web developers so that they can check their website performance while having a glance at the current speed of the internet.

Features:

  • Check the download speed and upload speed.
  • Quickly find out the information about pings.
  • Check the performance of the website by having a look a speed of the net.

Download: Speed Test

Best Chrome Extensions for Web Design:

If you a web designer who loves to do all the design works on Google Chrome? Then you also have some handy google chrome extensions. Check out those best chrome extensions for web design below.

  1. Design Grid Overlay:

Design Grid is a useful chrome extension for designers. They can customize the display grids to fit their specific design needs by using grids.

This makes it more easier to achieve aesthetic look across the visual content.

Features:

  • You can set grid specifications and display the grid during the design stage.
  • Align the grid in different positions to get perfect alignment on the webpage.

Download: Design Grid Overlay

Best Chrome Extensions for Instant Previews:

If you love to install a chrome extension which helps you show instant previews? Then you can check out the best chrome extension for instant previews below.

  1. HoverZoom:

Best Chrome Extensions HoverZoom

HoverZoom is a small extension which provides some useful features. It’s a special tool which makes it easy to preview images, videos and the thumbnails on the web.  This useful extension shows instant previews for the objects on the web. With the help of this special tool, you can start exploring the galleries, videos and more with instant preview option.

Features:

  • Instantly previews videos, images and thumbnails
  • Disable & Enable Zooming for specific sites.
  • Adjustable delay and fading effect.
  • Quickly zoom images when you hover over the mouse on the object.

Download: HoverZoom

Best Chrome Extensions for Tab Management:

Are you frustrated with the lots of tabs on your browser? Want to organize them in a clear way to stay cool. Then this chrome extension for tab management will help you out.

  1. SuperTabs:

SuperTabs

Most of you might get frustrated with open tabs of your browser. I Personally, got frustrated because of 20 or sometimes 30 opened tabs on the browsers. Presently, i don’t have to worry about them because I have a cool extension call super tabs. This extension allows you to quickly list and search current open tabs and you can also switch them quickly.

You can find out tabs based on titles, and also see the badge counter and monitor other tabs as well.

Features:

  • Badge counter helps you find out how many tabs are opened.
  • Quickly switch through the tabs.
  • Find out tabs using their names.

Download: SuperTabs

Best Chrome Extensions for Screenshots and Media:

Previously, I often used to think about the screenshots and how to take them hassle-free. Now, with the help of google chrome extensions, I can take a lovely screenshot with ease. Check the recommended screenshot extension below.

  1. Awesome Screenshot:

Awesome Screenshot is one of my favourite extension. This special extension has a built-in screenshot tool which takes high-quality screenshots of your browser. With this tool, you can capture a screenshot of your whole webpage within seconds. You can even add annotations, comments and do more with this Awesome Screenshot extension.

Features:

  • Take high-quality screenshots of your webpage.
  • Add annotations, comments in your screenshot.
  • Blur sensitive information in your screenshot.

Download: Awesome Screenshot.

  1. Privacy Badger:

Privacy Badger

If you are worried about your privacy? then privacy badger is a perfect extension for you. This tool protects your online privacy while you are browsing the web. Privacy Badger stops and blocks all the spying ads and invisible trackers and ensures your privacy.

Features:

  • Stops all spying ads and invisible trackers.
  • Block all the malicious ads and gives healthy browsing.

Download: Privacy Badger.

These are the 15 best chrome extensions that people love to install. Not only these 15 this list go on so deep as there are few more chrome extensions which are helpful for specific category people. In our, upcoming posts you can check them out.

read more
GadgetsAppsTechnology News

Get access to any computer via Google’s Chrome Remote Desktop service

Get access to any computer via Google’s Chrome Remote Desktop service

With Google’s free Chrome Remote Desktop service, you can get access to any computer that runs on Windows, Linux, Mac or Chrome OS. You can access any computer from any mobile device or any other desktop.

Earlier, if one had to access a computer remotely, then it would be a costly affair. It involved a complicated and costly software and technical know-how. Now, it is become so easy that you can even get access to any of the remote device’s contents and click on it just as if you were actually in front of the computer.

How to Use Chrome Remote Desktop

The greatest advantage is that Chrome Remote Desktop allows you to sign into your own personal computer or work computer from afar.

In order to access the  Remote Desktop service, you need to decide on the type of connection, follow a few easy steps and you will be remotely connected.

Steps you need to follow when accessing your own computer using the  Remote Desktop

Firstly open Chrome on the host computer. Navigate to Google’s Chrome Remote Desktop web app. Next click on the circular blue arrow icon within the box labelled ‘Set up remote access.’ After being prompted to download the Chrome Remote Desktop extension, you need to click the ‘Add to Chrome’ button and confirm your desire to proceed. On returning to the original tab, there will be a prompt to enter your computer’s name and move ahead. Click the ‘Next’ button, create a PIN composing six digits. To access the computer remotely, the PIN is needed along with being signed into your Google account for security purposes. A warning may show up in order to ensure that you want to allow the app access to start a remote connection.

How to Prepare Computers for Remote Connection:

You will gain access anytime the computer is powered on and Chrome is running. In case you require the connections to remain for a long time, then go to the computer’s power management settings to ensure it does not go into hibernation mode.

To disable the remote connections, click the Chrome Remote Desktop icon which is on the right of the browser’s address bar. Then click the trash can icon that is alongside the computer’s name to remove it from the app. You can also uninstall the app by right clicking its icon and choosing ‘Remove from Chrome.’

The next step is to connect the computer from either another desktop or mobile device. For this, you need to go to the Chrome Remote Desktop website – remotedesktop.google.com/access which is within the Chrome browser. Sign into Chrome by using the same Google account that you used on the host computer. Your computer’s name will appear and by clicking on it you can begin the connection. You will be in and you can do anything you want, just as if you were sitting in front of the computer.

For access via mobile, download the Chrome Remote Desktop app for iOS or Android devices. If you are signed into the same Google account, the app will show the computer and allow you to connect with a tap and typing your PIN.

read more
AppsTechnology News

Google Stadia: A Platform for Gaming Enthusiasts

Google Stadia: A Platform for Gaming Enthusiasts

What is Google Stadia?

Google Stadia, the future of gaming is a platform for the gaming enthusiasts. It is not a box, but according to Google it could be a virtual stadium. It is in effect a game console running in cloud, built for the YouTube generation. The  Stadia is the future for games to be played anywhere. The best part is that one will not require a game console or either an expensive gaming PC.

With  Stadia, one essentially requires access to Google Chrome’s browser in order to play games on one’s phone, tablet, PC or TV. Google Stadia is a cloud streaming service and the future of gaming.

Google Stadia cloud streaming services

YouTube and Chrome will be the main Google Stadia cloud streaming services. Google is relying on YouTube which is popular with gaming clips and also the creators who stream games to people on services like Twitch. It is on these platforms, where kids love to spend time to chat, play or even watch streamers.

YouTube will help push Google Stadia in a big way. With Stadia, when you watch a clip, you can instantly play it. The streamers will create lobbies whereby the fans can join and play along with them on YouTube with Stadia supporting instant clipping to the video service.

Google Stadia will be available through the Chrome browser, Chromecast and initially only on the Android devices.

Stadia games and operating system

Google unveiled Stadia games and Entertainment studio for creating exclusive Stadia titles. Not much is known with regards to the details on what games they will be creating.

If Google is planning to dominate the gaming field, then they need to get games on its platform.

Linux will be the operating system that will power its hardware on the server. In other words, the developers will have to port their games to Stadia. The big challenge for Google is to convince big publishers to join their bandwagon. There is not much details with regard to the cost for developing, publishing and running games on  Stadia.

Information regarding Google Stadia

The cost of the this service for the consumers is still not known. As regards the launch, it is slated to be in 2019. Important information regarding the  Google Stadia like ‘Can the consumer own their own games?’ or ‘Will it be based on subscription?’ has still not been answered by Google.

As for the games streaming, Google will use its own technology to stream games in 1080p or 4K to devices. Latency will be reduced with the game client and server being on the same machine. All this definitely requires an internet connection to access Stadia which should be approximately 25 Mbps for 1080p resolution at 60fps.

There will be no scope for gaming offline, since Stadia service is completely cloud based. The image quality will be based on your internet connectivity.

Google has hired a lot of talented people in the industry to make Google Stadia the future in gaming.

read more
Technology News

Technique Identifies New Electricity Producing Bacteria

Technique Identifies New Electricity Producing Bacteria

When you live in bad conditions you learn to adapt. This is a rule that is common to all living beings and is therefore also applicable to some bacteria. There are certain species of bacteria that live in oxygen deprived areas and in such situations they have to find a way to breathe that does not involve oxygen. These bacteria are found in places deep within mines, at the bottom of lakes and sometimes even in our guts, all these places don’t have much oxygen and they need to adapt. How do they do this you say? These bacteria are able to breathe by taking in and pumping out electrons rather than oxygen. This means these bacteria are also electricity producing bacteria.

The difficulties in Cultivating Electricity Producing Bacteria:

These electricity producing bacteria can be used to run fuel cells, purify sewage water besides a host of other uses. But getting this type of bacteria has been a problem.

Scientists are unable to produce these electricity producing bacteria in laboratories because of the extremely tiny size which is even smaller than a mammal’s cell.

Engineers at MIT have overcome this problem by engineering a way by which they can get small samples of bacteria. They have come up with a microfluidic technique that allows them to produce samples of electricity producing bacteria. This ability to generate electricity is known as polarizability, this microfluidic technique allows scientists to harness electricity from bacteria in a much safer and more efficient manner than what you have today.

This technique also gives the ability to distinguish from different types electricity producing bacteria. Scientists believe that there is a broad range of such kind of bacteria and that electricity producing capabilities are not restricted to a certain kind of bacteria.

How do the Bacteria generate Electricity?

Electricity producing bacteria generate electrons in their cells which then transfers it across their cell membranes via channels made of surface proteins. This process of transfer is known as extracellular electron transfer or EET for short.

Existing Techniques for Acquiring Electricity Producing Bacteria:

Existing techniques for growing electricity producing bacteria involves growing a large batch of such bacteria and measuring the EET activity. This is a time consuming and meticulous process. Still other techniques exist that involve rupturing the cell to probe the protein activity within it.

Using the Microfluidic technique:

Researchers used a microfluidic setup to compare various electricity producing bacteria each possessing a different type of electricity. Such strains include a strain of bacteria that actively produces electricity in microbial fuel cells, also known as “wild- type” bacteria.

Researchers wanted to see whether there is a relation between a bacteria’s electricity producing abilities and its behavior in a microfluidic device conducted under a dielectrophoretic force.

Scientists used the microfluidic device and passed the electricity producing bacteria through it by passing a voltage through the device. When the electricity producing bacteria reached the narrowest part of the device, another stronger voltage was passed through the other side of the device thus trapping the bacteria. Some bacteria got trapped at a higher voltage while others got trapped in a lower voltage setting. This suggests that each type of electricity bacteria reacts differently.

read more
AppsGadgetsTechnology News

How to Use Google Lens on iPhone and iPad in a perfect Way

How to Use Google Lens on iPhone and iPad in a perfect Way

Wondering how to use Google lens on iPhone and iPad in a perfect way? But don’t know about the Google lens. Then don’t worry, i got you covered.

Google Lens has made its initial debut at Google’s I/O 2017 event, which lets you obtain text and hyperlinks from images, and it can also identify a number of landmarks around the world.

Earlier in 2018, Google has released Google Lens feature to all non-Pixel Android devices and later it has started rolling the update to the iOS devices as well.

For people who are confused with what actually Google Lens does, here is the straight and simple answer.

“Google Lens is a comprehensive photo recognition tool built into Google Photos that can provide additional information about the pictures you are taking.”

How to use Google Lens on iPhone and iPad

Let’s get into few examples for clear understanding.

Example 1: For instance, taking a picture of Burj Kalifa will show the reviews, contact information and any additional information that found useful to the user.

Example 2: Taking a picture of an invitation will automatically be added to your calendar and marked it as an important date.

I hope with these examples you can get a clear view on the Google lens. Now, lets have a look at how to use Google lens on iPhone and iPad in a perfect way.

How to Use Google Lens on iPhone and iPad

If you are not using the Google Application on your iPhone/iPad yet, go to the App Store and download the latest version of Google app and launch it.

Make sure to Sign-in with your existing Google account or create a new account to effectively use this application.

How to use Google Lens on iPhone and iPad

Once you are done with signing in, locate the search bar and tap on the Lens icon on the right corner.

Suddenly it prompts a popup, click on the blue button that says “Turn on camera to use Lens”. Also, you need to provide permission access to utilize the Google Lens to the fullest. Tap “OK” in the permissions alert on your settings menu to allow Google to access your camera.

That’s it, just locate a picture that you want to know more information about, and click on the circle that appears on the bottom.

This feature is not limited to only the photos that you are taking currently, but also the photos that you have taken previously and stored in your device. To know more information about the photos that you have previously taken, simply tap on the picture icon located at the top right of the camera.

How to Use Google Lens on iPhone and iPad

And repeat the same permission access step that you have done for providing access to your camera. But this time it asks to grant access to the photo library. Once you are done with giving access, simply select a photo you want.

How to delete Google Lens history?

Are you striving to know about how to delete Google lens history? Then don’t worry it’s not that difficult at all. You can simply delete Google lens history by using this post. Check out the below content.

  • Simply log in to your same Google account on your PC/Desktop.
  • Go to https://myactivity.Google.com/, where you can find all the images that you have snapped using Google Lens.
  • At the top right corner of every image, you will find the “More Options” icon. Click on the icon and delete the photos.
  • Or you can directly delete all the activities you have done with Google Lens with one click.
  • At the top of the My Activity page, you will find “Today”. Similar to the process of deleting an individual photo, you will find the “More Options” icon on the right corner.
  • Click on that and you can find an option to delete all at once.

This is how you can delete Google lens history. So, just check the above process and do it in perfect way. Now, are you keen to learn more information about the Google lens then check out this guide.

More Information on Google Lens:

As you are interested to learn more about the Google lens you can check it out here in this article. Google lens has some best features which helps you to learn about the product from its history. While its visual character recognition powerhouse has been optimized to read more product labels, Google has also sharpened its machine learning and AI to recognize more animals, which suggests common pet breeds as well.

Without stopping its limitations to that, Google Lens can now also recognize a person, Wi-Fi network names for auto-connecting, and geometric shapes. And if cannot able to grab the exact information, it will offer up similar photos that match the picture that you are looking.

Curious to know what other things Google Lens can do? Or wondering how to use Google lens in iPhone and iPad perfectly? Then its Ok, here is the information you are looking for.

What can you do with Google lens?

  1. Collect contact information:

Place your Google Lens-equipped camera at any business card, and it has the ability to capture both the phone number and address present in that card. Also, It will add that info to a contact on your phone as well. That feature works with email addresses and URLs.

So, if you are keen to collect the contact information of a product then just take out your Google lens and have a glance at the product to learn more about the contact information and details about the pic or product.

  1. Books, music, movies:

If you scan a book cover or a music album cover, Google Lens will identify the title and give you reviews sourced from the web, and also adept at pulling up information about music albums, movies just by scanning their covers. If you are music freak who loves to know about the music albums and more then simply use this scan the cover with Google lens to find out more interesting aspects about those music albums and more.

  1. Details about things:

Want to know information about a landmark or building? Just take a picture of it, and Google Lens will provide you with information about the structure’s construction, architect and more. If you are walking through a museum, the Google Lens feature in Google Photos can give you information about the art pieces you see. That’s handy right?? It replaces the tour guide, as it offers even more information that one can provide. If you know what we mean(every minute detail).

  1. Scanner:

Google Lens offers more features than just collecting phone numbers and email addresses. It also scans barcodes and QR codes on products and shows up more informative results. If you strive to get more details and collect more information then you shouldn’t miss this tool.

  1. Recognize images:

Google states that Google Lens can identify the common plants and animals and shows you the necessary information when you point your camera at one of them.

Well, if you are an Android user, but still reading this article to know exactly what Google Lens does, you may be still in a disappointing side.

It’s not compatible with all Android devices and if so but not equally. For example, while it will work with the Samsung Note 9, it won’t play as nicely with the Samsung Galaxy S9. Some of the users have also noticed that the app doesn’t work on the Moto Z Play, Nokia 7 Plus, Xiaomi Mi A1, and many other phones. You’ll have to be running Android Marshmallow and above in order to access the app.

Conclusion:

By the end of this article, you might have come to the conclusion that “How to use Google lens on iPhone and IPad” is not a tough task to deal with. Speaking about the application itself, Google Lens is a handy application that lets you know about the things around you in just one snap. But the only concern with the application is with the consistency. We all know that Google is a masterpiece in making the useful technology, let’s hope Google Lens will also get better and better with the updates.

I hope you all got a clear view over how to use Google lens on iPhone and iPad in a perfect way. So, start using Google lens and enjoy its features.

read more
1 6 7 8 9 10 20
Page 8 of 20